Welcome summer, you stinker you!!
I don’t know about the oven in your kitchen but when it’s a stinker like it has been for the past few days the last thing I want to do it turn my oven on. In winter we turn it on and use it as a heater, why on earth would we want that in summer?! Ok, I can think of two reasons. One, you promised mince pies to the office (totally regretting this one) and two, you get sent a lovely new cookbook. Tuesday was one of those days where both exceptions happened. And now we have a new rule in our home; I'm not allowed to turn the oven on throughout summer.
Ok so what recipe and book called for the oven to be turned on on a 30C+ day? First, the recipe, torn croutons of course. Yes dear readers, torn croutons. And I’m going to say you should do the same and get that oven cranking. It was totally worth it. No I didn’t just eat torn croutons, although they were delicious to snack on, they were for a Summer Panzanella Salad. This time of year, when it’s hot and you don’t want to eat steamy foods is the perfect time of year for this salad. The tomatoes make up a big portion and are beautiful and fragrant and just taste like summer right now but you also get the combination of dressing soaked croutons and the crunch from the croutons you add last minute. It’s a salad with the best kind of carbs and it’s delicious.
Showing posts with label tomato. Show all posts
Thursday, 21 December 2017
Friday, 21 April 2017
Zuppa Di Funghi - Wild Mushroom Soup from Emiko Davies' Acquacotta
Sometimes it's the small things that make you feel better, more yourself again. Sometimes it's as simple as a bowl of soup on a chilly night, curled up on the couch.
A furry friend keeping your toes warm doesn't hurt either.
The past few weeks have been so up and down I don't really know where I am half the time but more on that another day. I've been cooking here and there but mostly not for myself, I've been in a different kitchen that has a dishwasher and oh how much more enjoyable cooking is when you can load the dishwasher and not have a giant sink full of dishes to tackle at the end. I've also learnt a snippet of my family's history that has me so curious about what my grosi and great grosi (swiss grandma) might have cooked for the ones they loved. I suppose I could ask my Uncle or cousins but I have so many questions I think I'll overwhelm them or they'll think I'm crazy! It's easy for my mind to go off on little tangents now and then. Thinking a lot family lately and what it'd be like to have everyone in the one room for a day. The thought makes me smile, we'd talk and talk and talk until the lot of us had no voices left. It would be wonderful.
Home again last week and in my own (dishwasher-less) kitchen, I craved comfort and feeling unsettled with my un-stocked pantry and fridge I assumed dinner was going to arrive in plastic boxes with wooden chopsticks. Not so comforting about that. This was until I picked up a copy of Emiko Davies new cookbook, Acquacotta that had been sent to me (thankyou thankyou thankyou). My menulog order was out on hold as I came across a recipe for a tomato based wild mushroom soup, Zuppa Di Funghi. Hmmm mushrooms - a little bit sad but yes, onion - yes, garlic - yes, canned tomatoes - yes, dried porcini - YES. DONE. The soup was so robust, comforting and full of flavour ti's going to be a regular dinner on those nights that you need something to warm you through to your toes. Emiko tells us the dried porcini mushrooms are optional but I highly recommend adding them even if it means a little online shop to get them (I get mine from here). It gives it a beautiful flavour that you can't get from other mushrooms. I used fresh button mushrooms and swiss brown mushrooms along side the dried porcini but if I had them I'd have also added other mixed mushrooms like fresh porcini and chanterelles.
Friday, 9 September 2016
eggplant parmigiana from The Dinner Ladies
For the past two weeks I've been cooking for one, or should I say cooking for six and eating the same thing all week while still filling my freezer. I've also eaten a lot of random rice bowls. Not the lovely vibrants looking ones which are all over instagram where these amazingly organised people keep dressings and sauces and roasted vegetables just lying around ready to make a rice bowl on demand. The kind of rice bowls I've been eating start with those 90 second rice packets, a hard boiled egg, a can of tuna and a random mix of anything else leftover from the previous nights dinner or a can of beans on top. And let me tell you they are not instagram worthy at all... I sit watching trashy tv after night school and am so hungry that I could eat anything which is why I can stomach my random rice bowls which lack flavour and texture but do a great job at filling a hole.
So when the lovely cookbook The Dinner Ladies by Katherine Westwood and Sophie Gilliatt arrived in the mail I was only too happy to start cooking from it. I mean it promised to fill my freezer and it is all about doing the prep work in advance and enjoying midweek dinners rather then being the headless chook most of us are when trying to complete these trendy 15 minute meals. The only catch is you need to be organised and prepared. Something I am somewhat good at and others times I envy everyone who manages to look like they have their stuff together.
Flicking through this book the are pages full of feasts just waiting for a family to dig in like twice cooked master-stock pork belly, three-bean chilli, lasagne, sausage rolls and also lighter dishes for the warmer nights like sesame prawn stir fry. The book comes with all the tricks to make feasts happen without the stress. It shows you it possible to eat a delicious, substantial dinner (that isn't a dodgy rice bowl) midweek. A couple of these cook ups in the freezer and my weeknight dinner disaster is sorted.
The recipe I chose to make first from this book was the eggplant parmigiana. I'm not the biggest meat eater when I cook for one and I LOVE eggplant and tomatoes and mozzarella so this was a perfect option. The fragrant bunch of basil in the local greengrocer also caught my eye or should I say nose as the smell was incredible. Summer is coming!!
It's starts with thickly slicing the eggplants and roasting them in a hot oven with salt and olive oil while you cook your basic tomato sauce. Once they are both done it is time to start assembling. If you are making it ahead, wait until everything is cooled before assembling but if you are going to cook it straight away start assembling the roasted eggplant and the tomato sauce with generous amounts of fresh basil, fresh mozzarella and grated parmesan cheese making sure you end with a cheese layer on top. Bake it in the oven until cooked though and bubbling at the sides. The recipe suggests to serve it with a green salad but I couldn't help but add some buttered pasta to mine too... I'm a carb lover what can I say.
The eggplant parmigiana from The Dinner Ladies will definitely start becoming a regular midweek dinner for me. Especially if I can make it over the weekend then just bung it in the oven midweek and dinner is done. So easy, so delicious and I think it's going to make the BEST filled baguettes for lunch the next day too. YUM.
The Dinner Ladies by Katherine Westwood & Sophie Gilliatt is published by Murdoch Books, September 2016 (RRP $39.99)
from The Dinner Ladies by Katherine Westwood and Sophie Gilliatt
serves 4-6 as a side dish or 2-3 as a main
2 medium eggplants, about 1.25kg
1 teaspoon salt
2 tablespoons olive oil
1 medium brown onion, diced
1 garlic clove, crushed
400g tinned chopped tomatoes
3 thyme sprigs, leaves stripped (I used a pinch of dried thyme)
2 teaspoons balsamic vinegar
1 very large handful basil leaves
150g fresh mozzarella cheese, sliced or torn roughly
50g parmesan cheese, grated
Make ahead: The whole dish can be assembled up to 3 days ahead and stored, covered, in the fridge. Bake it on the day you mean to serve it and serve warm or allow to cool to room temperature before serving.
- Preheat oven to 180C/350F.
- Line two baking trays with baking paper. Cut the eggplants into slices about 1.5cm thick, sprinkle with salt, lay them on the baking trays and brush with 1 tablespoon of olive oil. Bake for about 20 minutes or until golden brown and soft. Remove from the oven and set aside to cool. If not making ahead, leave the oven on.
- Meanwhile, in a saucepan, heat the remaining olive oil over medium-low heat and cook the onion and garlic with a pinch of salt for about 10-15 minutes until soft and sweet, stirring occasionally. When completely soft, add the tinned tomatoes, thyme and a splash of water and continue to cook gently, partially covered, for about 20 minutes. Add the vinegar and taste for seasoning - you may need to add a pinch of salt and/or sugar if the tomatoes are particularly sharp. Set aside to cook.
- Now to start the assembly. In an oven proof dish, place a layer of eggplant on the bottom. Top with one-third of the tomato sauce, then half of the basil, a third of the mozzarella and a sprinkling of parmesan. Repeat until you have three layers of eggplant, finishing with mozzarella and an extra snowing of parmesan on top.
- Place in the centre of your oven for 25-30 minutes or until cheese is melted and bubbling at the sides. Serve warm or at room temperature with a mixed leaf salad and/or some buttered pasta and/or a crusty baguette.
So when the lovely cookbook The Dinner Ladies by Katherine Westwood and Sophie Gilliatt arrived in the mail I was only too happy to start cooking from it. I mean it promised to fill my freezer and it is all about doing the prep work in advance and enjoying midweek dinners rather then being the headless chook most of us are when trying to complete these trendy 15 minute meals. The only catch is you need to be organised and prepared. Something I am somewhat good at and others times I envy everyone who manages to look like they have their stuff together.
The recipe I chose to make first from this book was the eggplant parmigiana. I'm not the biggest meat eater when I cook for one and I LOVE eggplant and tomatoes and mozzarella so this was a perfect option. The fragrant bunch of basil in the local greengrocer also caught my eye or should I say nose as the smell was incredible. Summer is coming!!
It's starts with thickly slicing the eggplants and roasting them in a hot oven with salt and olive oil while you cook your basic tomato sauce. Once they are both done it is time to start assembling. If you are making it ahead, wait until everything is cooled before assembling but if you are going to cook it straight away start assembling the roasted eggplant and the tomato sauce with generous amounts of fresh basil, fresh mozzarella and grated parmesan cheese making sure you end with a cheese layer on top. Bake it in the oven until cooked though and bubbling at the sides. The recipe suggests to serve it with a green salad but I couldn't help but add some buttered pasta to mine too... I'm a carb lover what can I say.
The eggplant parmigiana from The Dinner Ladies will definitely start becoming a regular midweek dinner for me. Especially if I can make it over the weekend then just bung it in the oven midweek and dinner is done. So easy, so delicious and I think it's going to make the BEST filled baguettes for lunch the next day too. YUM.
The Dinner Ladies by Katherine Westwood & Sophie Gilliatt is published by Murdoch Books, September 2016 (RRP $39.99)
eggplant parmigiana
recipe adapted ever so slightlyfrom The Dinner Ladies by Katherine Westwood and Sophie Gilliatt
serves 4-6 as a side dish or 2-3 as a main
2 medium eggplants, about 1.25kg
1 teaspoon salt
2 tablespoons olive oil
1 medium brown onion, diced
1 garlic clove, crushed
400g tinned chopped tomatoes
3 thyme sprigs, leaves stripped (I used a pinch of dried thyme)
2 teaspoons balsamic vinegar
1 very large handful basil leaves
150g fresh mozzarella cheese, sliced or torn roughly
50g parmesan cheese, grated
Make ahead: The whole dish can be assembled up to 3 days ahead and stored, covered, in the fridge. Bake it on the day you mean to serve it and serve warm or allow to cool to room temperature before serving.
- Preheat oven to 180C/350F.
- Line two baking trays with baking paper. Cut the eggplants into slices about 1.5cm thick, sprinkle with salt, lay them on the baking trays and brush with 1 tablespoon of olive oil. Bake for about 20 minutes or until golden brown and soft. Remove from the oven and set aside to cool. If not making ahead, leave the oven on.
- Meanwhile, in a saucepan, heat the remaining olive oil over medium-low heat and cook the onion and garlic with a pinch of salt for about 10-15 minutes until soft and sweet, stirring occasionally. When completely soft, add the tinned tomatoes, thyme and a splash of water and continue to cook gently, partially covered, for about 20 minutes. Add the vinegar and taste for seasoning - you may need to add a pinch of salt and/or sugar if the tomatoes are particularly sharp. Set aside to cook.
- Now to start the assembly. In an oven proof dish, place a layer of eggplant on the bottom. Top with one-third of the tomato sauce, then half of the basil, a third of the mozzarella and a sprinkling of parmesan. Repeat until you have three layers of eggplant, finishing with mozzarella and an extra snowing of parmesan on top.
- Place in the centre of your oven for 25-30 minutes or until cheese is melted and bubbling at the sides. Serve warm or at room temperature with a mixed leaf salad and/or some buttered pasta and/or a crusty baguette.
Friday, 25 March 2016
(The) Best Chicken: Baked Chicken in Creamy Tomato Sauce from Dinner: A Love Story.
Have you ever been so unorganised you've woken up and realised you have only one pair of clean undies in your drawer and the day was a near total disaster?? I've had that phew! feeling more than once over the past few weeks. I've been some what unorganised which has also lead to a lot of dodgy dinners like last Saturday night which consisted of cheese and crackers or the other week when I reheated pasta sauce from the freezer on toast at 9pm.
But everything changed last Monday night. I cooked dinner.
It made me realise that cooking is my zen. What yoga is to some, cooking is for me. Not the mad rush kind of cooking in a commercial kitchen, been there, done that and I didn't have thick enough skin. But cooking in my little kitchen and making a meal out of ingredients gives me a certain satisfaction and feeling of fulfillment. Cooking for one doesn't have quite the same feeling as when I'm cooking for two or more so maybe it's not the act of cooking itself but the act of sharing what I've made with the ones I love.
Or maybe that makes no sense at all and I was just so high on a home cooked meal I needed to share this with you all.
I made (The) Best Chicken: Baked Chicken in Creamy Tomato Sauce from Dinner: A Love Story by Jenny Rosenstrach. It was so delicious. There was one problem, I only made enough for two and not enough for seconds or leftovers. It was a comforting, home cooked dinner at it's finest. It was simple yet so full of flavour. The canned tomatoes turn delicious and rich in the oven, almost sticky and as the chicken cooks it soaks up the flavour from the sauce and hint of herbs. I adapted the recipe slightly since we didn't have any marscapone as it's not a staple at our kitchen, instead I stirred through a couple of spoonfuls of greek yogurt at the end and it worked just as well. I served it with brown rice cooked with a stock cube and blanched sugar snap peas coated in butter and a good pinch of salt.
It was rich and comforting and a dinner I will repeat again, especially since it's started getting a little cooler here. Store cupboard ingredients, chicken from the freezer and dinner is practically already made, a perfect weeknight meal. This would also work really well served with pasta or to make it a little fancy, serve it with a saffron risotto and a side salad.
I'm now off to do some washing so that it's at least another week before I have that phew! moment again.
(find original recipe here)
serves 2
2 large boneless, skinless chicken breasts
2 tablespoons olive oil
1/2 onion, finely diced
2 cloves garlic, crushed
400g canned chopped tomatoes
5 basil leaves, roughly torn (or a pinch of dried oregano)
2 tablespoons marscapone or thick greek yoghurt
salt & pepper
- Preheat oven to 175C/350F.
- Sprinkle the chicken with salt and pepper. Heat the olive oil in an oven proof pan or skillet on high heat and brown the chicken on all sides (they do not need to cook through). Remove from the pan and turn heat down to medium-low. In the remaining oil left in the pan cook the onion and garlic for about 2 minutes.
- Add the can of chopped tomatoes and bring to a simmer, stir through basil (or oregano) and season with salt and pepper. If using marscapone, stir through now. Add the chicken back into the pan then place in the preheated oven.
- Bake for 40 minutes, turning half way through or until the chicken is cooked through.
- If you are using greek yogurt, remove the chicken from the pan and stir through the greek yoghurt now. Serve with rice, pasta or some nice crusty bread and some buttered greens.
But everything changed last Monday night. I cooked dinner.
It made me realise that cooking is my zen. What yoga is to some, cooking is for me. Not the mad rush kind of cooking in a commercial kitchen, been there, done that and I didn't have thick enough skin. But cooking in my little kitchen and making a meal out of ingredients gives me a certain satisfaction and feeling of fulfillment. Cooking for one doesn't have quite the same feeling as when I'm cooking for two or more so maybe it's not the act of cooking itself but the act of sharing what I've made with the ones I love.
Or maybe that makes no sense at all and I was just so high on a home cooked meal I needed to share this with you all.
I made (The) Best Chicken: Baked Chicken in Creamy Tomato Sauce from Dinner: A Love Story by Jenny Rosenstrach. It was so delicious. There was one problem, I only made enough for two and not enough for seconds or leftovers. It was a comforting, home cooked dinner at it's finest. It was simple yet so full of flavour. The canned tomatoes turn delicious and rich in the oven, almost sticky and as the chicken cooks it soaks up the flavour from the sauce and hint of herbs. I adapted the recipe slightly since we didn't have any marscapone as it's not a staple at our kitchen, instead I stirred through a couple of spoonfuls of greek yogurt at the end and it worked just as well. I served it with brown rice cooked with a stock cube and blanched sugar snap peas coated in butter and a good pinch of salt.
It was rich and comforting and a dinner I will repeat again, especially since it's started getting a little cooler here. Store cupboard ingredients, chicken from the freezer and dinner is practically already made, a perfect weeknight meal. This would also work really well served with pasta or to make it a little fancy, serve it with a saffron risotto and a side salad.
I'm now off to do some washing so that it's at least another week before I have that phew! moment again.
(The) Best Chicken: Baked Chicken in Creamy Tomato Sauce
recipe adapted from Dinner: A Love Story by Jenny Rosenstrach(find original recipe here)
serves 2
2 large boneless, skinless chicken breasts
2 tablespoons olive oil
1/2 onion, finely diced
2 cloves garlic, crushed
400g canned chopped tomatoes
5 basil leaves, roughly torn (or a pinch of dried oregano)
2 tablespoons marscapone or thick greek yoghurt
salt & pepper
- Preheat oven to 175C/350F.
- Sprinkle the chicken with salt and pepper. Heat the olive oil in an oven proof pan or skillet on high heat and brown the chicken on all sides (they do not need to cook through). Remove from the pan and turn heat down to medium-low. In the remaining oil left in the pan cook the onion and garlic for about 2 minutes.
- Add the can of chopped tomatoes and bring to a simmer, stir through basil (or oregano) and season with salt and pepper. If using marscapone, stir through now. Add the chicken back into the pan then place in the preheated oven.
- Bake for 40 minutes, turning half way through or until the chicken is cooked through.
- If you are using greek yogurt, remove the chicken from the pan and stir through the greek yoghurt now. Serve with rice, pasta or some nice crusty bread and some buttered greens.
Thursday, 3 December 2015
Pomodori al riso aka Tomatoes stuffed with rice from Five Quarters: Recipes and Notes from a Kitchen in Rome
I've become lazy and blank on this space.
We all have those days where everything you make/eat tastes meh...well I do. So my reason for silence and blank-ness is that everything I make lately is meh and there are thousands of food blogs out there with flashier photo's and a much broader recipe base, not just about what I made (& ate) for dinner which lately has been meh for you to read and drool over. Saying I feel lost in cyber space is an understatement.
Brain fart, sorry.
The last tasty thing I made was a coupleweeks months ago now and I still can't stop thinking about it. Pomodori al riso aka Tomatoes stuffed with rice from 'Five Quarters: Recipes and Notes from a Kitchen in Rome' by Rachel Roddy who writes the blog Rachel Eats. I have a thing for stuffed vegetables... stuffed anything really. If you can fill it and bake it, why not!? isn't everything better when its stuffed and baked?
You don't see recipes that double carb it much these days with all the 'super foods' and 'clean eating' shenanigans around but it was nice to read a recipe that was just honest home cooked food. Nothing there to convince me what health benefits it would have on me other than to fill an empty tummy and serve to friends with a nice side salad and a good bottle of wine. I mean the first ingredient is 8 firm, fruity, fleshy and flavoursome tomatoes... how can you not want to make this instantly??
With a little bit of prep and planning, once it is all assembled and ready to go in the oven you can forget about for 1-1 1/4 hours and then once the timer goes off you have another 30 minutes to fix your hair (also so the tomatoes, which are pyroclastic-ly hot don't burn the roof of your mouth) before you serve a dinner that looks impressive and isn't shy on flavour. The recipe says you can leave them until they are at room temperature as it allows the flavours to settle and get better but I'll be completely honest with you, I only left mine long enough so I didn't singe my mouth off because as always... hunger wins! Next time I'll wait though, all the little grains of rice soak up the olive oil and tomato juice and have time to mingle with the basil. I had leftovers for lunch the next day and it was perfect! I love how this meal is honest home cooking that doesn't skimp of taste. No flashy ingredients or techniques, just a damn delicious dinner. I make again and again over summer, just have to wait for the big juicy tomatoes to come into season... bring on summer!
(recipe adapted ever so slightly to avoid the washing up of extra bowls)
8 firm, fruity, fleshy and flavoursome tomatoes
2 garlic cloves, finely sliced
8 basil leaves, torn
10 tablespoons risotto rise (I used Arborio)
100ml extra-virgin olive oil, plus extra for the potatoes
1kg potatoes
salt and freshly ground pepper
- Preheat your oven to 180C/400F.
- Cut the tops of the tomatoes, keeping the little lids aside and one by one hold each tomato over a bowl and, using a teaspoon, scoop out their insides - flesh, seeds and juice - into the bowl. Sprinkle a little salt in the inside of each tomato then turn cut side down onto paper towels, set aside.
- Process the tomato flesh, seeds and juice in a food processor or blitz with a hand blender. Add the garlic, basil leaves, rice and olive oil to the pulverised tomato flesh, season generously with salt and pepper. Stir everything together well and then let sit for at least 45 minutes so the rice soaks up all the juices.
- Meanwhile, cut the potatoes into 1cm thick, 3cm long matchsticks. Place them in large baking dish, pour over a little love oil, sprinkle with salt and using your hand toss the potatoes until they are well coated. Spread them out evenly on your baking dish and place the hollowed out tomatoes in amongst them.
- Spoon your rice mixture into the hollow tomatoes until they are 3/4 full then place the lids on top. Slide the tray into your pre-heated oven and bake for 1-1 1/4 hours, or until the tomatoes are soft and just starting to shrivel, the rice is plump and tender and the potatoes are soft and golden. Allow them to sit for about half an hour before eating.
Warning - the tomatoes are blistering hot when they come out of the oven (no joke!) so I advise you don't skip the last step and let them sit and cool down slightly before digging in.
We all have those days where everything you make/eat tastes meh...well I do. So my reason for silence and blank-ness is that everything I make lately is meh and there are thousands of food blogs out there with flashier photo's and a much broader recipe base, not just about what I made (& ate) for dinner which lately has been meh for you to read and drool over. Saying I feel lost in cyber space is an understatement.
Brain fart, sorry.
The last tasty thing I made was a couple
You don't see recipes that double carb it much these days with all the 'super foods' and 'clean eating' shenanigans around but it was nice to read a recipe that was just honest home cooked food. Nothing there to convince me what health benefits it would have on me other than to fill an empty tummy and serve to friends with a nice side salad and a good bottle of wine. I mean the first ingredient is 8 firm, fruity, fleshy and flavoursome tomatoes... how can you not want to make this instantly??
With a little bit of prep and planning, once it is all assembled and ready to go in the oven you can forget about for 1-1 1/4 hours and then once the timer goes off you have another 30 minutes to fix your hair (also so the tomatoes, which are pyroclastic-ly hot don't burn the roof of your mouth) before you serve a dinner that looks impressive and isn't shy on flavour. The recipe says you can leave them until they are at room temperature as it allows the flavours to settle and get better but I'll be completely honest with you, I only left mine long enough so I didn't singe my mouth off because as always... hunger wins! Next time I'll wait though, all the little grains of rice soak up the olive oil and tomato juice and have time to mingle with the basil. I had leftovers for lunch the next day and it was perfect! I love how this meal is honest home cooking that doesn't skimp of taste. No flashy ingredients or techniques, just a damn delicious dinner. I make again and again over summer, just have to wait for the big juicy tomatoes to come into season... bring on summer!
Pomodori al riso aka Tomatoes stuffed with rice
from Five Quarters: Recipes and Notes from a Kitchen in Rome by Rachel Roddy(recipe adapted ever so slightly to avoid the washing up of extra bowls)
8 firm, fruity, fleshy and flavoursome tomatoes
2 garlic cloves, finely sliced
8 basil leaves, torn
10 tablespoons risotto rise (I used Arborio)
100ml extra-virgin olive oil, plus extra for the potatoes
1kg potatoes
salt and freshly ground pepper
- Preheat your oven to 180C/400F.
- Cut the tops of the tomatoes, keeping the little lids aside and one by one hold each tomato over a bowl and, using a teaspoon, scoop out their insides - flesh, seeds and juice - into the bowl. Sprinkle a little salt in the inside of each tomato then turn cut side down onto paper towels, set aside.
- Process the tomato flesh, seeds and juice in a food processor or blitz with a hand blender. Add the garlic, basil leaves, rice and olive oil to the pulverised tomato flesh, season generously with salt and pepper. Stir everything together well and then let sit for at least 45 minutes so the rice soaks up all the juices.
- Meanwhile, cut the potatoes into 1cm thick, 3cm long matchsticks. Place them in large baking dish, pour over a little love oil, sprinkle with salt and using your hand toss the potatoes until they are well coated. Spread them out evenly on your baking dish and place the hollowed out tomatoes in amongst them.
- Spoon your rice mixture into the hollow tomatoes until they are 3/4 full then place the lids on top. Slide the tray into your pre-heated oven and bake for 1-1 1/4 hours, or until the tomatoes are soft and just starting to shrivel, the rice is plump and tender and the potatoes are soft and golden. Allow them to sit for about half an hour before eating.
Warning - the tomatoes are blistering hot when they come out of the oven (no joke!) so I advise you don't skip the last step and let them sit and cool down slightly before digging in.
Wednesday, 26 August 2015
Saucy Baked Ziti from Stir by Jessica Fechtor.
I just finished reading Stir, My broken brain and the meals that brought me home by Jessica Fechtor and whenever I finish a really great book I feel a little down after because I want more. I often find myself flicking through the last pages hoping that there is another page hidden somewhere in the back. It's a brilliant memoir which take you on her journey through to recovery after having a brain aneurysm rupture at 28 and how food and cooking brought her back into the kitchen which inturn helped her healing. She started a food blog called Sweet Amandine, named after her favourite almond cake during her recovery so she could share her stories and recipes. My words here can't do her book or writing justice. It's a touching memoir that makes you want to hug everyone you love just that little bit tighter and feed them till they are passed full.
The writing in this book makes you feel like you were there through her pain, her recovery and when she finds her way back in the kitchen. How she learnt be the guest in her own home when normally she was the host. You crave the grilled salmon, dressed salad and crusty bread her and her husband make while away at a friends cabin and when she talks about taking her helmet off when she felt safe, it's like you were right there with her. Jessica Fechtor has a way with words that takes you with her and her story.
And the recipes in this book match her writing, they are page splatterers, you can't help but want to get elbows deep in them. With a story behind each one it brings the food to life when you're cooking and knowing that someone all the way across the other side of the world made this recipe every week for Friday dinners and now it's found it's way into your little kitchen, it's a nice feeling to have while pottering around the kitchen.
The first one that tickled my fancy before I'd even finished the book was the Saucy Baked Ziti. Only a few months ago I had never heard of Baked Ziti before, what on earth is this hashtag going around instagram!? A bit of googling and insta-stalking later I realised that it essentially was a type of pasta bake. The internet does not do this dish much justice to be honest and I'd never heard of this type of pasta called 'ziti'. But then it popped up in Jess's book where she mentions that she never really knew what the fuss was about and I'll be honest again, either did I and I love a good pasta bake! If she didn't know what the fuss was about but the recipe has made it into her book then it must be worth a try and... Wholly Cow! It was good!!
Rich and comforting but spicy and slightly creamy with cheese and basil throughout. Oh and how can I forget the panko bread crumb topping!?! I'm going to say it... One of the best pasta bakes I've ever had. Jess's Saucy Baked Ziti rocked! Sorry to all the other hundreds of Baked Ziti recipes out there in the cyber void, I will forever stay true to this one.
It does use a fair few pots but then it goes in the oven for 15 minutes for the final cooking and it gives you time to do an initial tidy and clean so you can sit down knowing that there is only your bowls and the baking dish left. I love a recipe like that and didn't mind the washing up at all for the final result. I will be making this again and again I can already tell. So delicious.
I loved that Jessica shared her story with the world, thankyou. The only problem now is which recipe to make next... the wholemeal chocolate chip cookies? or the Butter Almond cake? or to throw a dinner party on a Friday night and serve freshly baked challah and roast chicken!?
serves 6 - 8
For the tomato sauce:
4 tablespoons olive oil
3 garlic cloves, minced
1 teaspoon crushed chilli flakes, plus more to taste (I found 1 teaspoon spicy enough)
2 x 400g cans whole peeled tomatoes
1 teaspoon fine sea salt, plus more to taste
For the bechamel:
2 tablespoons unsalted butter
2 tablespoons plain flour
2 cups full cream milk, warmed (but not boiled)
1/2 teaspoon fine sea salt, plus more to taste
1/4 teaspoon ground nutmeg, plus more to taste
For the rest of the dish:
450g dry ziti or rigatoni (I used penne)
225g fresh mozzarella cheese, cut into 1/2 inch cubes
1 cup (50g) freshly grated parmesan
1 cup (50g) panko bread crumbs
A pinch or two of nutmeg
1/2 teaspoon crushed chilli flakes (optional - I left these out)
2 tablespoons olive oil
A handful of fresh basil leaves, sliced or torn into small pieces
- Preheat oven to 375F or 180C and brush a baking dish with olive oil.
Make the tomato sauce:
- Pour the 4 tablespoons olive oil into a saucepan and warm over medium-high heat. Stir in the garlic and crushed chilli flakes and cook for about 1 minute or so, until fragrant (be careful not to colour the garlic). Add the tomatoes, smooshing them up in your hands as you drop them in the pot along with all the juices. Stir in the salt and bring to a boil. Lower the heat and simmer for about 10 minutes, stirring occasionally until slightly thickened. Taste and add more salt or chilli if you'd like. Remove the pot from the heat and set aside.
Meanwhile, make the bechamel:
- Melt butter in a clean saucepan over medium head. Add the flour and stir for a couple of minutes to form a pale brown paste. Very slowly add the warmed milk while whisking continuously. Bring the sauce to a boil and cook for about 5 minutes, whisking the whole time until it thickens. Remove pot from the heat, stir in the salt and nutmeg then taste to see if you need anymore of either. Set aside.
Make the pasta and assemble the dish:
- Bring a large pot of salted water to a boil and add the pasta. Cook until it's 3 to 4 minutes short of being done. Drain and transfer to your largest bowl. Add the tomato sauce, bechamel, mozzarella and about three quarters of the parmesan and mix well.Transfer mix into prepared baking dish and scatter the ziti with the remaining parmesan.
- In a small bowl, toss the bread crumbs with a pinch of nutmeg, some extra chilli flakes if you want a little extra heat and 2 tablespoons of olive oil and sprinkle over the top.
- Bake until the ziti is bubbling and the top is brown, about 15 minutes. Remove from the oven and let rest for 10 minutes, then scatter the sliced basil over the top and serve.
The writing in this book makes you feel like you were there through her pain, her recovery and when she finds her way back in the kitchen. How she learnt be the guest in her own home when normally she was the host. You crave the grilled salmon, dressed salad and crusty bread her and her husband make while away at a friends cabin and when she talks about taking her helmet off when she felt safe, it's like you were right there with her. Jessica Fechtor has a way with words that takes you with her and her story.
And the recipes in this book match her writing, they are page splatterers, you can't help but want to get elbows deep in them. With a story behind each one it brings the food to life when you're cooking and knowing that someone all the way across the other side of the world made this recipe every week for Friday dinners and now it's found it's way into your little kitchen, it's a nice feeling to have while pottering around the kitchen.
The first one that tickled my fancy before I'd even finished the book was the Saucy Baked Ziti. Only a few months ago I had never heard of Baked Ziti before, what on earth is this hashtag going around instagram!? A bit of googling and insta-stalking later I realised that it essentially was a type of pasta bake. The internet does not do this dish much justice to be honest and I'd never heard of this type of pasta called 'ziti'. But then it popped up in Jess's book where she mentions that she never really knew what the fuss was about and I'll be honest again, either did I and I love a good pasta bake! If she didn't know what the fuss was about but the recipe has made it into her book then it must be worth a try and... Wholly Cow! It was good!!
Rich and comforting but spicy and slightly creamy with cheese and basil throughout. Oh and how can I forget the panko bread crumb topping!?! I'm going to say it... One of the best pasta bakes I've ever had. Jess's Saucy Baked Ziti rocked! Sorry to all the other hundreds of Baked Ziti recipes out there in the cyber void, I will forever stay true to this one.
It does use a fair few pots but then it goes in the oven for 15 minutes for the final cooking and it gives you time to do an initial tidy and clean so you can sit down knowing that there is only your bowls and the baking dish left. I love a recipe like that and didn't mind the washing up at all for the final result. I will be making this again and again I can already tell. So delicious.
I loved that Jessica shared her story with the world, thankyou. The only problem now is which recipe to make next... the wholemeal chocolate chip cookies? or the Butter Almond cake? or to throw a dinner party on a Friday night and serve freshly baked challah and roast chicken!?
Saucy Baked Ziti
recipe from Stir, My broken brain and the meals that brought me home by Jessica Fechtor.serves 6 - 8
For the tomato sauce:
4 tablespoons olive oil
3 garlic cloves, minced
1 teaspoon crushed chilli flakes, plus more to taste (I found 1 teaspoon spicy enough)
2 x 400g cans whole peeled tomatoes
1 teaspoon fine sea salt, plus more to taste
For the bechamel:
2 tablespoons unsalted butter
2 tablespoons plain flour
2 cups full cream milk, warmed (but not boiled)
1/2 teaspoon fine sea salt, plus more to taste
1/4 teaspoon ground nutmeg, plus more to taste
For the rest of the dish:
450g dry ziti or rigatoni (I used penne)
225g fresh mozzarella cheese, cut into 1/2 inch cubes
1 cup (50g) freshly grated parmesan
1 cup (50g) panko bread crumbs
A pinch or two of nutmeg
1/2 teaspoon crushed chilli flakes (optional - I left these out)
2 tablespoons olive oil
A handful of fresh basil leaves, sliced or torn into small pieces
- Preheat oven to 375F or 180C and brush a baking dish with olive oil.
Make the tomato sauce:
- Pour the 4 tablespoons olive oil into a saucepan and warm over medium-high heat. Stir in the garlic and crushed chilli flakes and cook for about 1 minute or so, until fragrant (be careful not to colour the garlic). Add the tomatoes, smooshing them up in your hands as you drop them in the pot along with all the juices. Stir in the salt and bring to a boil. Lower the heat and simmer for about 10 minutes, stirring occasionally until slightly thickened. Taste and add more salt or chilli if you'd like. Remove the pot from the heat and set aside.
Meanwhile, make the bechamel:
- Melt butter in a clean saucepan over medium head. Add the flour and stir for a couple of minutes to form a pale brown paste. Very slowly add the warmed milk while whisking continuously. Bring the sauce to a boil and cook for about 5 minutes, whisking the whole time until it thickens. Remove pot from the heat, stir in the salt and nutmeg then taste to see if you need anymore of either. Set aside.
Make the pasta and assemble the dish:
- Bring a large pot of salted water to a boil and add the pasta. Cook until it's 3 to 4 minutes short of being done. Drain and transfer to your largest bowl. Add the tomato sauce, bechamel, mozzarella and about three quarters of the parmesan and mix well.Transfer mix into prepared baking dish and scatter the ziti with the remaining parmesan.
- In a small bowl, toss the bread crumbs with a pinch of nutmeg, some extra chilli flakes if you want a little extra heat and 2 tablespoons of olive oil and sprinkle over the top.
- Bake until the ziti is bubbling and the top is brown, about 15 minutes. Remove from the oven and let rest for 10 minutes, then scatter the sliced basil over the top and serve.
Tuesday, 30 June 2015
Turkey meatballs with a simple tomato sauce.
We recently added a new member to our kitchen family. A microwave. It's actually very exciting even though it is one of those appliances which is a stock standard for some people. It was refreshing for a while not having one - I felt like a bit of a rebel and I was determined it was better without... you know more bench space and... and... Ok lets face it, I was brought up with a microwave and I have missed the luxury and convenience of having one.
I can now soften butter for baking, defrost frozen meat in 10 minutes rather than 24 hours, warm milk up for a coffee in the actual mug (saving washing a pot up) and reheating leftovers are so much easier now for snacking! But the defrosting meat in minutes feels like such a revelation. The possibilities which are open to me as an unorganised cook during the week are now endless if I have a well stocked freezer and pantry. To say I'm excited is an understatement!
Early in the week I defrosted (still a novelty!) some turkey mince which had been floating around our freezer for a while as I never was quite organised to take it out the night before and I didn't feel like tackling a huge turkey ice cube in a frying pan to make some sort of sauce. I knew there were two recipes I have been wanting to try and it all depended what other ingredients I needed and had to which one I was going to make. Unfortunately I didn't have most of the ingredients for either recipe but with my now defrosted turkey mince and turkey meatball on the mind I thought stuff it. I can do this without a recipe.
Starting with a simple tomato sauce I fried off an onion and some crushed garlic in olive oil until soft then adding a splash of red wine which we didn't finish from the weekend and a can of chopped tomatoes brought it to a simmer. Adding a pinch of salt, pepper and half a teaspoon of sugar, I let it bubble away while I got on with the turkey-balls.
I placed a small brown onion, a couple of garlic cloves, a big handful of home grown parsley - stalks and all, a generous squeeze of lemon juice and a good splash of extra virgin olive oil into a small food processor and blitzed until it was a rough paste. Emptied it into a mixing bowl then used the same food processor (no need to wash it) and threw in some stale bread that had also been floating around my freezer and gave it a whizz to get some rough breadcrumbs. I then put the bread crumbs into the mixing bowl along with the (defrosted!) turkey mince, an egg and a good pinch of salt and pepper. Mixed it all together then rolled them into golf ball sized balls ready for frying.
I panfried these in some olive oil on a medium heat for about 15-20 minutes until they were dark golden all over and cooked through. I always have to open one up to make sure (I have a fear of serving raw meat) but I never mind because it also means you get to have a quick taste - a little reward for the cook. I served these with pasta and a good snowing of parmesan cheese but these would be great with some fresh crusty bread if you don't want another pot to wash up. They didn't take very long to cook, in fact the washing up took longer I think so if your blessed with a dishwasher I envy you :) ... the next appliance on my wish list... just need a bigger kitchen/apartment first!
Turkey meatballs:
1 small brown onion, peeled and quartered
2 garlic cloves, peeled
a hefty handful of parsley, stalks and all
juice of half a lemon
2 tablespoons extra virgin olive oil
3-4 slices of stake crusty bread
500g turkey mince
1 egg
a good pinch each of salt and pepper
3 tablespoons regular olive oil (or vegetable oil), for frying
Simple tomato sauce:
2 tablespoon olive oil
1 brown onion, finely diced
2 clove garlic, crushed
a good splash of red wine - optional
1/2 teaspoon sugar
2 x 400g can chopped tomatoes
salt and pepper
Pasta or fresh crusty bread
and parmesan cheese, to serve
- Start with your simple tomato sauce. Heat the olive oil in a small saucepan then add your onion and garlic and fry until onions are translucent. Add your splash (or two) of wine, let it bubble then add your canned tomatoes and sugar. Bring to a simmer and let cook away wile your prepare the turkey-balls. Season with salt and pepper.
- In a small food processor put the onion, garlic, parsley, lemon juice and extra virgin olive oil and give it a good whizz until it becomes a rough paste. Empty into a mixing bowl. Next add your stale bread to the food processor (no need to wash the food processor) and whizz until it becomes rough bread crumbs. Pour that into the mixing bowl along with the turkey mince, egg and salt and pepper. Give everything a good mix using a fork making sure you don't have clumps of any ingredients anywhere.
- Form mince mixture into golf ball sized balls. This will make about 20.
- Heat a large frying pan over medium heat and add the olive oil. When the oil is hot, add your turkey-balls, turning regularly so they cook even and until golden on all over and cooked through.
- Serve them along side the simple tomato sauce with pasta or some fresh crusty bread, a sprinkling of parsley and a generous snowing of parmesan cheese.
I can now soften butter for baking, defrost frozen meat in 10 minutes rather than 24 hours, warm milk up for a coffee in the actual mug (saving washing a pot up) and reheating leftovers are so much easier now for snacking! But the defrosting meat in minutes feels like such a revelation. The possibilities which are open to me as an unorganised cook during the week are now endless if I have a well stocked freezer and pantry. To say I'm excited is an understatement!
Early in the week I defrosted (still a novelty!) some turkey mince which had been floating around our freezer for a while as I never was quite organised to take it out the night before and I didn't feel like tackling a huge turkey ice cube in a frying pan to make some sort of sauce. I knew there were two recipes I have been wanting to try and it all depended what other ingredients I needed and had to which one I was going to make. Unfortunately I didn't have most of the ingredients for either recipe but with my now defrosted turkey mince and turkey meatball on the mind I thought stuff it. I can do this without a recipe.
Starting with a simple tomato sauce I fried off an onion and some crushed garlic in olive oil until soft then adding a splash of red wine which we didn't finish from the weekend and a can of chopped tomatoes brought it to a simmer. Adding a pinch of salt, pepper and half a teaspoon of sugar, I let it bubble away while I got on with the turkey-balls.
I placed a small brown onion, a couple of garlic cloves, a big handful of home grown parsley - stalks and all, a generous squeeze of lemon juice and a good splash of extra virgin olive oil into a small food processor and blitzed until it was a rough paste. Emptied it into a mixing bowl then used the same food processor (no need to wash it) and threw in some stale bread that had also been floating around my freezer and gave it a whizz to get some rough breadcrumbs. I then put the bread crumbs into the mixing bowl along with the (defrosted!) turkey mince, an egg and a good pinch of salt and pepper. Mixed it all together then rolled them into golf ball sized balls ready for frying.
I panfried these in some olive oil on a medium heat for about 15-20 minutes until they were dark golden all over and cooked through. I always have to open one up to make sure (I have a fear of serving raw meat) but I never mind because it also means you get to have a quick taste - a little reward for the cook. I served these with pasta and a good snowing of parmesan cheese but these would be great with some fresh crusty bread if you don't want another pot to wash up. They didn't take very long to cook, in fact the washing up took longer I think so if your blessed with a dishwasher I envy you :) ... the next appliance on my wish list... just need a bigger kitchen/apartment first!
Turkey meatballs with a simple tomato sauce.
Serves 4 (approx. 20 balls)Turkey meatballs:
1 small brown onion, peeled and quartered
2 garlic cloves, peeled
a hefty handful of parsley, stalks and all
juice of half a lemon
2 tablespoons extra virgin olive oil
3-4 slices of stake crusty bread
500g turkey mince
1 egg
a good pinch each of salt and pepper
3 tablespoons regular olive oil (or vegetable oil), for frying
Simple tomato sauce:
2 tablespoon olive oil
1 brown onion, finely diced
2 clove garlic, crushed
a good splash of red wine - optional
1/2 teaspoon sugar
2 x 400g can chopped tomatoes
salt and pepper
Pasta or fresh crusty bread
and parmesan cheese, to serve
- Start with your simple tomato sauce. Heat the olive oil in a small saucepan then add your onion and garlic and fry until onions are translucent. Add your splash (or two) of wine, let it bubble then add your canned tomatoes and sugar. Bring to a simmer and let cook away wile your prepare the turkey-balls. Season with salt and pepper.
- In a small food processor put the onion, garlic, parsley, lemon juice and extra virgin olive oil and give it a good whizz until it becomes a rough paste. Empty into a mixing bowl. Next add your stale bread to the food processor (no need to wash the food processor) and whizz until it becomes rough bread crumbs. Pour that into the mixing bowl along with the turkey mince, egg and salt and pepper. Give everything a good mix using a fork making sure you don't have clumps of any ingredients anywhere.
- Form mince mixture into golf ball sized balls. This will make about 20.
- Heat a large frying pan over medium heat and add the olive oil. When the oil is hot, add your turkey-balls, turning regularly so they cook even and until golden on all over and cooked through.
- Serve them along side the simple tomato sauce with pasta or some fresh crusty bread, a sprinkling of parsley and a generous snowing of parmesan cheese.
Saturday, 20 June 2015
chilli mussels in a rich tomato sauce - a dinner worth sharing.
For the past two weeks during the weeknights Tristan has been away doing courses near Newcastle. This has meant it's been just Arthur and me. The first week I managed to have dinner at someones house nearly every night which was great except that Arthur was pretty pooy at me for never being home on time to feel him dinner.
The second week I had planned to be home some nights and did a small grocery shop so I wouldn't be tempted to get takeaway. I bought Tofu with the idea that Tristan doesn't like it so this was my chance to eat what I wanted without having someone complain there was no meat in it. I was a little excited on Monday but you know what it's not all it is cracked up to be.
I struggled.
I didn't enjoy anything I made and the tofu is still in the fridge, untouched. The idea of eating alone in front of the tv felt lonely. I was completely unmotivated when there wasn't someone to cook for or share a meal with.
There was hopeful ideas for a few posts about cooking for one but I'm sorry to say I don't have any helpful hints or insightful knowledge on this subject. I don't really know how to do it myself so how can I tell all of you how to do it. So instead I will share this recipe for Chilli Mussels, which Tristan made last weekend when he was home that you can share with a partner, a friend, or a crowd around a table. It's a fun, full of flavour, finger-licking messy dinner which reminds me that cooking is all about sharing a meal with people who make you laugh and let you be you. What more can anyone ask for?
(Note: this can easily be double for a group, just increase the cooking times a little bit and obviously the size of your pot... don't do what I normally do and cram it all in a tiny pot then transfer it at the last minute and have two pots to wash up in the end.)
2 table spoons extra virgin olive oil
1 brown onion, diced
4 garlic cloves, finely diced
1 - 2 red chilli's, finely diced (depending on how spicy you like it)
2 table spoons tomato paste
1 lemon, juice and zest finely grated
1 cup white wine
800g can crushed tomatoes
2 teaspoons sugar
Cracked pepper, to taste
1kg pot ready mussels
1 bunch parsley, stalks finely sliced and leave roughly chopped
Crusty bread and salty butter, to serve
- In a large pot heat the olive oil on medium heat and add the onion, garlic, chilli and parsley stalks. Cook for about 5 minutes until onions have softened.
- Next add the tomato paste and lemon juice. When the tomato paste starts to stick to the bottom of the pot (but not burn) add your wine and scrape all the tomato paste that has stuck to the bottom off. This is a flavour hit!
- Add the crushed tomatoes, 1/2 cup water and the sugar and bring to a boil. Reduce the heat to a simmer and cook for about 15 minutes. Taste and season with a pinch of pepper. You won't want to add any salt yet as the mussels let out salty water when they open as they cook.
- Once your sauce has simmered, add your pot ready mussels, cover with a lid and cook for about 2-4 minutes (if you have whopper mussels you will need to judge by eye). Check and see if they have all opened. If they haven't then cook for a further 2 minutes or sometimes all you need to do is leave the lid on with the heat off for an extra couple of minutes and they steam inside without over cooking.
- Stir through the parsley, take the pot to the table with plenty of napkins and dig in with a friend or two. Enjoy.
Note: any mussels that don't open in the cooking process (still jammed shut!) discard.
The second week I had planned to be home some nights and did a small grocery shop so I wouldn't be tempted to get takeaway. I bought Tofu with the idea that Tristan doesn't like it so this was my chance to eat what I wanted without having someone complain there was no meat in it. I was a little excited on Monday but you know what it's not all it is cracked up to be.
I struggled.
I didn't enjoy anything I made and the tofu is still in the fridge, untouched. The idea of eating alone in front of the tv felt lonely. I was completely unmotivated when there wasn't someone to cook for or share a meal with.
There was hopeful ideas for a few posts about cooking for one but I'm sorry to say I don't have any helpful hints or insightful knowledge on this subject. I don't really know how to do it myself so how can I tell all of you how to do it. So instead I will share this recipe for Chilli Mussels, which Tristan made last weekend when he was home that you can share with a partner, a friend, or a crowd around a table. It's a fun, full of flavour, finger-licking messy dinner which reminds me that cooking is all about sharing a meal with people who make you laugh and let you be you. What more can anyone ask for?
chilli mussels in a rich tomato sauce.
serves 2 greedy people (or 4 with sides)(Note: this can easily be double for a group, just increase the cooking times a little bit and obviously the size of your pot... don't do what I normally do and cram it all in a tiny pot then transfer it at the last minute and have two pots to wash up in the end.)
2 table spoons extra virgin olive oil
1 brown onion, diced
4 garlic cloves, finely diced
1 - 2 red chilli's, finely diced (depending on how spicy you like it)
2 table spoons tomato paste
1 lemon, juice and zest finely grated
1 cup white wine
800g can crushed tomatoes
2 teaspoons sugar
Cracked pepper, to taste
1kg pot ready mussels
1 bunch parsley, stalks finely sliced and leave roughly chopped
Crusty bread and salty butter, to serve
- In a large pot heat the olive oil on medium heat and add the onion, garlic, chilli and parsley stalks. Cook for about 5 minutes until onions have softened.
- Next add the tomato paste and lemon juice. When the tomato paste starts to stick to the bottom of the pot (but not burn) add your wine and scrape all the tomato paste that has stuck to the bottom off. This is a flavour hit!
- Add the crushed tomatoes, 1/2 cup water and the sugar and bring to a boil. Reduce the heat to a simmer and cook for about 15 minutes. Taste and season with a pinch of pepper. You won't want to add any salt yet as the mussels let out salty water when they open as they cook.
- Once your sauce has simmered, add your pot ready mussels, cover with a lid and cook for about 2-4 minutes (if you have whopper mussels you will need to judge by eye). Check and see if they have all opened. If they haven't then cook for a further 2 minutes or sometimes all you need to do is leave the lid on with the heat off for an extra couple of minutes and they steam inside without over cooking.
- Stir through the parsley, take the pot to the table with plenty of napkins and dig in with a friend or two. Enjoy.
Note: any mussels that don't open in the cooking process (still jammed shut!) discard.
Tuesday, 3 February 2015
Martha Stewart's one-pan-pasta
Last Thursday night we had a lazy date night in that consisted of a one-pan-pasta, a huge bowl of ice cream and a movie.
recipe from Martha Stewart - find the original here
Serves 4
400g dried spaghetti
400g cherry tomatoes, halved
1 brown onion, thinly sliced
4 cloves of garlic, thinly sliced
1/2 teaspoon chilli flakes
2 large sprigs of fresh basil (or 4 small)
2 tablespoons of extra virgin olive oil
1 teaspoon of table salt
a generous grinding of black pepper
4.5 cups of water
parmesan cheese and extra basil leaves, for serving
- Place pasta, tomatoes, onion, garlic, chilli flakes, basil sprigs, extra virigin olive oil, salt, pepper and the water in a pan.
- Bring to a boil, this should take about 2-3 minutes. Once boiling keep stirring the pasta to separate it a little. It should be done in about 9 minutes or until the pasta is cooked through and the liquid has been absorbed.
- Serve with the extra basil leaves and parmesan sprinkled on top.
The one-pan-pasta recipe from Martha Stewart has kind of been a internet sensation if you follow a few food blogs and most blogs I read have already made this... ages ago! I'm a little late to the party but better late than never. I'd seen the recipe online about a year a go and my friend Kate, her boyfriend, Pete showed me the recipe too knowing I was a foodie but I kinda brushed it off and didn't think much of it. To be honest I was sceptical.... one-pan-pasta... just put it all in a pot together... pasta, sauce ingredients and the water. Nup! I don't believe it. Plus I also read a blog review (here) saying that the traditional way of making pasta and a sauce (the normal way) was still much better, so why would I attempt this recipe?!
But then I saw this video from the blog Bon Appetempt and why on earth hadn't I made this earlier??!? (Also her book comes out this week, you should definitely go and check out her book trailer... and maybe all her other video's while your there. She is great!!)
The big thing here: I only have to wash up one pot.
This is an amazing discovery! All I keep thinking about now is what other things I can add or swap in the recipe to change the sauce up and still keep the one-pan pasta idea. I could use canned tomatoes in winter, fry some bacon up in the pan before adding all the other ingredients and or chorizo or or or... you could add anything and still only have to wash up one pan! I wonder if it'd work with short pasta... I don't see why not? ahhaha the possibilities are endless!!
Ok maybe I'm a little excited about a pasta dish but to be honest I think it's a pretty funky recipe. We don't get Martha Stewart magazine here in Australia (well you can but it'll cost you an arm, leg and your first born) so not many of her recipes cross my path except through other food bloggers. I think I might have to have a ritual weekly browse of her website in case I miss another gem like this.
I definitely recommend giving this a go. The sauce goes thick and rich with kind of a creamy-ness to it but not a drop of cream in sight! It also has a bit of a chilli kick so if you're not that into spice maybe half the amount of chilli flakes. I can't wait to make this again... just writing this thinking about dinner the other night and I wish I was having that for lunch... yes I had it cold the next day in a sandwich and it was GREAT!
mmm cold spaghetti sandwich... yum :)
If anyone else has a food hero I'm yet to discover please let me know below. I'd love to find more hidden gems like this that I should have tried to ages ago.
One-pan-pasta
Serves 4
400g dried spaghetti
400g cherry tomatoes, halved
1 brown onion, thinly sliced
4 cloves of garlic, thinly sliced
1/2 teaspoon chilli flakes
2 large sprigs of fresh basil (or 4 small)
2 tablespoons of extra virgin olive oil
1 teaspoon of table salt
a generous grinding of black pepper
4.5 cups of water
parmesan cheese and extra basil leaves, for serving
- Place pasta, tomatoes, onion, garlic, chilli flakes, basil sprigs, extra virigin olive oil, salt, pepper and the water in a pan.
- Bring to a boil, this should take about 2-3 minutes. Once boiling keep stirring the pasta to separate it a little. It should be done in about 9 minutes or until the pasta is cooked through and the liquid has been absorbed.
- Serve with the extra basil leaves and parmesan sprinkled on top.
Saturday, 29 November 2014
Tomato Sauce with Carrots and Onions from My Berlin Kitchen.
So the other week when I was home alone for dinner I of course had to cook myself pasta. It's simple easy and why resist one of your favourite foods when there is no one eating but you?!
I picked up my favourite food memoir My Berlin Kitchen by Luisa Weiss who writes the blog 'The Wednesday Chef' (such a great blog! check it out!) because when I was reading this book practically every recipe she has in there I wanted to make that then and there but reading till 1am because you can't put it down then going to make a big bowl of pasta for yourself probably isn't the best idea so I've tagged the book like a crazy women and one recipe that I thought would be great for when I'm home alone was her Tomato Sauce with Carrots and Onions. It also was the only ingredients I had left in the fridge so it was fate I say.
Sounds simple you say? It is and that's whats so great about it. It comes with her family story abut her and her father and I remember when I still lived with my patents and my mum had her own version of a tomato sauce she made so it kind of hit home a little. Plus who always has a few carrots, onions and a can of tomatoes floating around their fridge and pantry right before payday? I always do.
Luisa gives you a tip when making this and thats - "to let the onion cook thoroughly in the olive oil before adding the rest of the ingredients. This mellows the sometimes metallic bite of the onion and adds sweetness to the sauce."
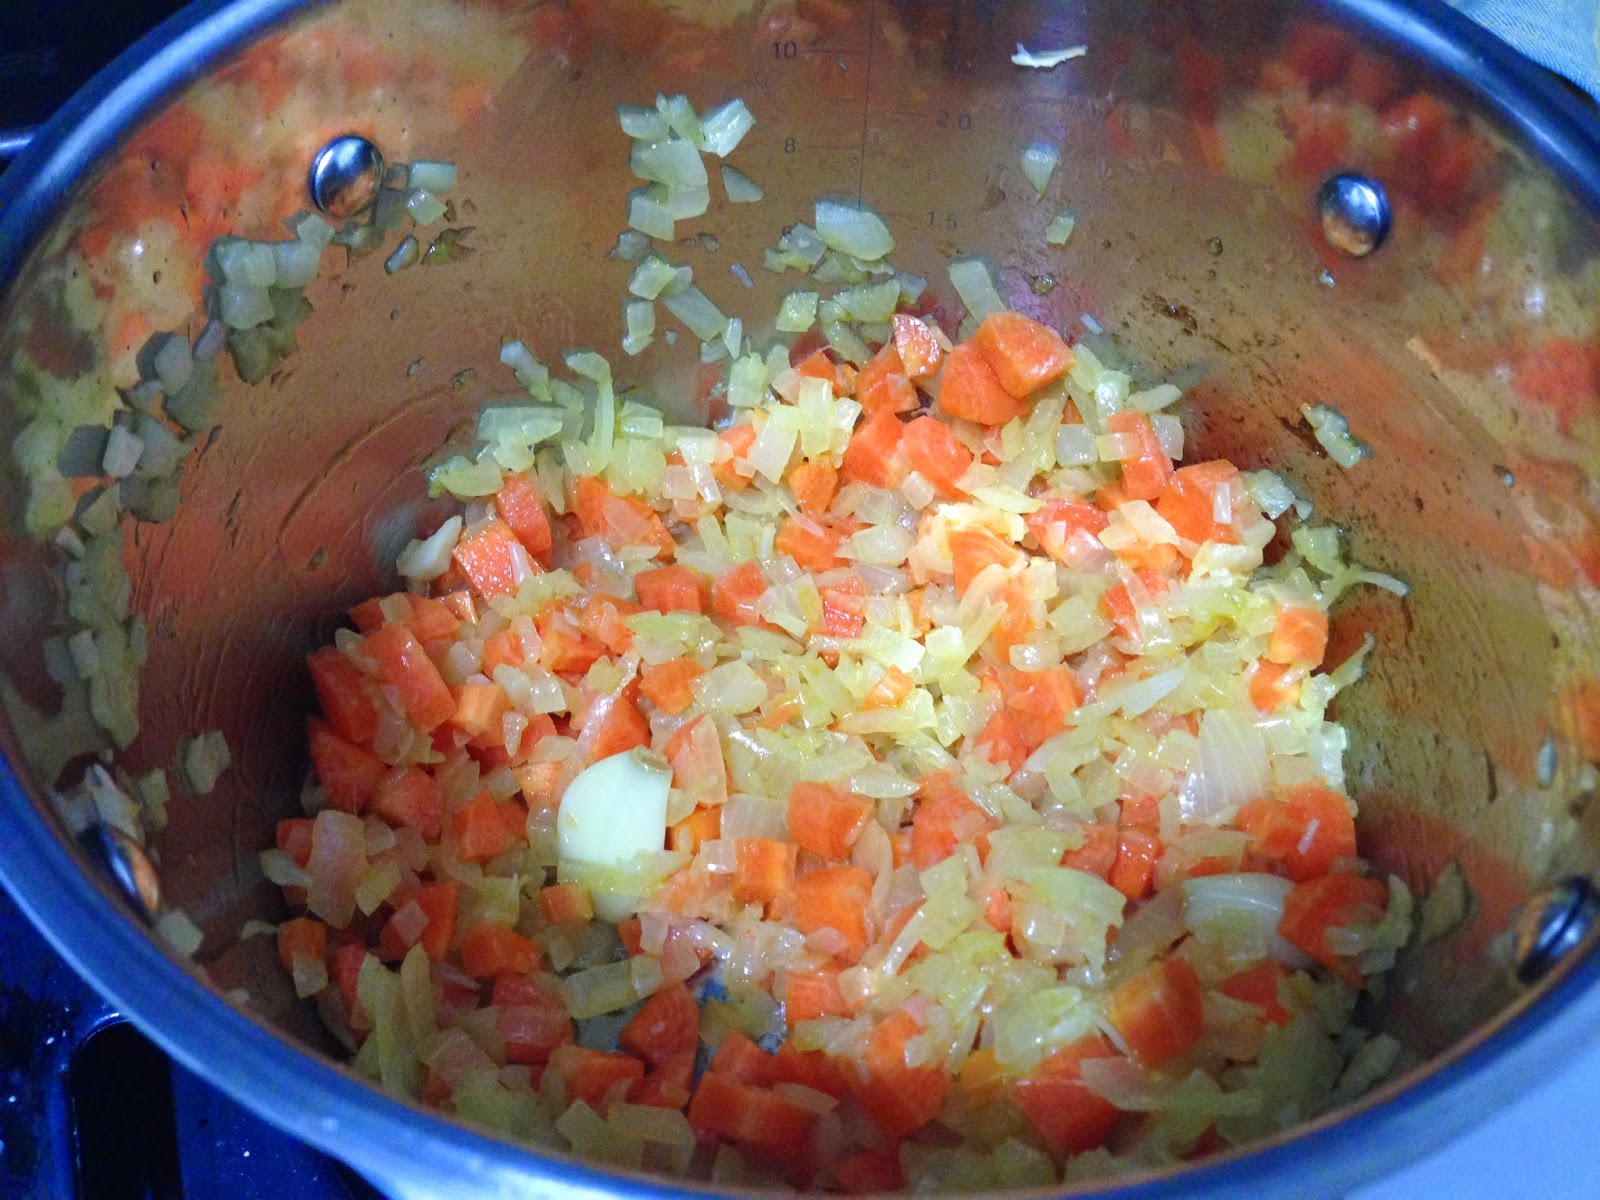
The basic recipe (adapted ever so slightly) is heat a couple of tablespoons of olive oil in a small/medium pot, add a whole garlic clove and a diced brown onion and cook that for about 10 minutes or so until the onion has gone really soft. Then add your diced carrot and cook for a little longer. Add a can of diced tomatoes, a pinch of salt and chilli flakes and bring to a simmer. Cook your pasta until al dente, stir sauce and pasta together (fishing out the garlic clove) then serve with a generous serving of parmesan cheese.
So simple and tasty and definitely a great store cupboard/end of pay week staple!
Subscribe to:
Posts (Atom)
...
#giveaway
15 minute meals
30 minute meals
5 Minute Food Fix
A Common Table
A Kitchen in the Valley
A Modern Way to Eat
Acquacotta
Adam Liaw
Alison Roman
Alison Thompson
almonds
Amelia Morris
Anna Jones
Annie Herron
Antonio Carluccio
Anya von Bremzen
apple
apps
Apt 2b Baking Co
Artisan Sourdough Made Simple
Ashley Rodriguez
autumn
avocado
babies
baby
baby shower
bacon
Bake
baked pasta
baking
Bali
Barcelona Cult Recipes
basil
BBQ
beans
beef
beetroot
Bill Granger
biscuits
blondies
Bon Appetempt
Bowl & Spoon
bread
breadcrumbs
broccoli
brussel sprouts
burgers
burrito
buttercream
butternut squash
byo
cabbage
cake
calzone
camping
Carla Lali Music
carrot
cauliflower
chicken
childhood
chilli
chinese cooking
chipotle
chocolate
chorizo
chutney
Claire Ptak
Classic German Baking
Classics 1
Classics 2
coconut
Comfort Food
cookbook addict
cookies
cordial
corn
cucumber
curry
custard
Cynthia Chen McTernan
Date Night In
David Dale
Delicious. magazine
dessert
Dining In
dinner party nightmares
Dinner: A Love Story
dip
doings
Donna Hay
Donna Hay Magazine
dumplings
easy
egg
eggplant
Eleanor Ford
Emiko Davies
Emilie Raffa
Emma Spitzer
ENOTW
Every Night of the Week Veg
family
Fast Fresh Simple
Feast
Feasting
fennel
fiction
Fire Islands
Five Quarters
Flora Sheedan
Florentine
Food & Wine
Food52
Fresh & Light
Fress
frozen dessert
Fuchsia Dunlop
galette
Gatherings
Genius Recipes
Gennaro Contaldo
Gennaro's Fast Cook Italian
Gennaro's Italian Bakery
Gennaro's Pasta Perfecto!
german
ginger
gnocchi
goats cheese
granola
Greenfeast
gumbo
Gwyneth Paltrow
Happenings
holiday
home
home-grown herbs
How to be a Domestic Goddess
hungry
Hunter Valley
ice-cream
indian
Indonesian Cooking
involtini
It's All Easy
It's all Good
jam
Jamie Does
Jamie Magazine
Jamie Oliver
Jamie's America
Jamie's Great Britain
Jamie's Italy
Jane Hornby
japanese
Jenny Rosenstrach
Jessica Fechtor
Julia Turshen
Justine Schofield. The Weeknight Cookbook
kale
Karen Martini
kimchi
Kitchen
korean
Kylee Newton
LA Cult Recipes
Land of Fish and Rice
leek
lemon
lentils
life
Light of Lucia
Link Love
links
long weekends
love
Luciana Sampogna
Lucio Galletto
Lucy Tweed
Luisa Weiss
Maggie Beer
maple
Marc Grossman
Marcella Hazan
Marian Burros
Martha Stewart
Matthew Evans
meal planning
meatballs
meatloaf
mess
mexican
Michael James
Michelle Crawford
mince
mint
miso
Monte Carlos
Mum's cooking
mushroom
mussels
My Berlin Kitchen
My Kitchen Year
Naturally Ella
new beginnings
New York Cult recipes
Nigel Slater
Nigelissima
Nigella Bites
Nigella Express
Nigella Lawson
No Time to Cook
noodles
North West Island
nostalgia
Not Just Jam
NotWithoutSalt
oats
omelette
paddle pops
parsley
pasta
Paul McIntyre
Paul West
Paulene Christie
pea
pecans
pesto
pickle
pickles
pie
pizza
Plenty
Plenty More
plum
pork
potato
prawns
preserving
prosciutto
pudding
pumpkin
quesadilla
quinoa
Rachel eats
Rachel Khoo
Rachel Roddy
ragu
rambles
raspberry
recipe
rhubarb
rice
risotto
River Cottage Australia
romantic
Ruth Reichl
saffron
salad
Sally Wise
salsa verde
Salt Fat Acid Heat
Samin Nosrat
sandwiches
Sara Forte
sausage
Save with Jamie
schupfnudeln
seafood
sesame
Seven Spoons
Simon David
Simple
slow cooker
Slow Cooker Central
Small Victories
Sophie Hansen
soup
sourdough
Sprouted Kitchen
starters
Stephanie Danler
Stir
stir-fry
stuffed
sushi
Sweet Amandine
sweet potato
Sweetbitter
tahini
Taking Stock
Tara O-Brady
Taste Tibet
Tasting Rome
thai
Thai Food Made Easy
The Art of Pasta
The Best of Maggie Beer
The Comfort Bake
The Dinner Ladies
The Little Book of Slow
The Little Paris Kitchen
The Modern Cook's Year
The Modern Preserver
The Naked Chef
The New Classics
The Tivoli Road Baker
The Violet Bakery Cookbook
The Wednesday Chef
The Zen Kitchen
thyme
Tom Kime
tomato
tuna
turkey
tuscany
Two Greedy Italians
Two Red Bowls
Valeria Necchio
vanilla
veal
vegetables
vegetarian
Veneto
vietnamese
wedding
wedding cake
What can I bring?
What to Bake and How to Bake it
Where Cooking Begins
Where the Heart is
yoghurt
Yossy Arefi
Yotam Ottolenghi
Yumi Stynes
zucchini