Monday, 29 September 2014

Meatballs from 'The Naked Chef'.

I'm a terrible blogger. I'm sorry.

Last week was full of birthday dinners, heart monitors and anxious thoughts that if I keep thinking about them too much I'll go crazy far sooner than a 25 year old should. So instead of worrying, I'm back to blogging.

Last Sunday I had one of my best friends over for dinner and I was super excited. I hadn't had anyone over for dinner in such a long time, it gave me an excuse to cook something that took a little bit longer and needed a little bit more labour of love put into it. And it was a Sunday night so shouldn't every Sunday dinner be a little special?
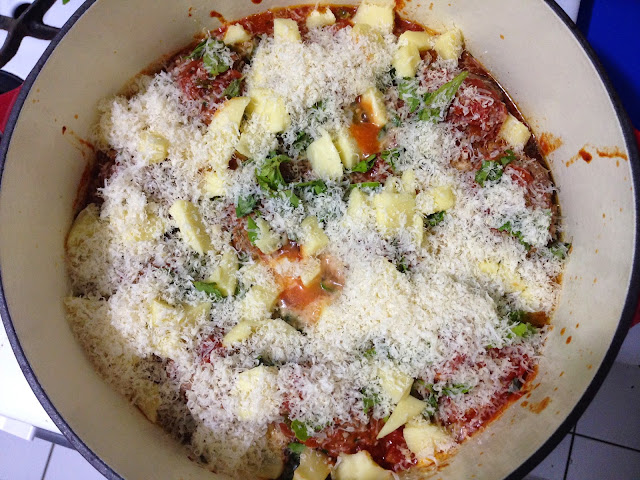
The Naked Chef Meatballs Jamie Oliver

I picked out a Jamie Oliver book I hadn't blogged about yet. I'd made a few recipes maybe 2 years ago from it but then it was put back on the shelf and has gathered dust ever since. And thats not to say that it isn't a great book because let me tell you this. I LOVE YOUNG JAMIE OLIVER. He's so cheeky and happy and full of energy, there is almost a bounce in his step in his first TV show 'The Naked Chef' as he teaches people to cook for the first time in our lounge rooms and kitchens. But seriously, who doesn't have a soft spot for young Jamie and the now Dad Jamie who is still just as cheeky!?

You all know I'm a Jamie Oliver junkie and I wouldn't be a true junkie if I didn't have his very first book 'The Naked Chef'. In his first books its all about honest food and cooking for people you love, weather its a for a few people or a date night. I chose Meatballs because I wanted a safe, affordable recipe that I couldn't stuff up.
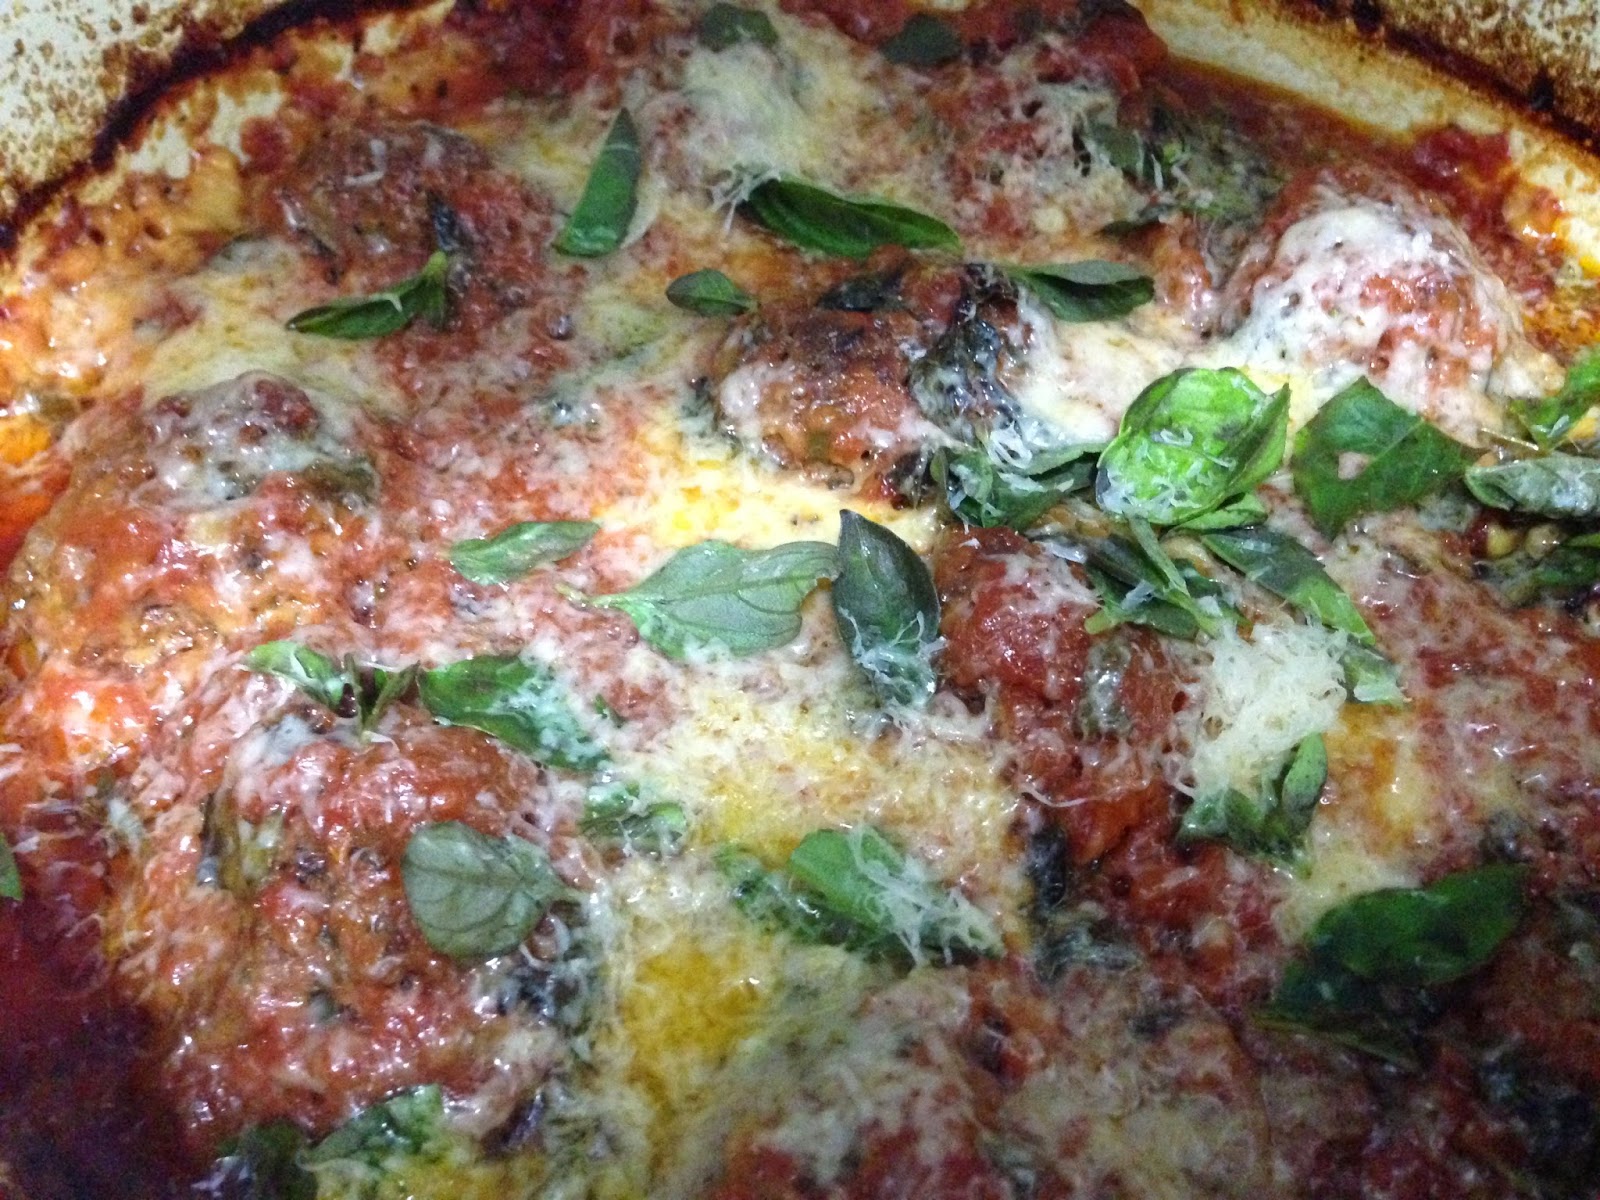
The Naked Chef Meatballs Jamie Oliver

These were so delicious. Best yet! I did read the recipe wrong again and not all the way through first but that step was optional anyway so it was all good.

Also it does help that they were baked so I could do a quick spruce around the apartment before my dinner date came round and then all I had to do was cook some tagliatelle pasta when she was here. Easy Peasy dinner idea, and it can also feed more than three... We had leftovers for the next day and two lunches frozen for later in the week, so its great for a small crowd.

The Naked Chef Meatballs Jamie Oliver

Give this recipe a go, you wont regret it! I promise!

The Naked Chef Meatballs Jamie Oliver

The Naked Chef's Meatballs.

Serves 4-6
(recipe adapted slightly)

For the Meatballs: 

1kg beef mince
2 slices of bread whizzed into bread crumbs
2 level tbsp dried oregano
1/4 level tsp ground cumin
1/4 tsp cayenne pepper
1 tbsp finely chopped fresh rosemary
1 tbsp finely chopped fresh parsley
1 egg yolk
1 level tsp salt 
a good 2 pinches of freshly cracked pepper

- Place all ingredients in a bowl and give it a good mix with a fork or get into it with clean hands.

- Shape into balls (what ever size you feel like - I did big meatballs because they had time to cook in the oven but you can do any size you like - just remember the bigger they are, the longer they take to cook!) I made these tennis ball sized.

- Place on a plate and store in the fridge while you get on with the tomato sauce (see below).

Basic Tomato Pasta Sauce:

1 clove garlic, finely chopped
2 tbsp olive oil
1/2 tsp chilli flakes
2 tsp dried oregano
3 x 400g tins of chopped tomatoes
1 tbsp red wine vinegar
1 small handful of fresh basil
salt and pepper

- Gently fry the garlic with the olive oil but don't let it colour. Add the chilli, oregano and tomatoes. Stir everything together. Bring to a boil and reduce to a simmer for 30 - 45 minutes.

- Add the vinegar and chopped basil. Season with salt and pepper and taste.

Putting it all together:

3 tbsp olive oil
2 handfuls of fresh basil
120g mozzarella cheese, in chunks
60g finely grated parmesan
400g pasta of your choice (optional)

- Preheat your oven to 200 C or 400 F

- Heat the olive oil in a heavy bottom casserole pan on a medium heat (make sure it can also go in the oven) and add your meatballs. Fry them until they are brown all over but be gentle so you don't break them up.

- Turn the heat down and add all of the basic tomato pasta sauce. Cover and place in a preheated oven.

(Remember the bigger your balls the longer they'll need to cook. I baked mine for about 20 minutes, covered.)
- If serving with pasta, cook pasta according to packet instructions now so everything is ready together.

- Scatter the mozzarella, parmesan and basil over the top and bake for another 15 min or until the cheese is oozy and golden. Serve.

Thursday, 18 September 2014

Queen Victoria Sponge from Jamie's Great Britain.

My Mum is the easiest to please when it comes to birthday cakes. She likes a plain sponge cake. Super easy and it's always nice having a forgotten favourite now and again. Sponge cake is never something I think of often when I want to bake something sweet but every time I make it I always think, why don't I make this more often. They are great afternoon tea cakes and you can dress them up or down and fill them with anything you want. They make a lovely birthday cake too, letting you experiment with fillings, flavoured oils, icings and syrups. It's like a blank canvas for you to make your own!

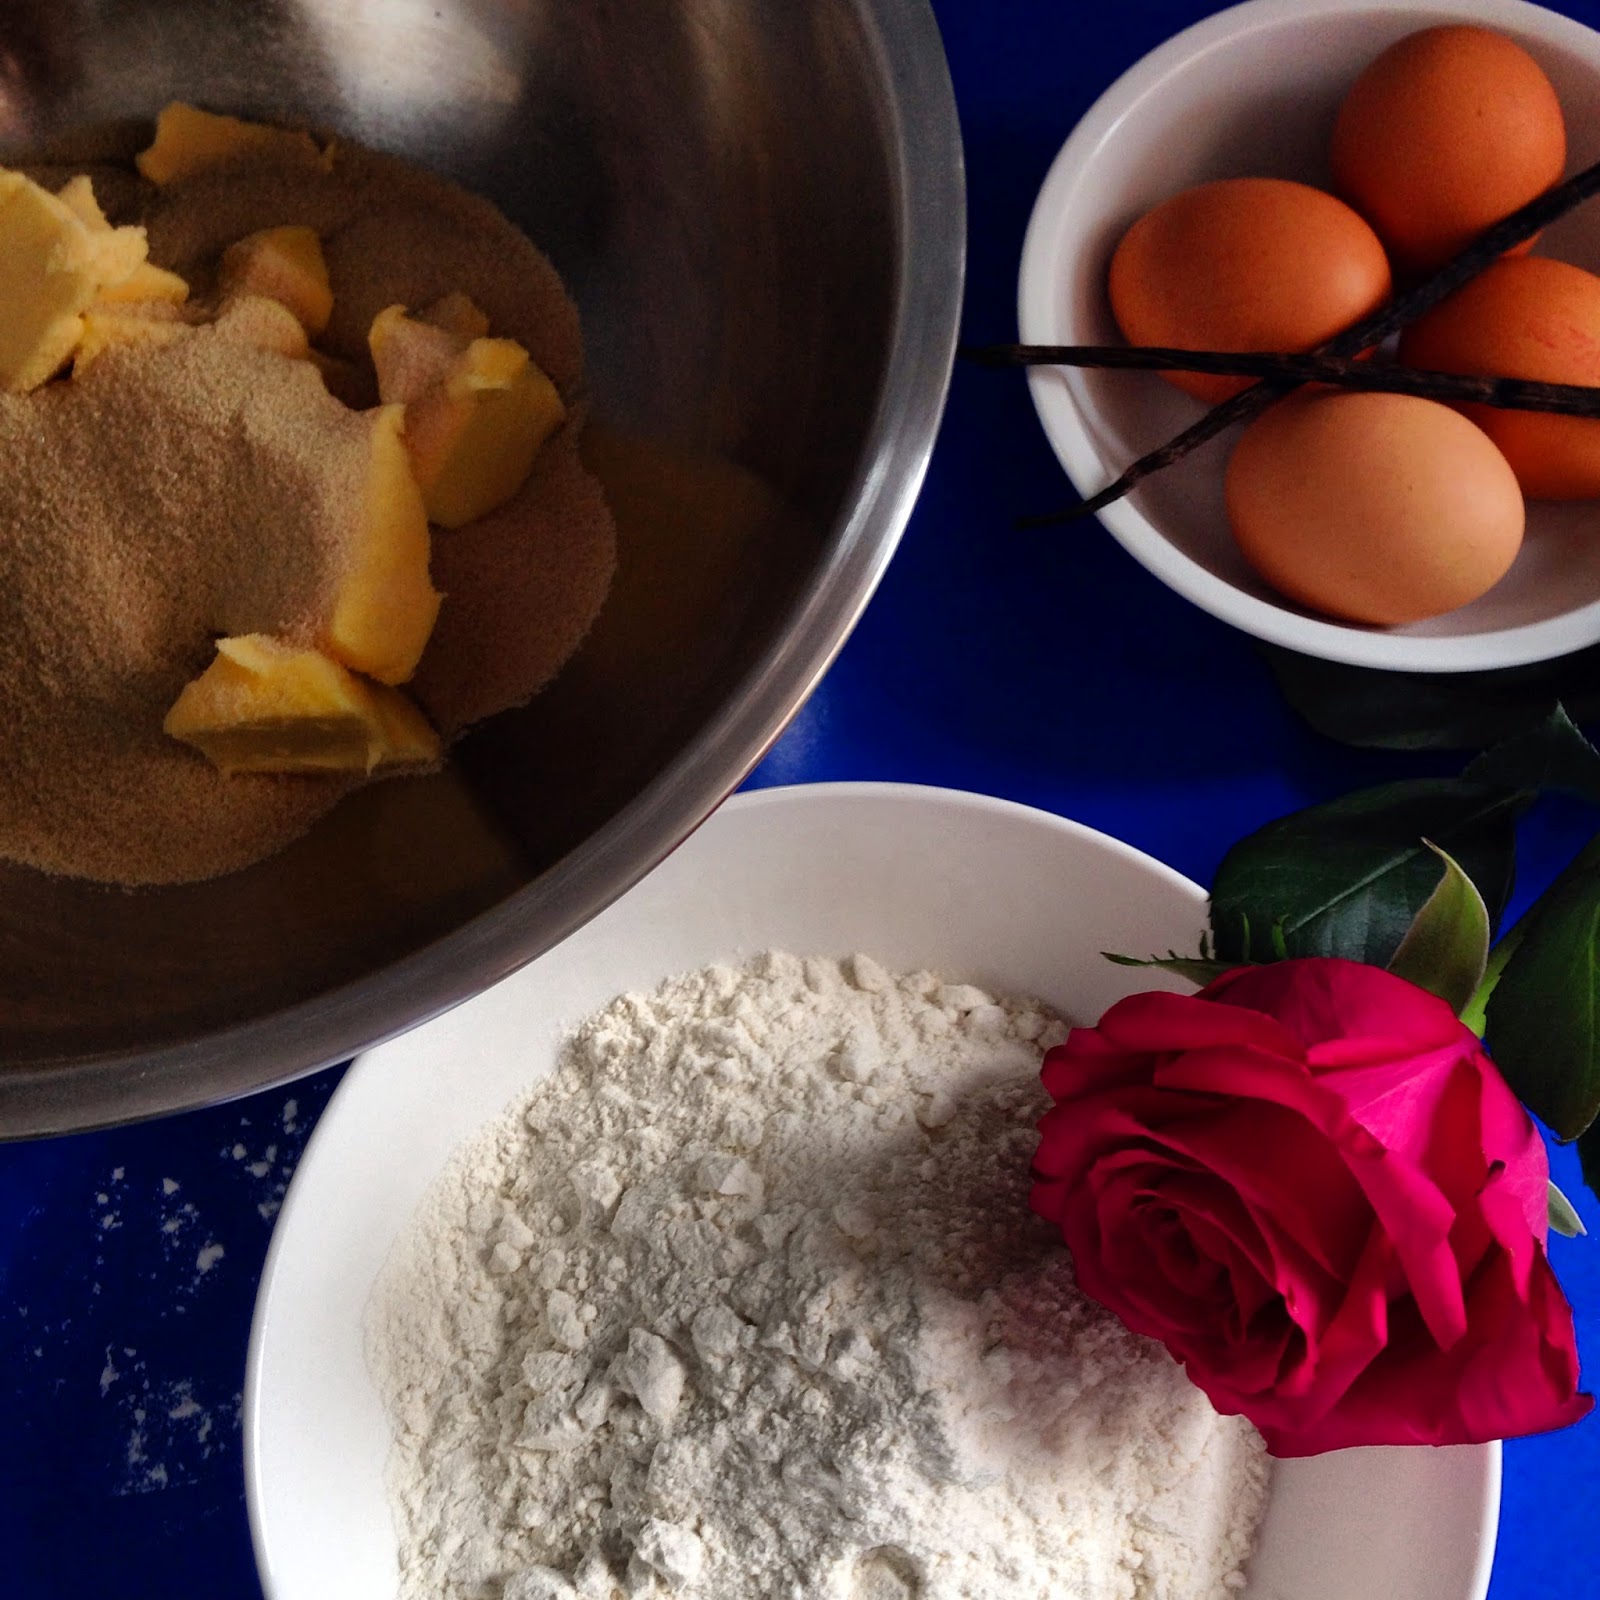
queen victoria sponge cake

There are probably thousands of sponge cake recipes and I know the sponge cake I made at TAFE was completely different to this recipe. This one is much more of a pound cake but I think these are a little tastier and have a bit more guts to them. And the fact that to make a traditional sponge you need to whisk the eggs for about 10 minutes... there is that 'I don't have a stand mixer' problem again. So I went with this recipe from Jamie Oliver's Great Britain cookbook. It was quite fitting since Mum's an Essex girl originally but I think she's a true blue Auzzie now, being here more than 40 years.

I made this during the madness of Spiderman cupcakes and finished it off at my mum's place where we celebrated her birthday. Every time I walk into mum mum's kitchen I just wish it was mine. It's so lovely and new with large, wide benches that aren't blue and ... a dishwasher!! Luxury!

I split the mixture into two sandwich tins and baked them for easily 40 minutes but please don't go by this time. The oven I have is from the 60's and bakes things odd if you haven't already read about my oven disasters. I will put the time Jamie's uses below and go from that as a guide.

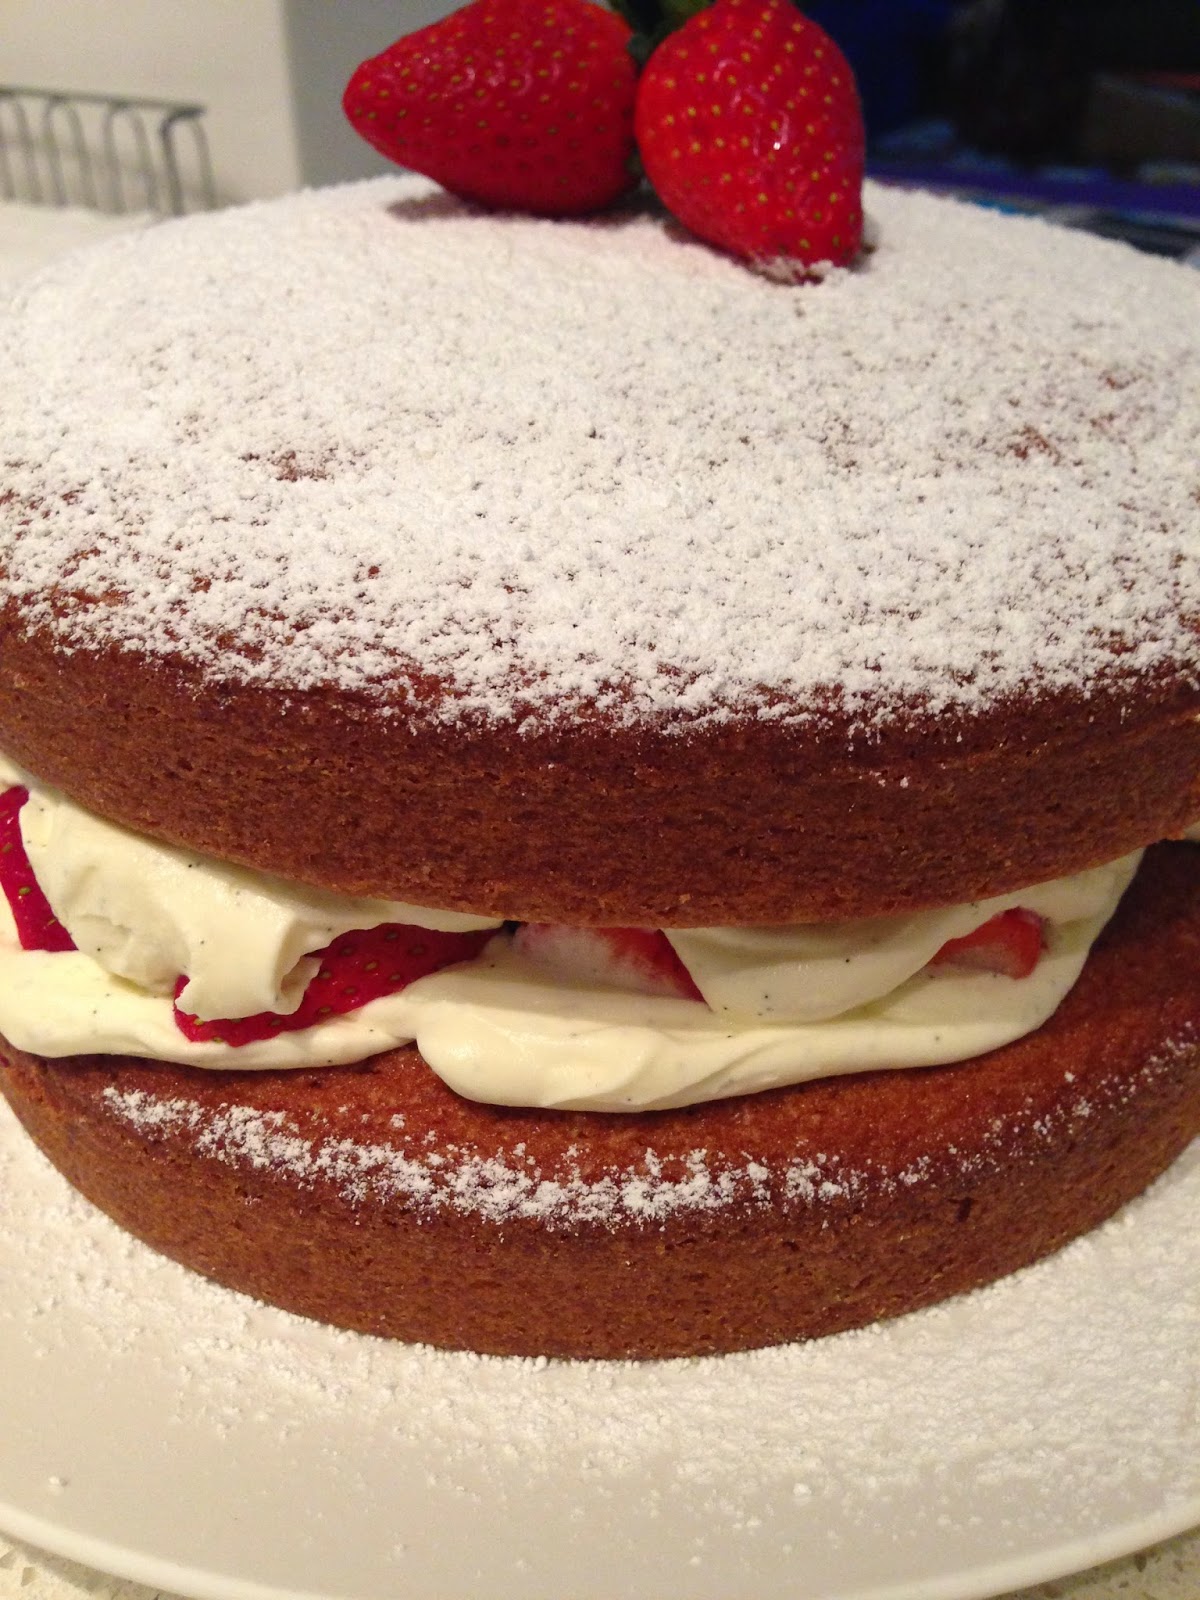
When they were cool I put whipped vanilla cream in the centre and fresh strawberries. Jamie says to add rose essence and orange zest to the cake but I knew Mum wouldn't be a fan of that and raspberry jam and fresh raspberries in the centre but the raspberries were $9 a punnet and the strawberries were $1.50 a punnet so I went with more strawberries over a tiny amount of raspberries.

I did try and crystallise rose petals but they turned out terrible and went straight in the bin. The reason... I don't have a pastry brush at home. I will try them again another time and let you know how they go and put a better description than brush egg white on them, dust in sugar and bake. Hmmm there has to be more to it or everyone would do it all the time. I will get back to you on this.

So some simple dusting of icing sugar over the top and a strawberry in the middle was my final touch and boy oh boy ... YUM.

Happy Birthday for last Friday Mama. I hope you had a wonderful day, love you x

queen victoria sponge cake

Queen Victoria Sponge from Jamie's Great Britain.

serves 10
(recipe below adapted -  find original recipe here.)

250g unsalted butter, softened
250g raw (golden) caster sugar
4 large eggs
250g self raising flour
1 tsp vanilla extract

250mL pure cream
2 tbsp caster sugar
1 vanilla pod, seeds scraped

300g strawberries, washed and halved

To make the cake - 

- Pre-heat your oven to 190 C or 375 F.

- Grease two 20cm cake tins with butter, line the bases then dust with flour. Make sure you line and make your cake tin non-stick properly. It's so disappointing to put all that effort in then have your cake stick and not come out of the tin.

- Cream butter and sugar together until pale and creamy with electric hand held beaters (or by hand - there is nothing wrong with a bowl and wooden spoon). Add vanilla and combine well.

- Add eggs, one at a time, mixing well after each addition.

- Fold the flour through by hand half at a time until it is all incorporated.

- If you mixture is really thick at this point (mine was) add 2 tbsp of milk and mix it in to loosen it up.

- Spoon the mixture evenly into the two prepared tins and spread with a pallette knife or the back of a spoon to even out the surface.

- Bake for 20 - 25 minutes (mine baked for 40 - so make sure you kinda know your oven).

- The cake should be cooked when a skewer is inserted and comes out clean. Allow to cool in tins slightly then turn out onto a cooling rack.

To decorate the cake - 

- Once your cakes are completely cool you can assemble them.

- Whisk cream, sugar and vanilla together until fluffy peaks (you don't want to create butter so be careful).

- If you're cakes have domed alot you may want to trim the top so you can stack them on top of each other. Choose which one will be the base and which one will be the top.

- On the base, cover the top with about half of the whipped cream then scatter the strawberries on top (you may not need all of them, just use enough to cover the top). Add the rest of the cream then place the second cake on top.

- Dust the top with icing sugar in a sieve and the most beautiful strawberry you can find.

- Store in the fridge if not eating straight away, otherwise... DIG IN!

Tuesday, 16 September 2014

donna hay's chorizo and capsicum tacos from The New Classics cookbook

Burrito's and taco's are a staple in our little house hold. It's a great, quick, easy dinner that doesn't require the oven on so its a winner in summer. In our little apartment the oven heats up the apartment in about 10 minutes so in winter its great but in summer you want to avoid the oven at all costs unless you want to turn our place into a sauna. We've had some great spring days over the past week and it's given us all a little taste of summer and a reminder that it's on it's way.

With all the events coming up it's already starting to feel like the silly season is close. You know I saw a  Heston Blumenthal Christmas pudding in the supermarket on Monday?! Crazy!! But I'm a little excited too for Christmas this year, I wasn't so much last year but this year I'm excited for the long hot days and sand between my toes.

Anyway lets get back on track about Taco's. This is normally a meal that Tristan cooks when it's his night of cooking, using the little seasoning sachet and a whole heap of salad, cheese, guac and sour cream. Normally... Ok every time, I over fill mine and end up a complete mess with it all over me.

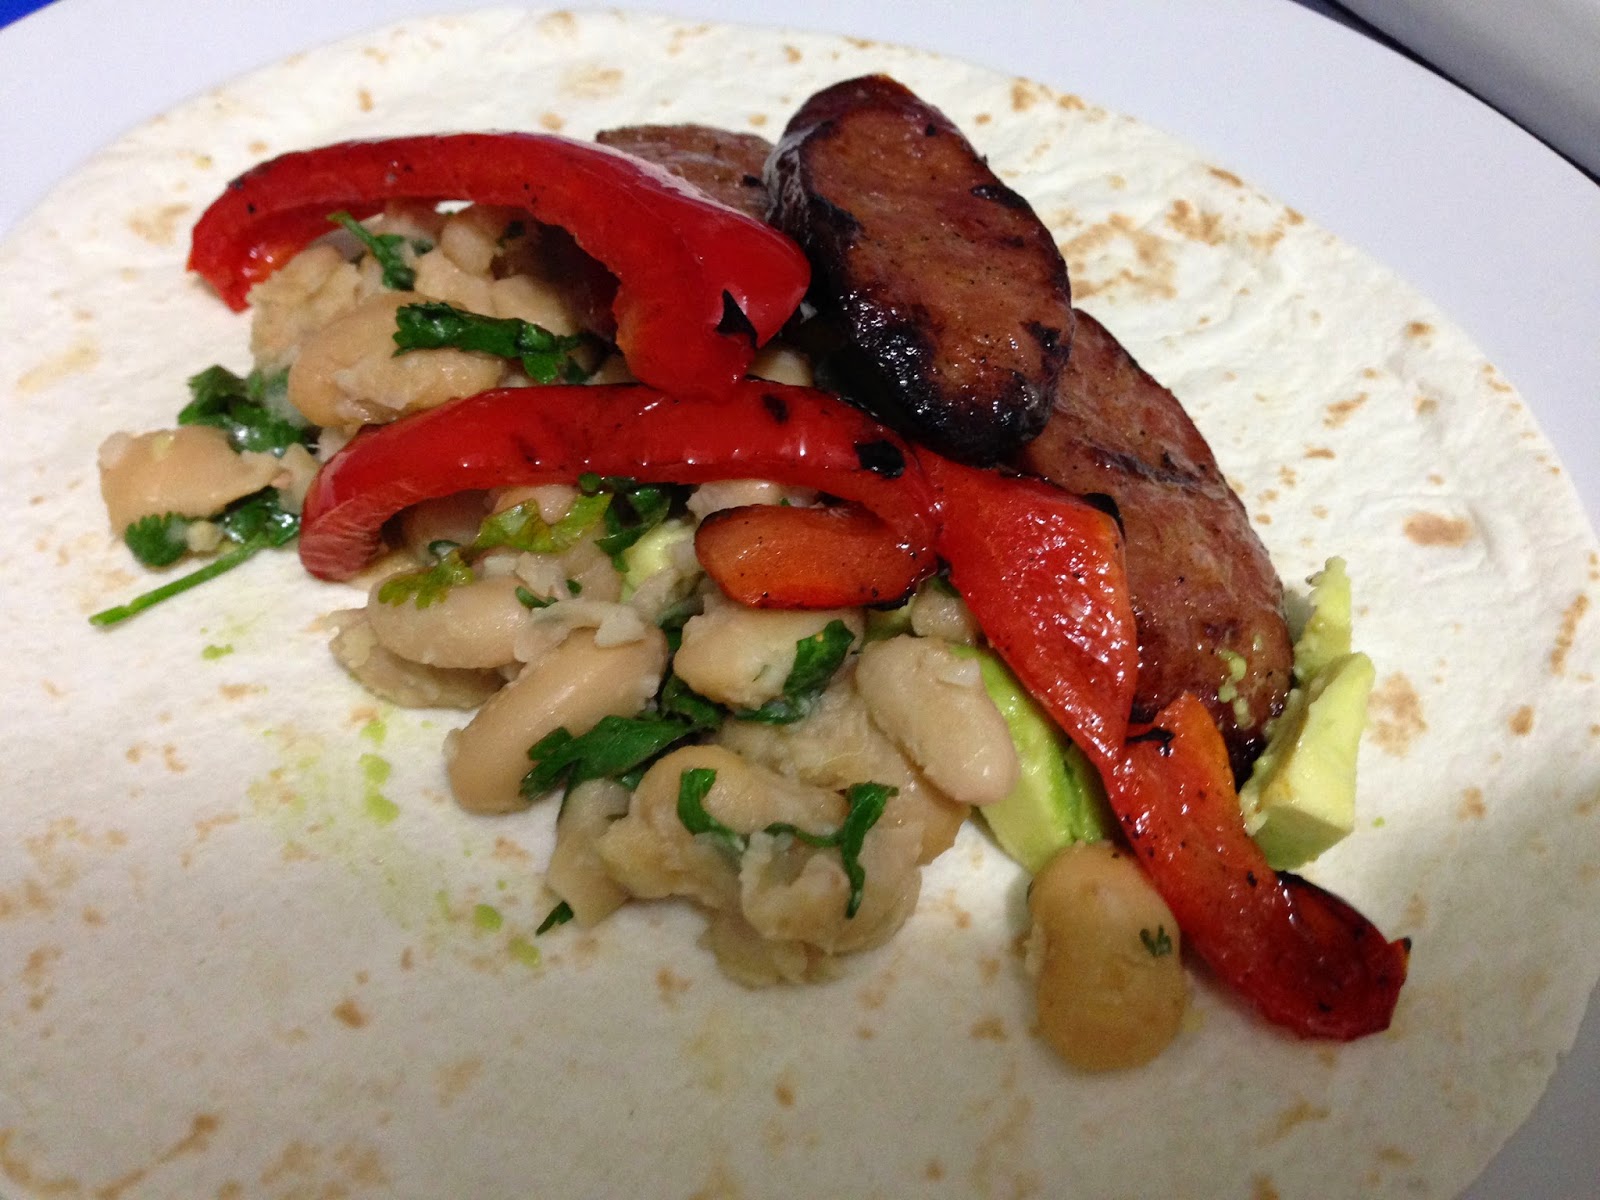
I decided to try something new and make it all from scratch following a Donna Hay recipe from The New Classics. I picked this book off my bookshelf and decided I was going to pick something from it to make and I literally opened the book on the page for Chorizo and Capsicum Taco's with home made refried beans and I was sold (the pulled pork taco's also look amazing but I just don't have 4 hours midweek to make pulled pork). This is such a lovely book with beautiful photo's taken from her magazines and WOW sums it up. I want to eat everything in it. Seriously! You turn over every page and there is something that makes your mouth water.

This taco recipe was super easy too. I put most of it on the BBQ.
Yes ladies and gentlemen you read that right.
Girl can BBQ.
chorizo and capsicum tacos

chorizo and capsicum tacos

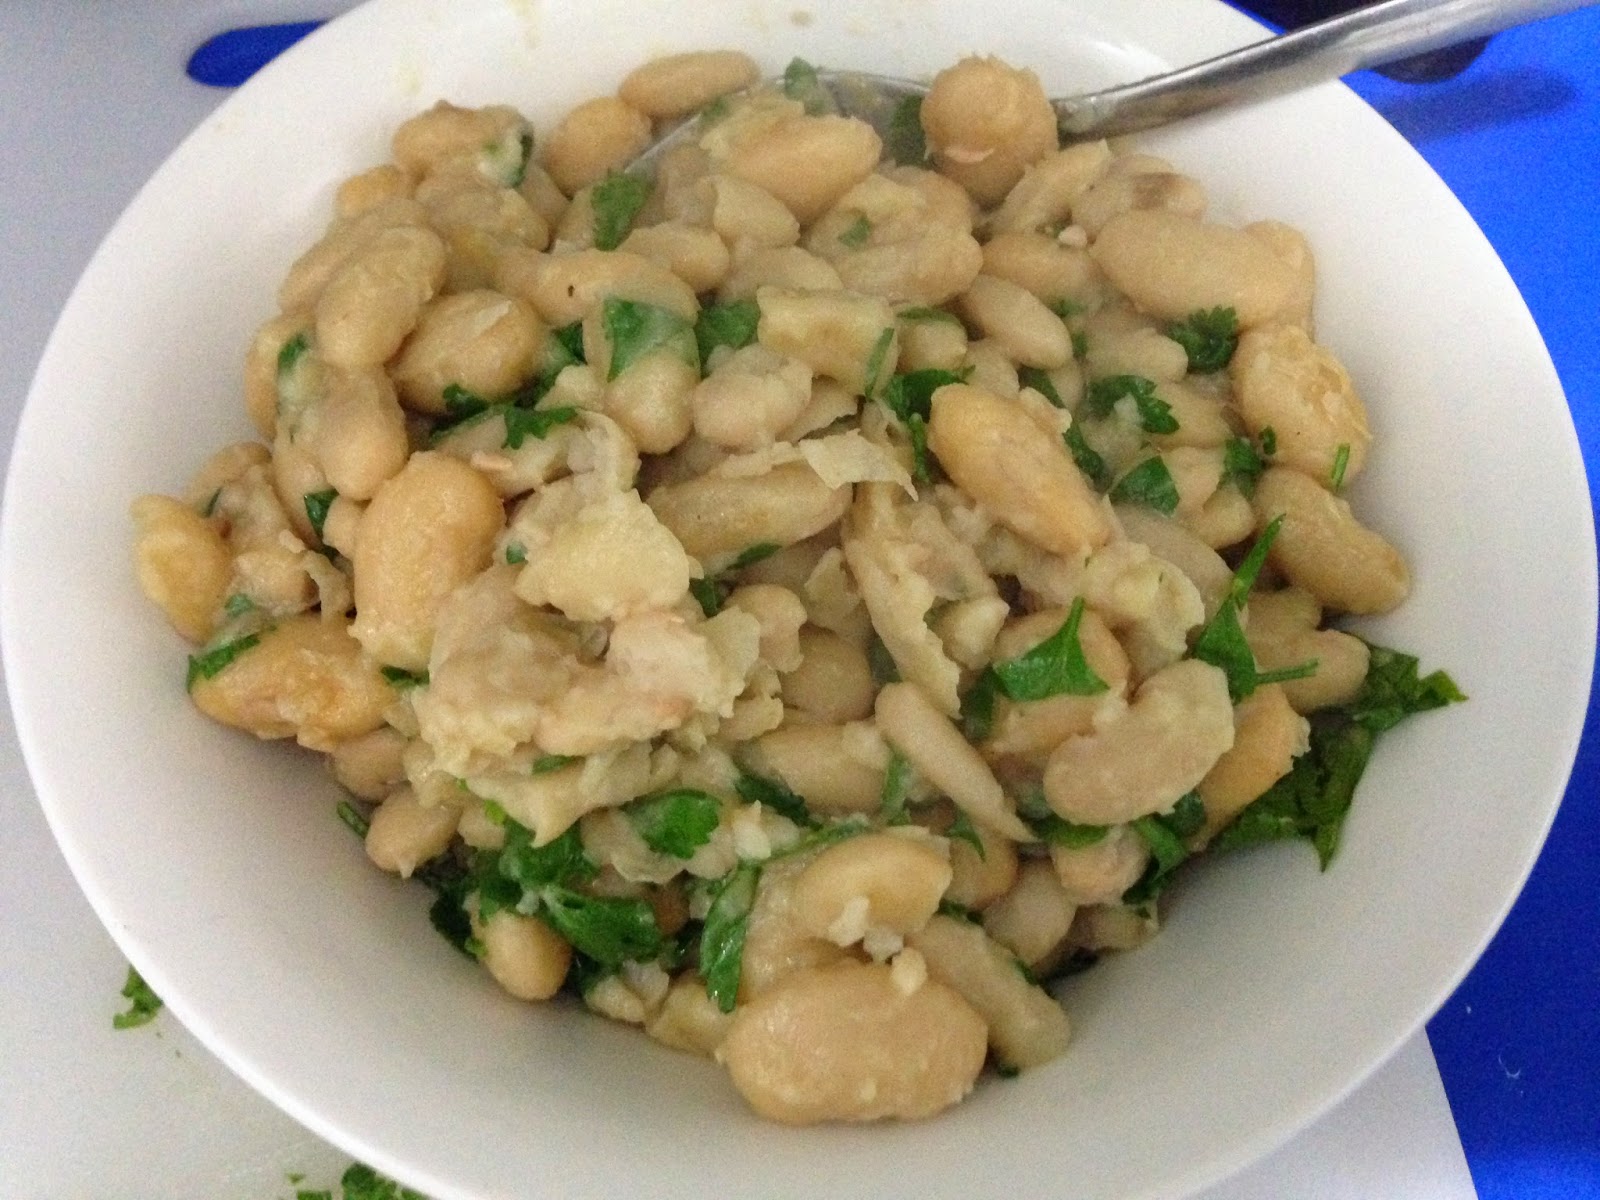
Then the refried beans were a quick stir-fry on the stove. I used canned butter beans instead of black-eyes beans soaked over night because I'm just not that organised to remember to soak beans and also I couldn't find them in the supermarket.
homemade refried beans

This is such a great summer BBQ recipe or quick midweek dinner. Would be great with an ice cold beer to go with it. This will defiantly be coming out again when summer is here to stay.

chorizo and capsicum tacos

Donna Hay's chorizo and capsicum tacos.

serves 3
(recipe adapted from 'The New Classics' by Donna Hay')

2 red capsicums, sliced
2 dried chorizo sausages, sliced
1 garlic clove, thinly sliced
2 tbsp extra virgin olive oil
1 tbsp red wine vinegar
lemon wedges, to serve
6 tortilla's
1 x quantity of refried beans (recipe below)

- Preheat BBQ on high.

- In a bowl place the garlic, oil and vinegar. Allow to sit while you cook the capsicum and chorizo.

- Chargrill the capsicum and chorizo for about 5 min or until cooked through and gnarly on the edges.

- Place the chargrilled capsicum and chorizo in the bowl with the garlic and toss to combine.

- Serve with warmed tortillas and refried beans (recipe below).

donna hay's refried beans from The New Classics Cookbook.

(recipe adapted)

2 cans of butter beans
2 tbsp extra virgin olive oil
2 garlic cloves, crushed
1 tbsp lemon juice
1/4 cup flat leaf parsley, chopped 
(I added a little fresh coriander leaves as well but only because i already had it in the fridge)
sea salt flakes (to taste)

- Drain and rinse the beans.

- Heat oil in a frying pan, add the beans and garlic and cook on high for 3-4 minutes. Squash some of the beans with the back of a fork or wooden spoon.

- Remove from the heat. Add the lemon juice, herbs and salt. Serve as an accompaniment with your favourite taco fillings.

Monday, 15 September 2014

Fairy Cakes (turned Spiderman) from How to be a Domestic Goddess by Nigella Lawson.

If you don't already know I have two nephews who are typical boy boys. Super hero's and guns and lego and cars. You name it and they love all that sort of stuff! The youngest turns 5 next week but had his birthday party on Saturday and if you follow me on instagram you would have already seen that the request this year was Spiderman cupcakes. Last year it was teenage mutant ninja turtles. Having already done it last year I thought I was completely prepared and knew exactly what I was doing and I wouldn't be under pressure at all. WRONG! I would make absolutely no money if I did this professionally and not just for family love. They took me 5 hours. By the end of them I didn't want to see another spiderweb on a red or blue cupcake for a very long time. It was a relief to deliver them to Wizzy World at 3:30pm and know that they will be demolished by tiny mouths any moment.

Fairy Cakes from How to be a Domestic Goddess

The recipe I used for the cupcakes is Fairy cakes from Nigella Lawson's How to be a Domestic Goddess (I doubles it in the photo above) and its super easy if you don't have a free-standing mixer and are sick of wiping the walls of butter and sugar from using a hand held mixer. You put all the ingredients in a food processor and wizz until they are combined. Add some milk to loosen the batter up a little and there you have it! Cupcakes that aren't only easy but taste awesome too.

I used the Buttercream icing recipe from Donna Hay Modern Classics 2 because Nigella uses packet royal icing to ice her's and I had strict instructions that these needed to look like spiderman.

Fairy Cakes from How to be a Domestic Goddess

I added cocoa to both the cake batter and buttercream to make a chocolate version. The vanilla are still best though :)
Fairy Cakes from How to be a Domestic Goddess


After they were cooled I iced the cupcakes, making them as round and even on top as possible with the buttercream then placed them in the freezer for 5 minute to make the icing set hard.

I then used Ready to Roll icing called Fondarific Buttercream Fondant I got from Cake Decorating Central. This is one of the easiest ready to roll icing I've used so if you're a first timer I high recommend this brand of icing. Use a little cornflour to stop it sticking to your bench and rolling pin then roll it out about 2mm thick. Using a round cutter about 7.5cm in diameter (or another size that fits the top of your cupcake depending on how big you made them) cut out circles then place them over the cupcakes and using your finger tips gentle fold them around the edges. I used black colour to paint on the webs and then white ready to roll icing cut out for the eyes.

**This is where I would cue a video if i was more organised and tech-savvy**

I'm sorry if that completely confused you. This is the clip I used for the Teenage Mutant Ninja Turtle cupcakes I made last year which might give you a better idea of how to roll and place the icing on the cupcakes.
spider-man cupcakes

These cupcakes are soooo good without the coloured icing. I personally peel the icing off when I get cake or cupcakes with the Ready to Roll stuff on there and just eat the buttercream and cake underneath. So if you want to give this a go without the spiderman look I've listed the recipes I used below.

Have a go and let me know what you think!

Fairy Cakes from Nigella Lawson's How to be a Domestic Goddess.

makes 12 fairy cakes

125g unsalted butter, softened
125g caster sugar
2 large eggs
125g self raising flour
1/2 tsp vanilla extract
2-3 tbsp milk

1x Buttercream icing (recipe below)

- Place all ingredients into a food processor except the milk and WIZZ it all together until everythign is combined really well.

- With the motor still running add the milk and then pulse until you get a smooth batter. 

- Divide the batter between 12 lined cupcake moulds. It looks like it wont make 12 but trust me it does. Each patty case only uses roughly a heaped tablespoon.

- Bake for 15-20 minutes until lightly golden on top and a skewer comes out clean from the middle.

- Allow to cool in the tin for about 10 minutes then take the cakes out onto a cooling rack.

- Ice cupcakes with Buttercream when cooled.

Note: If you wanted to make a chocolate version add 2 tbsp of sifted cocoa powder in with all the ingredients and an extra tbsp of milk.

Buttercream Icing from Donna Hay Classics 2.

250g unsalted butter
2 cups of icing mixture, sifted
1 tsp vanilla extract

- Whip butter and vanilla until pale and creamy using a hand held mixer or if you have guns beat until pale by hand.

- Add the icing mixture and whip until well combined and still light and creamy.

- Ice your cake or fairy cakes then refrigerate to set.

Note: If you wanted to make a chocolate version add 1 heaped tablespoon of sifted cocoa to the icing mixture.

Thursday, 11 September 2014

Nigella Lawson's Coq au Riesling from Nigella Express.

I love simple every day ingredients coming together and making that delicious dinner that reminds you of home. Who can go wrong with chicken, white wine, bacon, garlic and mushrooms?? Ok maybe a vegetarian but they are seriously good together. Add buttered pasta and holey moley look at what you have just created for dinner.

Last night I made Nigella Lawson's Coq au Riesling from her cookbook Nigella Express. This book does make you think from the name of the book that its all express dinners and in some ways it is. There are recipes that take 10 minutes to prepare from start to finish and then some like the one I cooked last night which are super quick to start then all you do is leave it for 30 minutes cooking, while if you're like me go and have a shower after a sticky day at work then when you get out and get in your jimmy-jams your dinner is nearly ready. I'm sure I say this all the time but I love meals like that!

I have this problem though where I like to keep adding ingredients when I cook by myself... especially if I'm the only one eating it like tonight (I made Nigella's recipe yesterday). I am writing this and I feel like I could kill the next person to walk in the apartment with my garlic breath. I even tried to eat something sweet after to cancel it out and all these lovely shortbread biscuits tasted like were garlic shortbread... yuk! Getting back on track... I struggle with recipes that don't require many ingredients and I feel I keep having to say to myself 'trust the recipe Dani... trust the recipe!' because otherwise I'll try and add an onion to everything or find some dried herbs in the cupboard or if I'm feeling really adventurous I'll find some jarred goodies in the fridge and sometimes it works but on those rare occasions (like tonight)... I fail. But it just shows that we are all human and we can all learn from mistakes.... mine tonight is no raw garlic chunks in carrot salad. On the plus side - if a vampire tries to get me tonight I'm safe! (or is that onions?)

Anyway this recipe I made last night was so good and I trusted what Nigella told me to do and didn't add anything extra. I did however not have garlic oil but I've seen on youtube clips that if you add whole cloves of garlic to oil and heat the oil it makes a kind of instant garlic oil. I left the whole garlic cloves in there and then fished them out and gave them to Tristan when I served up. And used a pinch of dried dill to garnish instead of fresh. It was so much yummier than my disaster of a dinner tonight. It was chickeny and winey and smokey from the bacon and you all know how much I love pasta! This weeks shape was casarecce which is like curled slightly twisted tubes. I loved them. One of my favourite shapes yet!

Try this recipe below. It's super easy, simple and very tasty! An all round winner in my books :) And trust the recipe!!!! TRUST THE RECIPE!

nigella lawson coq au riesling

Nigella Lawson's Coq au Riesling from Nigella Express.

serves 3
(Original recipe here. The recipe below has been adapted slightly to feed 2 people plus one lunch)

1 tbsp extra virgin olive oil
2 garlic cloves, peeled but left whole
100g streaky bacon, diced
1 leek, finely sliced
4 boneless chicken thighs, chopped into large-ish chunks
2 small bay leaves
250g button mushrooms, roughly torn into pieces
500mL dry white wine
salt and pepper to taste
400g casarecce pasta (or any type of pasta you like)

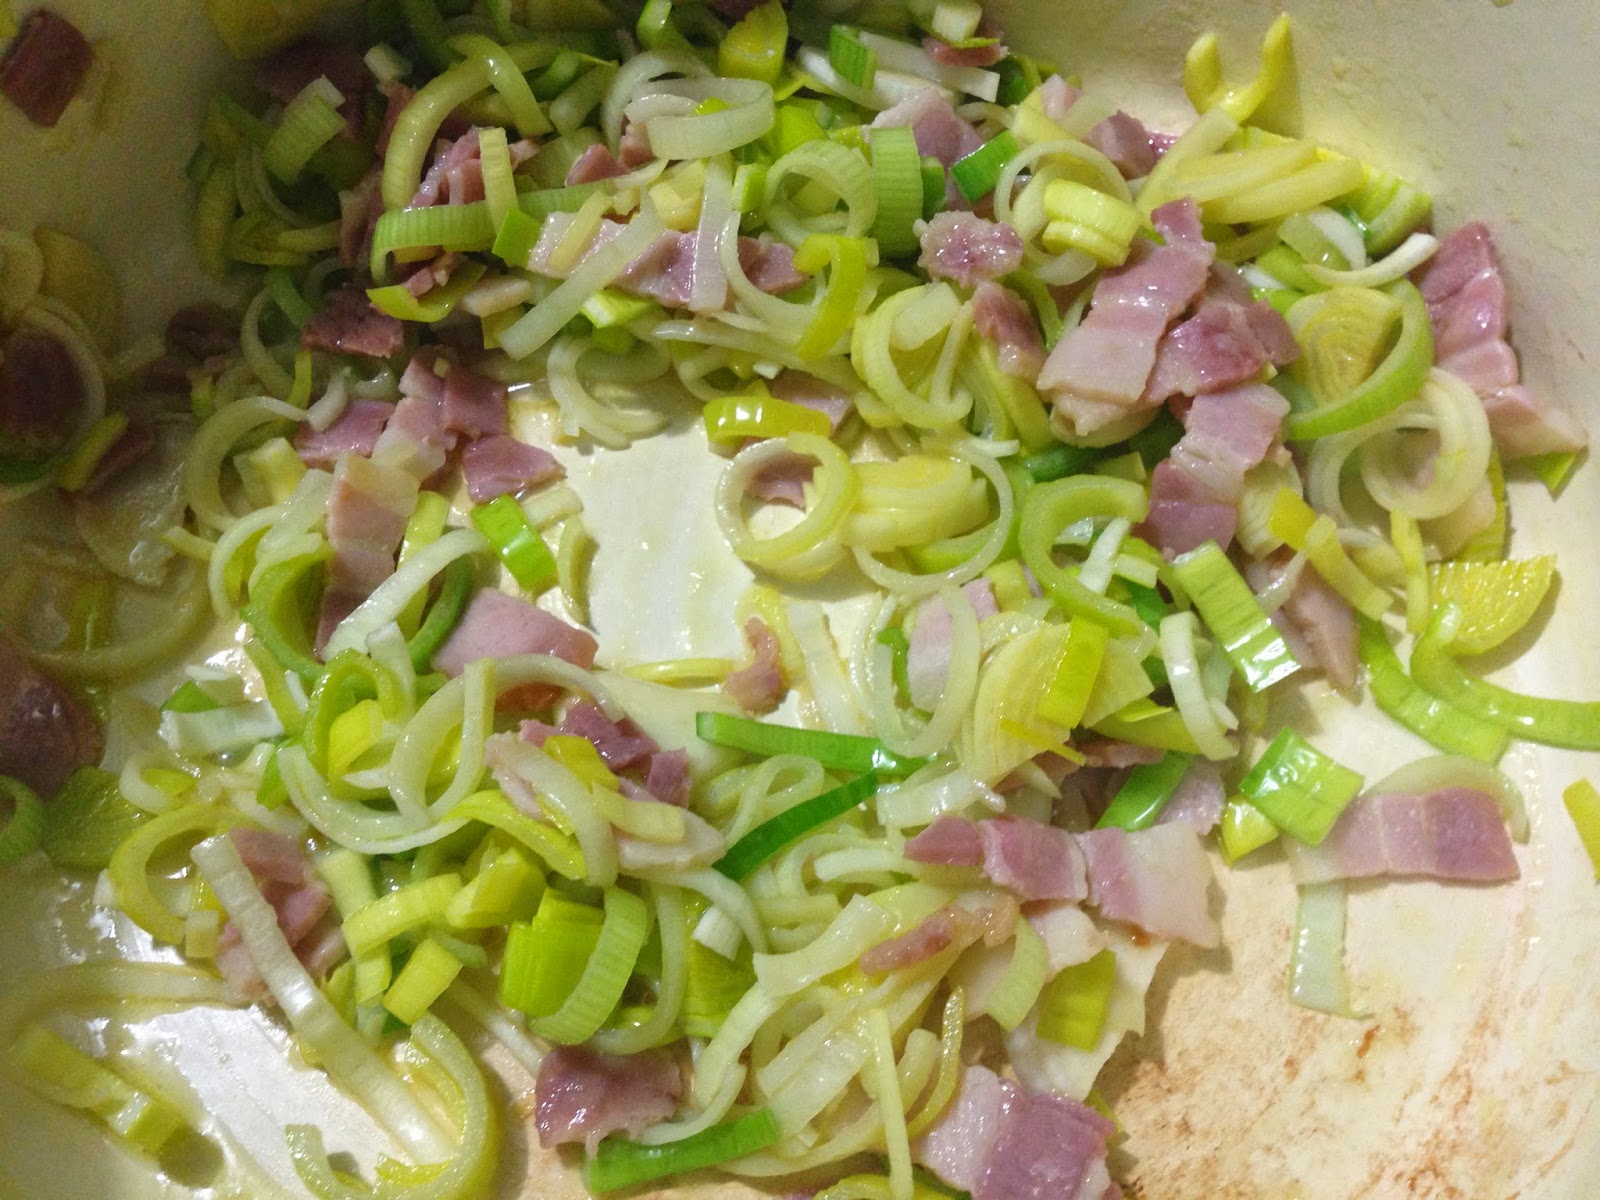
- Heat the oil in a casserole pot and add garlic cloves and bacon. Fry for 3-4 minutes on a medium heat.

- Add the leek to the pan and cook for 1 minute to soften.

- Add chicken pieces, bay leaves and mushrooms to the pan. Mix everything through then add your white wine.

- Bring to a boil, reduce to a simmer then cook for 30 minutes covered.

- Cook pasta according to packet instructions or until al dente. Put a knob of butter over the piping hot pasta and mix through.

- Taste the chicken and sauce then season with salt and pepper.

- Serve the Coq au Riesling on top of the buttered pasta and then sprinkle a pinch of dried dill (fresh would be better but I only had dried) on top.


nigella lawson coq au riesling

Tuesday, 9 September 2014

Jamie Oliver's Calzone recipe from Delicious. magazine - September 2014 - Issue 141.

This weeks meal planning took me a while. I thought it was all done and dusted and was pretty impressed with myself then looked at what I'd planned to make this week and to be honest... none of recipes felt like a little challenge or something new. They were the things I would make before I started this blog, recipes I would make with no recipe to follow and get to the end of dinner and be a little disappointed at myself for not branching out. I had also chosen books from my shelf that I had cooked out of and blogged from already so I wasn't showing you a new sneak peek into my cookbook obsession. SCRAP IT! I thought and started again by choosing books/magazines I hadn't cooked from or blogged about yet and chose a recipe out of each to make this week.

It started off with Jamie Oliver's Calzones from the latest Delicious. magazine this month (September 2014 - Issue 141). I wanted a little challenge and this is exactly what I felt like. I adapted the recipe slightly because our local supermarket isn't very good with ingredients that are a little out of the ordinary or specialised.
pizza dough

I'll be honest. I was a little hesitant about making this but thought that if it fails completely it's only Tristan and myself who I'm feeding and we can always have pasta with cheese on if its terrible. So on that note, I had nothing to loose.
pizza dough

I started with the dough and quartered the recipe that Jamie gives in the magazine. For the Calzone recipe you are meant to half the recipe but then that makes six calzones. Six is a little much for two of us no matter how greedy we are sometimes so I halved it again, quartering the original recipe. I had to scale out 2g of dried yeast... that was a little tricky since my scales are very tempremental. I had planned on seeing how many teaspoons 7g was then quartering it by eye but went with the rough 2g measurement instead... and it worked! YAY!
kneading pizza dough

I kneading the dough on my lovely blue bench top for 5 minutes then let it rest. The recipe says to rest it for 1 hour... I didn't have one hour. My stomach was eating itself even with just the thought home made Calzones. This step is good for tuck-shop lady arms.
calzone filling

For the filling I boiled two small potatoes, pan-fried some mushrooms, roughly chopped some baby rocket and then quartered bocconcini balls. The original recipe says use Taleggio cheese which is a strong soft italian cheese. When I worked in the restaurant it was on the cheese platter and it was a stinky one! I have nothing against smelly cheeses and I would have probably used Talleggio but like I've said above, our supermarket stocks a large brand variety of basics. And I have an obsession with bocconcini at the moment... mmm those soft little round milk stringy balls of cheese...
pizza base

After I got over my day dreaming of cheese, cheese and more cheese. I divided the dough into three, rolled the out to roughly about 5mm thick. Divided the filling between the three and folded one side over sealing the edges, pinching the sides over each other. Scored the tops and baked them in a very hot oven for 20 minutes. YUM YUM YUM.
vegetarian calzone

(Ok I'll admit something... I was meant to add a spoonful of creme fraise or sour cream to the filling but I got so excited that they were coming together and it was working and I wasn't pulling my hair out in frustration that I completely forgot to add it. But can confirm they are delicious with or without the cream fraise... I might add a couple of cherry tomatoes halved next time to make it a little more juicy. Who knows... maybe if I'd added the creme fraise I wouldn't be thinking nest time to add cherry tomatoes?!?)
calzone

Anyway... the verdict... it was scrumptious and I was pleased that I had gone outside my boundaries and made Calzones on a week night and not saved them for a weekend when I plan to make a more special meal and everything goes down the drain because something crops up. If your organised enough (not like me) you can even make the pizza dough the night before and leave it in the fridge so all you have to do it roll it out, fill them and bake them. How easy is that?!!

jamie oliver's calzone

Let me know what you think... there are a few steps in here that are hard to explain... would a little video help?? I'd love to hear your thoughts!
calzone

Click here for a different Calzone recipe by Jamie Oliver or make my version below :)

Calzone from Delicious. magazine September 2014 issue by Jamie Oliver.

Serves 2 hungry people or 3 with a side salad.
(recipe adapted)

Pizza Dough - 

250g 00 Flour (or strong white flour)
2g dried instand yeast (or 1/4 of a 7g sachet)
1 tsp caster sugar
15mL olive oil

Filling -

180g potatoes, halved
1 tsp butter
1 tbsp olive oil
2 thyme sprigs, leaves removed
200g button mushrooms
1 garlic clove, crushed
pinch of chilli flakes
1 tbsp creme fraiche or sour cream
150g bocconcini balls, quartered
1/2 cup baby rocket, roughly chopped

**Pre-heat your oven to 220 C or 420 F. **

Start by making the pizza dough: 
- Sift the flour and a pinch of salt into a large bowl or onto your bench. Make a well in the centre.

- In a jug mix 160mL of warm water, dried yeast, caster sugar and olive oil together and let sit for a couple of minutes. (You are waking the yeast up in the step so it can make your dough rise later)

- Using a fork, pour the liquid into the well in the flour and start working it together gradually from the centre until all the flour has been incorporated. Don't worry if it looks like a shaggy mess at the moment. Turn it out onto your bench if you have used a bowl and start kneading it with the heel of your hand on a floured surface.

- The amount of extra flour you will need to add will depend on the weather and the type of flour you have used. You want an almost tacky dough. Not so sticky that it's sticking to your hands every time you knead it but you defiantly don't want it too dry. The more you knead it, the better it will come together. If you're unsure about adding too much flour start by adding a little at a time as you work the dough. Knead it for 5-10 minutes or until smooth and stretchy.

- Place the dough in a floured bowl and cover with a damp tea towel somewhere warm for 1 hour or until it's doubled in size. While your dough is resting, start your filling.

For the filling:
- Boil your potatoes for 12-14 minutes or until cooked through, drain and then slice into 1.5cm pieces. Allow to cook a little.

- Pan fry your mushrooms with the butter, olive oil and thyme until all the liquid has been absorbed and they start to colour. Add the garlic and chilli flakes and cook for another minute. Allow to cool a little.

- In a bowl add the bocconcini, baby rocket, potatoes, mushrooms and creme fraiche (or sour cream) and mix together.

Constructing your Calzone:
- Knock back your dough by punching it down in the bowl then roughly knead it for a minute or so. (It's at this point you can cling wrap your dough and refrigerate it for 24 hours ready to use straight from the fridge). Divide it into 3 pieces.

- Roll out each piece of dough on a lightly floured surface to about 5mm thick and circle in diameter as possible.

- Divide the filling up between the three rolled out pieces of dough.

- Fold one side over and bring the edge to meet the other edge. Seal it by pinching and turning the edges over on each other then giving the final end a good pinch. Do the same to all of them.

- Score the top then place in the oven for 20 minutes. I had to rotate my trays so get even baking so make sure you keep an eye on them when your oven is up this high.

Monday, 8 September 2014

donna hay's ANZAC Cookies from Classic 2.

The reason I started baking was pure gluttony. I wanted a sweet treat warm from the oven and I wasn't going to get it unless I made it myself. I used to bake alot more at home when I lived at home with my parents. It could have been because there was a dishwasher at home, I was used to the oven, mum has a stand mixer or maybe it was just that there were more mouths to feed and I didn't feel so guilty knowing I was going to eat the entire batch or cookies or whatever delicious morsel I was making that time around.

I still enjoy baking but I have to admit that I'm impatient now and never think earlier enough if I want something sweet then, it's always a little last minute. Also if a recipe then starts with... 'stand mixer' I quickly turn the page cursing to myself or if it then says let the batter stand I also turn the page cursing at myself wishing I was more organised.

I look for easy melt and mix recipe or ones that can be done in a food processor. I have one of them :)

My gluttony started with craving something a little different. Something I hadn't made before so I thought of opening one of my most trusty cake books 'Cake' by Alison Thompson and got all the ingredients out for Ginger nut biscuits except that I had no ground ginger. Yes I could have gone to the store and bought some but then it also means I could go and buy a packet of my all time favourites Arrnotts Mint Slice so going to the shop was out of the question. Next option was shortbread. I love a good shortbread with the caster sugar dusted on the outside. YUM. But the couple of recipes I found all required rice flour (ok I didn't look very hard either because I'm sure I could have found a shortbread recipe without rice flour somewhere in my recipe collection) but I also had the golden syrup out.

Melt and mix... melt and mix... Come on think girl!

ANZAC cookies! of course! I had all the ingredients in my pantry and it was a melt and mix recipe. Why hadn't I thought of this earlier??

ANZAC biscuits

ANZAC biscuits are an Australian Classic. Mothers and wives used to make them and send them to the troops at war. The ingredients used withstand long periods of time so they were perfect to send to their loved ones.

Most ANZAC cookies are a stock standard recipe of golden syrup, butter, coconut, flour, sugar, rolled oats and bi-carb. I went with a recipe from Donna Hay's Classics 2 (it was already out from looking up shortbread). All you do it place the flour, sugar, coconut and rolled oats in a bowl. Melt the butter and golden syrup together. Add the bi-carb and some water together at the last minute then add that to the hot butter mixture. Everything bubbles up then pour it over the dry goodies in your bowl. So Easy!!

ANZAC biscuits

ANZAC biscuits

ANZAC biscuits

And so delicious might I say. Chewy and golden with the golden syrup giving it hints of caramel. Goes amazing with a cuppa!

Find the recipe I used here on Donna Hay's website.

ANZAC biscuits

Sunday, 7 September 2014

Nigella Lawson's Double Potato and Halloumi Bake from Nigella Bites cookbook.

So I've been a little bit bad on my posting this week. I started so well and I feel I've gone down hill which is dissapointing. I am hoping to be better this week and try and post more frequently.

I've just got home from fathers day breakfast. HAPPY FATHER'S DAY DAD! Hope you had a good breakfast, I enjoyed it! Mum and Tristan cooked scrambled eggs, smoked salmon, grilled tomatoes, bacon, sourdough and then fruit toast to finish. It was so delicious! I ate too many chip sangers last night for dinner... terribly unhealthy dinner but quite tasty so it was nice to have a big breakfast.

Ok back to what I made on Thursday night.... eeek it's Sunday and I haven't posted what I made on Thursday for dinner yet. I'm terrible... Muriel.

Nigella Lawson's Double Potato and Halloumi Bake

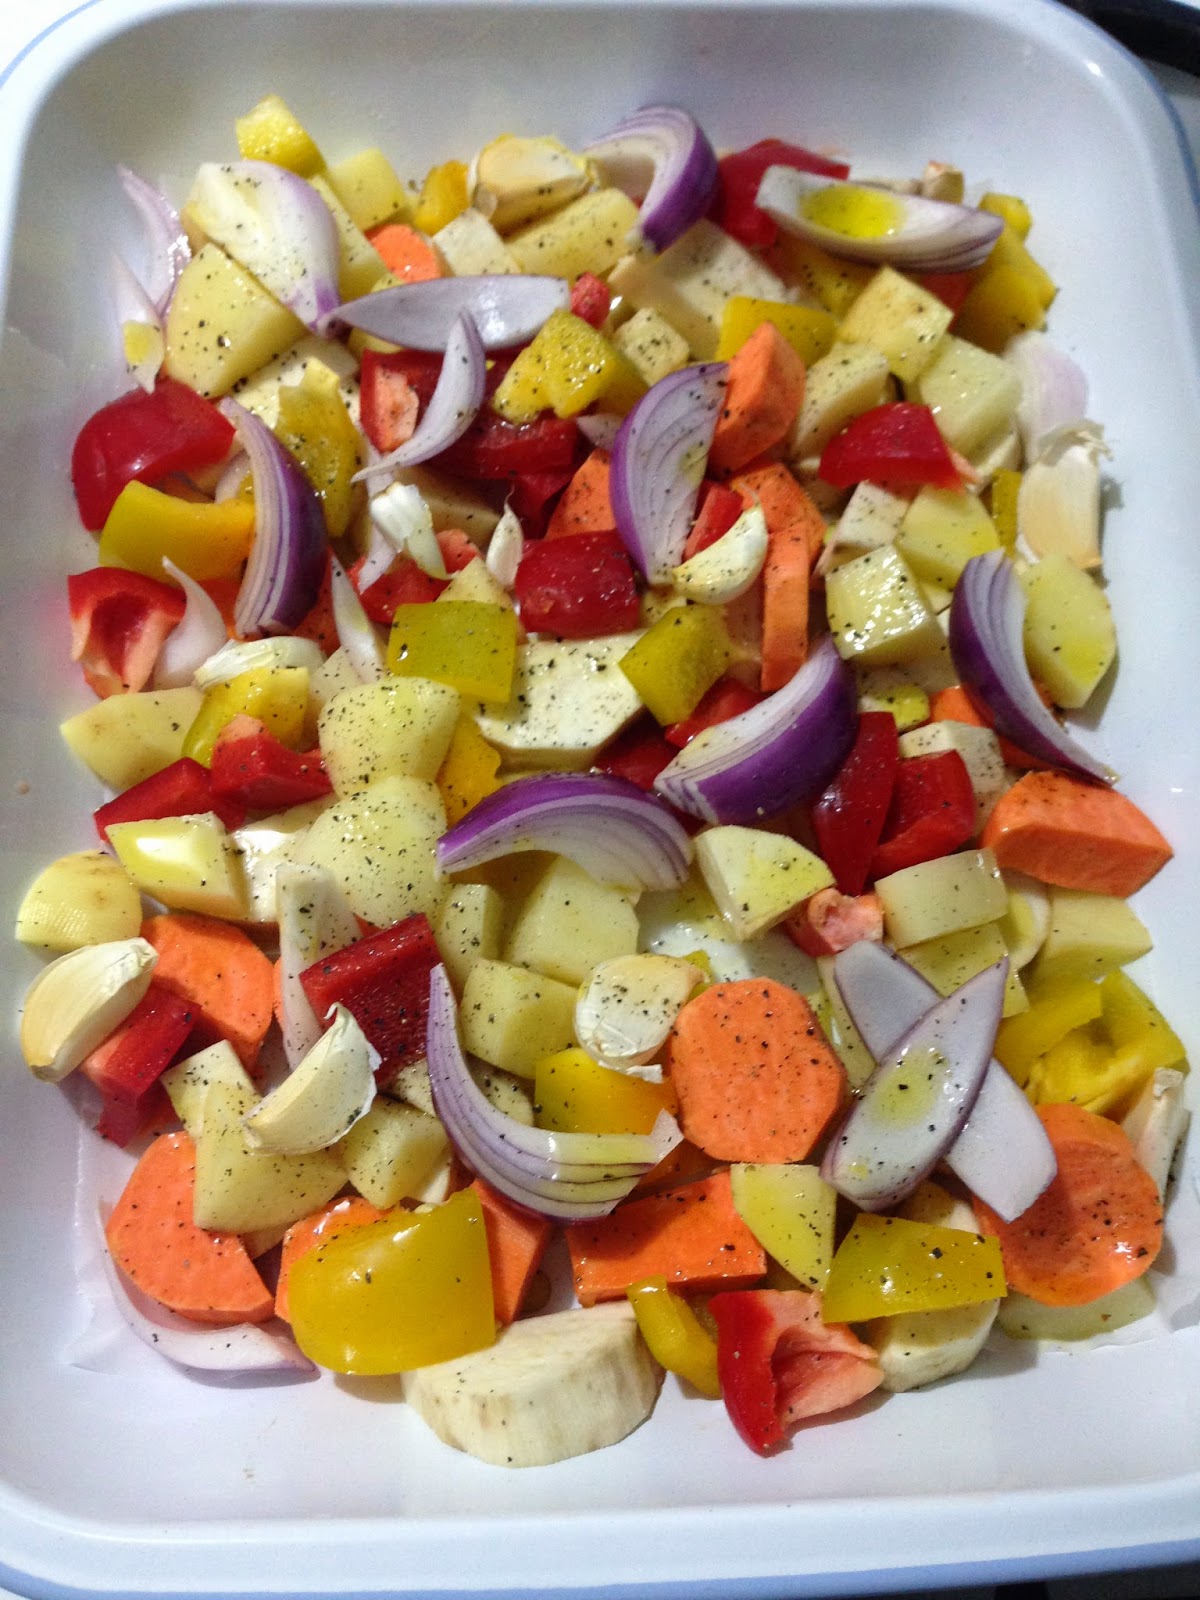
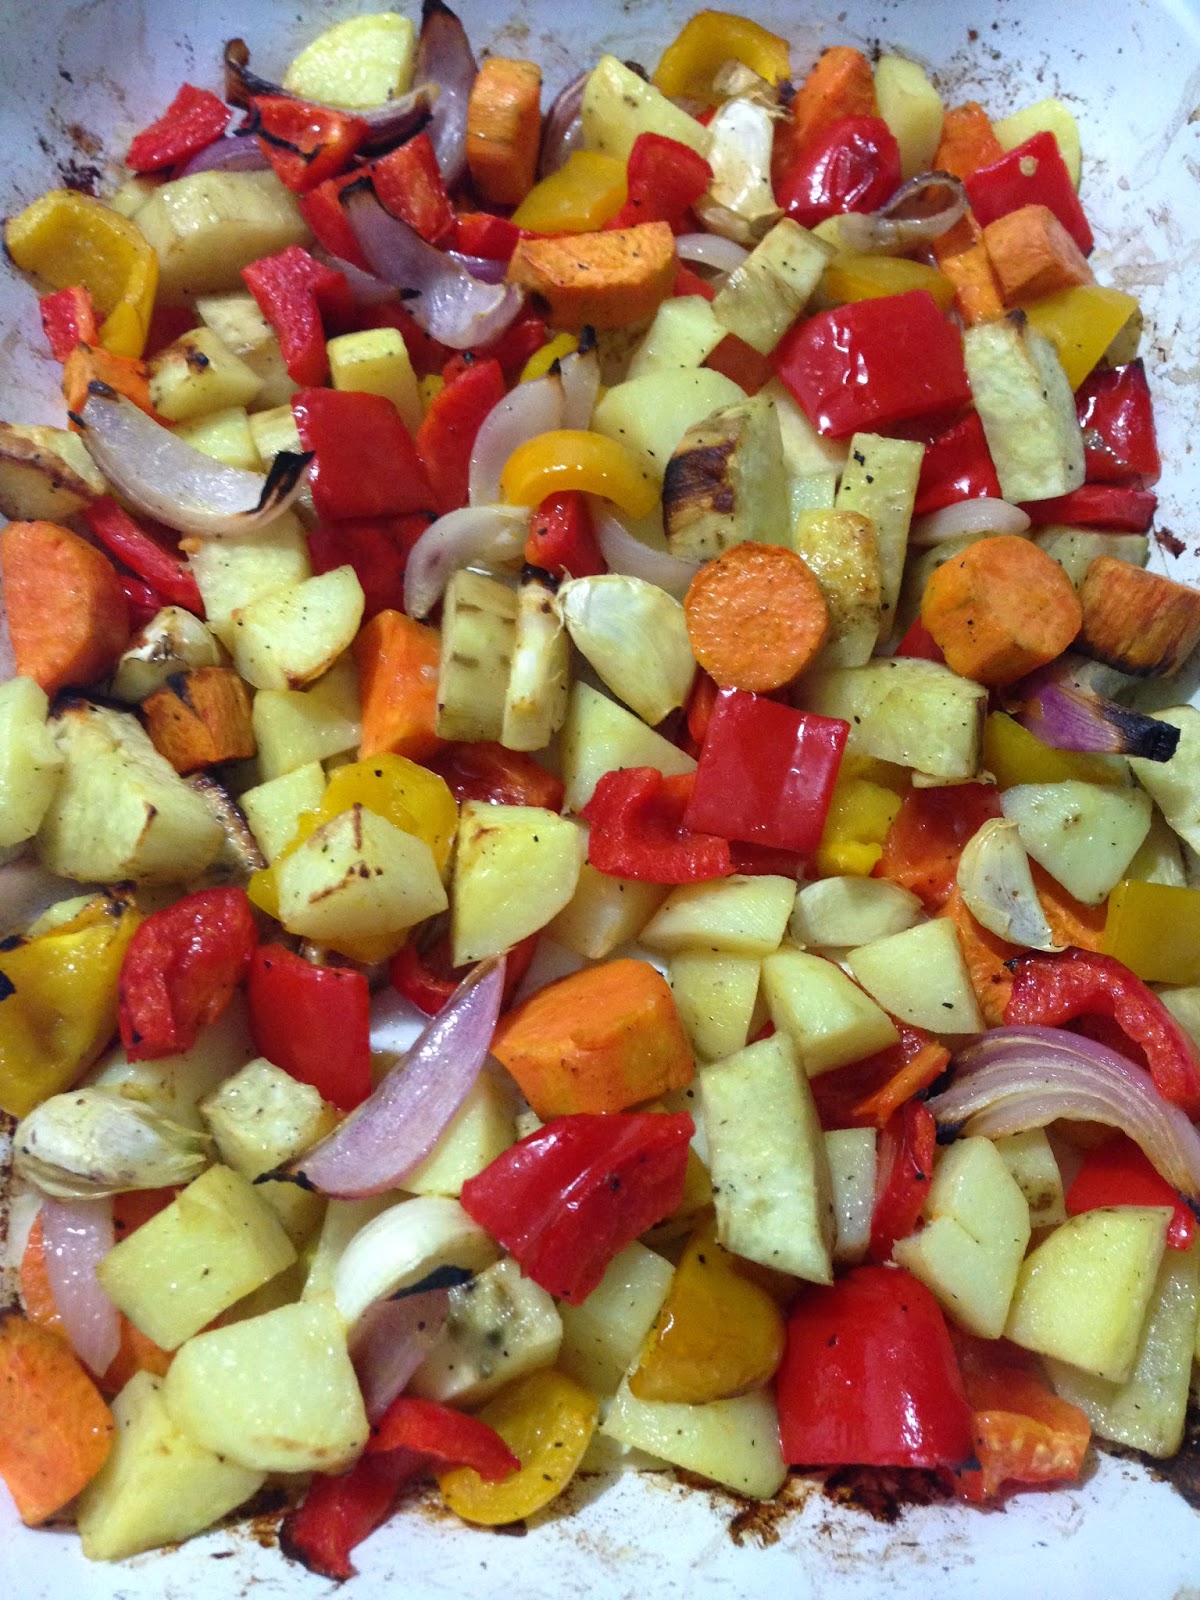
I decided that because I'd mastered the chicken tray back last week that it was a new tray bake to try and I guess because Nigella Lawson's worked so well last time I'd try another tray bake of hers. I made the Double Potato and Halloumi Bake from Nigella Bites. Who doesn't love cheese? This was a delicious mixed potato bake with all the little extras that roast veggies should always have (garlic cloves and onions) with sweet capsicum throughout it then covered in burnished thin slices of squeaky halloumi cheese. YUM! We had it with steak that Tristan cooked on the BBQ. One day I'll cook a steak on the BBQ but I'm a little hopeless on a BBQ... I always end up with either well done steak with charcoal bits or a steak that is still moo-ing on my plate.

Nigella Lawson's Double Potato and Halloumi Bake

This dinner is another great dish to bung everything in an oven tray, shove it in the oven, go have a shower or potter around before dinner then just add the cheese for the last 10 minutes of cooking and  serve. It would be great by itself as a vegetarian main or as a side like we had it. I even had it cold for lunch the next day. Just add a little splash of balsamic vinegar to it when it's cold and you have an amazing roast vegetable salad. The halloumi doesn't do so well the next day so eat all of it straight away (I'm sure that won't be hard) and then add some feta the next day to turn it into a kick-ass salad!

Nigella Lawson's Double Potato and Halloumi Bake

Such a pretty colourful dinner!

The recipe says to use sweet potato and normal baking potatoes. When we were at the supermarket I found a  red sweet potato. I had no idea what it was like but I did expect it to be red on the inside but it was white and oxidised very quickly and turned a very unappetising splotchy brown colour. It tasted great when cooked, sort of in between a sweet potato and a normal baking potato. This is also a great recipe to double if your having friends over and just divide everything between two baking trays and there is no exact amount of any ingredient. If you want just sweet potatoes then just had sweet potatoes, if you don't like sweet potatoes this can be made with normal baking potatoes or carrots or pumpkin!? Ahhh the vegetable combinations are overwhelming!! Just bake it all until the veggies are cooked through and top with cheese... mmm I love halloumi.

Nigella Lawson's Double Potato and Halloumi Bake

Nigella Lawson's Double Potato and Halloumi Bake from Nigella Bites cookbook.

serves 2-3
(recipe adapted to suit to amount of potatoes I had at home)

3 medium sized baking potatoes
1 medium sweet potato
1 medium red sweet potato
1 red onion
6 cloves of garlic
1 red capsicum
1/2 yellow capsicum
4 tbsp extra virgin olive oil
 black pepper
180g halloumi cheese, thinly sliced

- Preheat oven to 200 C or 400 F.

- Cut the baking potatoes into 2cm pieces.

- Cut both sweet potatoes into 4cm pieces, they don't take as long to bake as normal potatoes.

- Peel and cut red onion into 8 wedges.

- De-seed and roughly cut both capsicums into 2cm pieces.

- Throw everything into a baking tray with the garlic gloves and extra virgin olive oil and give a good toss together. Make sure everything is spread out on a single layer and you haven't over crowded the tray. Split into two trays if you need to.

- Bake for 45 minutes (or until the potatoes are soft/cooked through). Place the halloumi over the top and bake for a further 15 minutes or put under a grill until melted and golden.

- Serve by itself or as a side dish. (don't forget it makes an amazing roast veggie salad the next day with a splash of balsamic vinegar!)


Wednesday, 3 September 2014

Jamie Oliver's Trapani-Style Rigatoni from 30 minute Meals.

This dish I cooked for dinner should have been called 'Trapaneeeeasy-style Rigatoni'...

hehe get it!?

Ok I'm lame but maybe it's a little funny.... just a little?

If you didn't get my terrible joke, this was a very easy dinner to make which suited a grocery shop night perfectly. It meant we saved $50 on takeaway, it was super healthy and tasted way better than anything we could have ordered or ready made meal we could have picked up from the supermarket.

Earlier this week I made Jamie Oliver's Trapani-Style Rigatoni from 30 minute Meals. Jamie Oliver's 30 minute Meals cookbook has huge, three course meals in it which feed a family of 4 -6... not a small team of two. So instead of making the whole kit and caboodle which according to Jamie only takes 30 Minutes... I have my suspicions let me tell you. I think you'd have to be a crazy chicken to achieve it in 30 minutes. I only make one component of the meal which was plenty for the two of us and a green iceberg salad. But please, if anyone actually has cooked one of his big 30 minute meal dinners in the given time frame or at all please comment below and tell me how you went. I do feel a challenge coming on for a blog post in the future which includes this book and my iphone stopwatch... hmmmm.

Jamie Oliver's Trapani-Style Rigatoni from 30 minute Meals.

I would have loved the entire meal - Trapani-Style Rigatoni, Grilled Chicory salad, Rocket and Parmesan salad and a Limoncello kinda Trifle - but I think I'd need a second stomach to fit it all in, not to mention a washing up wench to work over time! So the Trapani-Style Rigatoni by its lonesome it was. This pasta served with a simple green salad would easily serve four people for dinner.

Growing up I used to love mums pesto she made in her food processor called 'osca'. It was spicy from the raw garlic but cheesy and creamy from all the parmesan cheese and pine nuts. The colour was vibrant green and herby from the basil and turned the olive oil green that slicked my lips afterwards as I wiped my plate clean with a slice of bread after I'd demolished a huge bowl of spaghetti. It was always a bit of a treat to have because mum wouldn't be as keen as dad and I were on the raw garlic she put in it. We loved it! It was even better when she used the home grown basil in the height of summer when its at its most fragrant. She always served it with a tomato salad dressed in balsamic vinegar and fresh oregano. One of my favourites in summer to end a meal, the vinegar cutting through the olive oil and finishing it of lovely.

Jamie Oliver's Trapani-Style Rigatoni from 30 minute Meals.

The Trapani-Style sauce is kind of like a lighter, sweeter pesto sauce. You don't have to cook it so it only take as long as the pasta does to cook which is a great mid-week meal. And If you have any left I think it would be great on some crusty bread with some cold meat and salad... mmm I'm already wishing I'd made extra for this weeks lunches! It uses almonds instead of pine nuts and also has cherry tomatoes through it which gives it that sweetness and lightness. The basil wasn't the best that I bought but in summer when the bunches are huge and smell like what I'd imagine an Italian summer garden to smell like I think this dish could be a real winner. It does use anchovies too... turn your nose down! I can see you turning your nose up from here!! I can't stand the smell of anchovies, or the way they make your fingers smell but when you add them to things as a seasoning rather than a flavour... its like a salty magic. I will admit I used only 2 fillets instead of 4 like the recipe says... I was too chicken.... but I couldn't taste them at all. I was almost disappointed that I didn't man up and add the 4 like Jamie said to. Next time I'll add the four like recipe says.

I can already tell that this pasta will become a staple in the summer. Easy, quick, fresh and minimal mess because everything gets bunged into a food processor and whizzed! Also when its stinking hot in our apartment and anything more than one stove element on is too much to handle this will be a perfect dinner.

If you want to give the entire meal a go, please let me know how you go otherwise I strongly recommend the rigatoni.
Jamie Oliver's Trapani-Style Rigatoni from 30 minute Meals.

Jamie Oliver's Trapani-Style Rigatoni from 30 minute Meals cookbook.

Serves 4

500g rigatoni pasta
40g parmesan cheese
100g whole blanched almonds (my packet of almonds said 110g... I used the whole packet)
2 cloves of garlic, peeled
1-2 red chilli's, stalk removed
2 large bunches of fresh basil
4 anchovy fillets in oil
450g cherry tomatoes
extra virgin olive oil

- Add the rigatoni to salted boiling water and cook according to packet instructions or al dente.

- While the pasta is cooking, make the Trapaneeeeeasy sauce :)

- Trapaneeeeesy sauce: Put the almonds, parmesan, garlic and chilli's into the food processor (using the bowl blade) and blitz until fine. Next add your anchovies, two thirds of your tomatoes and 1 1/2 bunches of basil and keep blitzing until it becomes a paste. Add about 2 tbsp of extra virgin olive oil, taste then season with some salt and pepper.

- Half your remaining tomatoes and pick the leaves off the 1/2 a bunch of basil left and set aside (I forgot to do this step...).

- When your pasta is cooked to perfection, reserve a little cooking water and add the pasta and sauce back to the hot pan, mix well and add a little splash of the cooking water if it looks a little dry to loosen it up. Toss the remaining tomatoes and basil in and serve immediately.

Enjoy your meal with the relief that there is hardly any washing up.

...

#giveaway 15 minute meals 30 minute meals 5 Minute Food Fix A Common Table A Kitchen in the Valley A Modern Way to Eat Acquacotta Adam Liaw Alison Roman Alison Thompson almonds Amelia Morris Anna Jones Annie Herron Antonio Carluccio Anya von Bremzen apple apps Apt 2b Baking Co Artisan Sourdough Made Simple Ashley Rodriguez autumn avocado babies baby baby shower bacon Bake baked pasta baking Bali Barcelona Cult Recipes basil BBQ beans beef beetroot Bill Granger biscuits blondies Bon Appetempt Bowl & Spoon bread breadcrumbs broccoli brussel sprouts burgers burrito buttercream butternut squash byo cabbage cake calzone camping Carla Lali Music carrot cauliflower chicken childhood chilli chinese cooking chipotle chocolate chorizo chutney Claire Ptak Classic German Baking Classics 1 Classics 2 coconut Comfort Food cookbook addict cookies cordial corn cucumber curry custard Cynthia Chen McTernan Date Night In David Dale Delicious. magazine dessert Dining In dinner party nightmares Dinner: A Love Story dip doings Donna Hay Donna Hay Magazine dumplings easy egg eggplant Eleanor Ford Emiko Davies Emilie Raffa Emma Spitzer ENOTW Every Night of the Week Veg family Fast Fresh Simple Feast Feasting fennel fiction Fire Islands Five Quarters Flora Sheedan Florentine Food & Wine Food52 Fresh & Light Fress frozen dessert Fuchsia Dunlop galette Gatherings Genius Recipes Gennaro Contaldo Gennaro's Fast Cook Italian Gennaro's Italian Bakery Gennaro's Pasta Perfecto! german ginger gnocchi goats cheese granola Greenfeast gumbo Gwyneth Paltrow Happenings holiday home home-grown herbs How to be a Domestic Goddess hungry Hunter Valley ice-cream indian Indonesian Cooking involtini It's All Easy It's all Good jam Jamie Does Jamie Magazine Jamie Oliver Jamie's America Jamie's Great Britain Jamie's Italy Jane Hornby japanese Jenny Rosenstrach Jessica Fechtor Julia Turshen Justine Schofield. The Weeknight Cookbook kale Karen Martini kimchi Kitchen korean Kylee Newton LA Cult Recipes Land of Fish and Rice leek lemon lentils life Light of Lucia Link Love links long weekends love Luciana Sampogna Lucio Galletto Lucy Tweed Luisa Weiss Maggie Beer maple Marc Grossman Marcella Hazan Marian Burros Martha Stewart Matthew Evans meal planning meatballs meatloaf mess mexican Michael James Michelle Crawford mince mint miso Monte Carlos Mum's cooking mushroom mussels My Berlin Kitchen My Kitchen Year Naturally Ella new beginnings New York Cult recipes Nigel Slater Nigelissima Nigella Bites Nigella Express Nigella Lawson No Time to Cook noodles North West Island nostalgia Not Just Jam NotWithoutSalt oats omelette paddle pops parsley pasta Paul McIntyre Paul West Paulene Christie pea pecans pesto pickle pickles pie pizza Plenty Plenty More plum pork potato prawns preserving prosciutto pudding pumpkin quesadilla quinoa Rachel eats Rachel Khoo Rachel Roddy ragu rambles raspberry recipe rhubarb rice risotto River Cottage Australia romantic Ruth Reichl saffron salad Sally Wise salsa verde Salt Fat Acid Heat Samin Nosrat sandwiches Sara Forte sausage Save with Jamie schupfnudeln seafood sesame Seven Spoons Simon David Simple slow cooker Slow Cooker Central Small Victories Sophie Hansen soup sourdough Sprouted Kitchen starters Stephanie Danler Stir stir-fry stuffed sushi Sweet Amandine sweet potato Sweetbitter tahini Taking Stock Tara O-Brady Taste Tibet Tasting Rome thai Thai Food Made Easy The Art of Pasta The Best of Maggie Beer The Comfort Bake The Dinner Ladies The Little Book of Slow The Little Paris Kitchen The Modern Cook's Year The Modern Preserver The Naked Chef The New Classics The Tivoli Road Baker The Violet Bakery Cookbook The Wednesday Chef The Zen Kitchen thyme Tom Kime tomato tuna turkey tuscany Two Greedy Italians Two Red Bowls Valeria Necchio vanilla veal vegetables vegetarian Veneto vietnamese wedding wedding cake What can I bring? What to Bake and How to Bake it Where Cooking Begins Where the Heart is yoghurt Yossy Arefi Yotam Ottolenghi Yumi Stynes zucchini