Showing posts with label recipe. Show all posts

Friday, 18 January 2019

Frozen Raspberries with Greek Yoghurt and Honey

Hello! How was everyones weekend/week? My weekend was lovely but this week has ended on a sad note for reasons I'm not going in to. Instead, I will tell you about my weekend that feels about 100 years ago but was in fact only 5 days ago.

On Saturday night I had a couple of the girls around for dinner and a movie, with air con - praise the air con! I was umm-ing and ahh-ing if I should cook because it was so damn hot and I had no inspiration. All I could think about was cold things. Knowing one of my lovely ladies was slightly shady from the night before, salad was out of the question and carbs were most definitely in. I was tossing up between trying a new Japanese dish I've wanted to give a go for a while and doing something I've made a few times already. After a quick group chat it was decided, Italian not Japanese. I made the Green Chicken Meatballs I've made before and served them with a rich tomato based pasta sauce and spaghetti. I feel I should have made a brighter more summery tomato sauce for the chicken balls but I over splashed the wine and used red wine instead of white because thats what I had on hand so I needed to cook it down more. White wine is now on my shopping list.

Frozen Raspberries with Greek Yoghurt and Honey | salt sugar and i

I was definitely not baking dessert with the heat which meant no cake or pie or crumble because that meant turning on the oven. Instead, I scoured Alison Roman's cookbook 'Dining In' for inspiration. I've owned her cookbook for a few months now but haven't made a thing from it. I seem to pick it up, oooo over all the recipes and then realise I'm missing an ingredient and the book goes back on the shelf. It's got some delicious looking recipes to share and make with friends, and it's definitely got a summery feel to it, no heavy wintery stews like her current NY Times recipe that's gone viral.

Friday, 11 January 2019

Lentil salad with tomatoes and a mustardy dressing


I don't know how you feel after the silly season we've just had but after eating and drinking like I wasn't ever going to see food or wine again I need a little kick up the butt. I do NOT mean a diet or a restart or a detox. Just a little more moderation, a little less wine, a little less cheese and a little more movement, aka gym. Which should be much easier to get up and go now that I won't wake with a foggy wine head... well Monday to Fridays anyway. I would love to say I'm back into routine but to be honest I am still trying to figure out my routine for being back at work and with this new FIFO (Fly In Fly Out) Hubby of mine. 5 weeks on, 5 weeks off. Some days I get to midday and the only one I've spoke to is Arthur, the cat. The downside of working from home too I guess.

My mission while Hubby is away is to eat my way through our freezer. I hate waste so I freeze portions of meals when we have leftovers and to avoid them ending up as the bowl of shame in the fridge (this is what happens to egg whites most of the time) I stick them in the freezer.  Our freezer is now chockers because I CANNOT cook for 2 people, let alone one!! And the downside of freezer eating is that I crave fresh foods so I've been making salads for lunches, the heartier ones keep for a couple of days and get better as the flavours are left to mingle.

Monday, 13 October 2014

Jamie Oliver's Beer Butt Chicken from Jamie's America.

Has anyone stuck a can of beer up a chickens bottom before?

Yes a chook you buy from the grocery store, not a live one. I hope no one has ever or will ever do it to a poor live chicken. I'm talking about BBQ Beer-Butt Chicken.

I had friends over the other week and it was the perfect excuse to give this ago. I always think that a whole chicken cooking for just two people is a little extravagant so when we have people over I get a little excited and cook too much food. I know that people will disagree with that statement because there is SOOO much you can do with left over chicken but thats just how I feel... or we leave it for a special occasion like a Sunday dinner.

It was a warm night when we decided to have visitors so cooking the chicken outside on the BBQ was perfect because it meant the oven didn't have to go on for a long period of time and bake us all in our tiny apartment. I chose to use a recipe from Jamie's America Cookbook (yes by Jamie Oliver - my weakness). It was super simple and didn't make that much mess (in the kitchen that is). You make a spice rub in a mortar and pestle and rub it all over the chicken then drink half of the can of beer (not hard to do) then stick it up its bottom and place it on a preheated BBQ. Cook for one and a half hours and yum!

And this time I didn't serve raw chicken. It was well and truly cooked. But... we were so hungry by the time it came to eat I got no photo's of the cooked chicken, just of it as I placed it on the BBQ. Sorry folks but it just means I have to do it again to get you that lovely picture.

I was worried the chicken would have been a little over cooked because it stayed on the BBQ a little longer than is should have but it was still yum. I was told by our dinner guests and Tristan that it wasn't dry at all but maybe they were being polite :) I also made two salads to go with the chicken but if I start on them too in the post I might be half way to a novel so I will save them for next time.

The only thing with the chicken was... I thought the can of beer would be empty when we took the chook off the BBQ but it was still half full. My thinking was that the BBQ heats the beer and it boils and evaporates into the chicken as it cooks and in the end all the beer is gone but it wasn't. I have never made this until then so I could be completely wrong. The recipe says nothing about the can being empty or full after so no idea if I actually did it right but it still worked if you ask me.

Mmmm. Chicken. Good.

Jamie Oliver's Beer Butt Chicken from Jamie's America.

Serves 4

1 large whole chicken (about 1.5kg)
1x 473ml larger (I used a can of Stella)

Spice rub:
1 heaped tsp fennel seeds
1 level tsp cumin seeds
1 level tsp smoked paprika
1 heaped tsp brown sugar
1 level tsp mild chilli powder (I used 1/4 tsp of cayenne pepper instead)
Salt and Pepper
3 tbsp olive oil

- Preheat your BBQ to 200 C or 400 F.

- In a mortar and pestle smash up the fennel and cumin seeds. Add the paprika, brown sugar, chilli powder, salt and pepper and give it a good mix. Finally stir in the olive oil, you should have a nice paste now. Drizzle and rub this all over the chicken, giving it a good massage.

- Open your can of beer. Drink and enjoy half of it. Place the chicken on top of the can so it looks like it's sitting on it (Can look a little rude about now) then place it on the BBQ hot plate.

- I used a gas BBQ (please forgive me Dj Bbq) and had the grill side turned on but had the chicken on the hot plate side so there wasn't direct heat straight underneath but heat all around it.

- Cook it for 1 hour and 30 minutes until the meat pulls away from the bone and the juices run clear. 

- Once cooked, remove the can from it's bottom with tongs. Be careful because it's very hot!

- Serve with salads or roast veggies. Enjoy!

I served this with Donna Hay's Potato Salad from Classics 1 and a Quinoa and Butternut squash Salad from It's all Good By Gwyneth Paltrow. 

Sunday, 5 October 2014

Soba Noodle Salad with broccoli, chicken and toasted nori by Karen Martini.

Oh my goodness it's Sunday already!!??

It's been a beautiful weekend of weather and what more to celebrate summer on it's way than salads!!

I love a good salad. I'd been eye-ing off this recipe for ages but always went past it because of the sauce it used which I could never find in the super market and the fact that it used cooked roast chicken. I don't know how often you have left over roast chicken in your house but I don't have it often so the leftovers are always minimal.

But you know... who's going to stop me from roasting a couple of chicken breasts and shredding them especially for the salad. It's not hard work. Turn the oven on, place 2 chicken breast on a baking tray with some olive oil, salt and pepper and cook for 45 min. Done.

SO with no more excuses I finally made the soba noodle salad with broccoli, chicken and toasted nori from Karen Martini's Feasting cookbook that I'd been wanting to make for ages. Actually there are so many dishes in the book that I want to make but the book is set out as huge feasts and all of the dishes feed alot of people. Yes I know I can cut the down and halve them but it's hard when I'm menu planning for the week to grab a book that has all these beautiful large feasts in it when I'm looking for a quick midweek meal. But I was wrong about this book. I was pleasantly surprised that the recipe I chose was easy and didn't take that long, it was a perfect midweek meal with leftovers for lunch the following day (the nori sheets went a little soft but the flavours were maybe even better).

The recipe calls for ponzu... yeh I didn't know what that was either so I googled it while grocery shopping and it doesn't seem like it would be too hard to find in a well stocked supermarket but the one I go to is being renovated at the moment so is not so great. But here's hoping it gets better! When I couldn't find ponzu on the shelves I googled how to make it and I came across a few recipes that required reduced master stock and other fancy ingredients only available form asian grocery stores and nothing could help me in my supermarket dilema. Then I found a simple version here. What did I have to loose? If it tasted bad then I wouldn't use it and we'd make something else up instead and if it did then I could feel like a ponzu genius.

I felt like a ponzu genius.

The whole salad was super yummy. It impressed me so much how all the flavours worked together and how fresh and delicious it all tasted. YUM. I will definitely do this again soon now that I know how easy and tasty it is. Plus I feel that it's pretty healthy too... correct me if I'm not though.

It felt healthy anyway :)

A great recipe for when you have the girls over because you can have it already to go then add the nori sheets and dress it right before you serve and there is no excess cooking while people are over. And you can fell healthy eating it so the ice cream after doesn't make you feel too guilty :)

Soba Noodle Salad with broccoli, chicken and toasted nori

serves 4
recipe adapted from Karen Martini's cookbook 'Feasting' - find original recipe on here

2 chicken breasts
2 tbsp olive oil
pinch of salt & pepper
(or 400g leftover roast chicken, shredded)


300g dried soba noodles
1 head broccoli, cut into florets
2 tbsp sesame seeds
2 tsp sesame oil
60ml soy sauce
30ml rice wine vinegar
30ml cup lime juice
4 tbsp extra virgin olive oil
2 heaped tsp jarred grated ginger
5 spring onions, finely sliced
1 sheet of toasted nori, roughly ripped into shreds

- Preheat your oven to 200 C or 400 F.
- Drizzle olive oil over chicken and sprinkle with salt and pepper. Place on a baking tray and bake for 30-45 minute or until cooked through. Remove from the oven and cover with foil to keep in the juices.
- Go and do something else fun for a little while so it can cool down a little (or prep everything else so it's all ready to do).

- Combine the sesame seeds, sesame oil, soy sauce, rice wine vinegar, lime juice, extra virgin olive oil and ginger in a large bowl (your will eventually put everything in this bowl - the bigger the better).

- Cook the soba noodles according to packet instructions (mine took about 3-4 minutes), drain and refresh under cold water.

- Cook the broccoli for 2 minutes and then drain, rinsing under cold water.

- Shred the chicken breasts with two forks. 

- Place chicken, noodles, broccoli, spring onions into the bowl with all the sauces and top with nori.

- Serve cold or at room temperature.

Monday, 29 September 2014

Meatballs from 'The Naked Chef'.

I'm a terrible blogger. I'm sorry.

Last week was full of birthday dinners, heart monitors and anxious thoughts that if I keep thinking about them too much I'll go crazy far sooner than a 25 year old should. So instead of worrying, I'm back to blogging.

Last Sunday I had one of my best friends over for dinner and I was super excited. I hadn't had anyone over for dinner in such a long time, it gave me an excuse to cook something that took a little bit longer and needed a little bit more labour of love put into it. And it was a Sunday night so shouldn't every Sunday dinner be a little special?
The Naked Chef Meatballs Jamie Oliver

I picked out a Jamie Oliver book I hadn't blogged about yet. I'd made a few recipes maybe 2 years ago from it but then it was put back on the shelf and has gathered dust ever since. And thats not to say that it isn't a great book because let me tell you this. I LOVE YOUNG JAMIE OLIVER. He's so cheeky and happy and full of energy, there is almost a bounce in his step in his first TV show 'The Naked Chef' as he teaches people to cook for the first time in our lounge rooms and kitchens. But seriously, who doesn't have a soft spot for young Jamie and the now Dad Jamie who is still just as cheeky!?

You all know I'm a Jamie Oliver junkie and I wouldn't be a true junkie if I didn't have his very first book 'The Naked Chef'. In his first books its all about honest food and cooking for people you love, weather its a for a few people or a date night. I chose Meatballs because I wanted a safe, affordable recipe that I couldn't stuff up.
The Naked Chef Meatballs Jamie Oliver

These were so delicious. Best yet! I did read the recipe wrong again and not all the way through first but that step was optional anyway so it was all good.

Also it does help that they were baked so I could do a quick spruce around the apartment before my dinner date came round and then all I had to do was cook some tagliatelle pasta when she was here. Easy Peasy dinner idea, and it can also feed more than three... We had leftovers for the next day and two lunches frozen for later in the week, so its great for a small crowd.

The Naked Chef Meatballs Jamie Oliver

Give this recipe a go, you wont regret it! I promise!

The Naked Chef Meatballs Jamie Oliver

The Naked Chef's Meatballs.

Serves 4-6
(recipe adapted slightly)

For the Meatballs: 

1kg beef mince
2 slices of bread whizzed into bread crumbs
2 level tbsp dried oregano
1/4 level tsp ground cumin
1/4 tsp cayenne pepper
1 tbsp finely chopped fresh rosemary
1 tbsp finely chopped fresh parsley
1 egg yolk
1 level tsp salt 
a good 2 pinches of freshly cracked pepper

- Place all ingredients in a bowl and give it a good mix with a fork or get into it with clean hands.

- Shape into balls (what ever size you feel like - I did big meatballs because they had time to cook in the oven but you can do any size you like - just remember the bigger they are, the longer they take to cook!) I made these tennis ball sized.

- Place on a plate and store in the fridge while you get on with the tomato sauce (see below).

Basic Tomato Pasta Sauce:

1 clove garlic, finely chopped
2 tbsp olive oil
1/2 tsp chilli flakes
2 tsp dried oregano
3 x 400g tins of chopped tomatoes
1 tbsp red wine vinegar
1 small handful of fresh basil
salt and pepper

- Gently fry the garlic with the olive oil but don't let it colour. Add the chilli, oregano and tomatoes. Stir everything together. Bring to a boil and reduce to a simmer for 30 - 45 minutes.

- Add the vinegar and chopped basil. Season with salt and pepper and taste.

Putting it all together:

3 tbsp olive oil
2 handfuls of fresh basil
120g mozzarella cheese, in chunks
60g finely grated parmesan
400g pasta of your choice (optional)

- Preheat your oven to 200 C or 400 F

- Heat the olive oil in a heavy bottom casserole pan on a medium heat (make sure it can also go in the oven) and add your meatballs. Fry them until they are brown all over but be gentle so you don't break them up.

- Turn the heat down and add all of the basic tomato pasta sauce. Cover and place in a preheated oven.

(Remember the bigger your balls the longer they'll need to cook. I baked mine for about 20 minutes, covered.)
- If serving with pasta, cook pasta according to packet instructions now so everything is ready together.

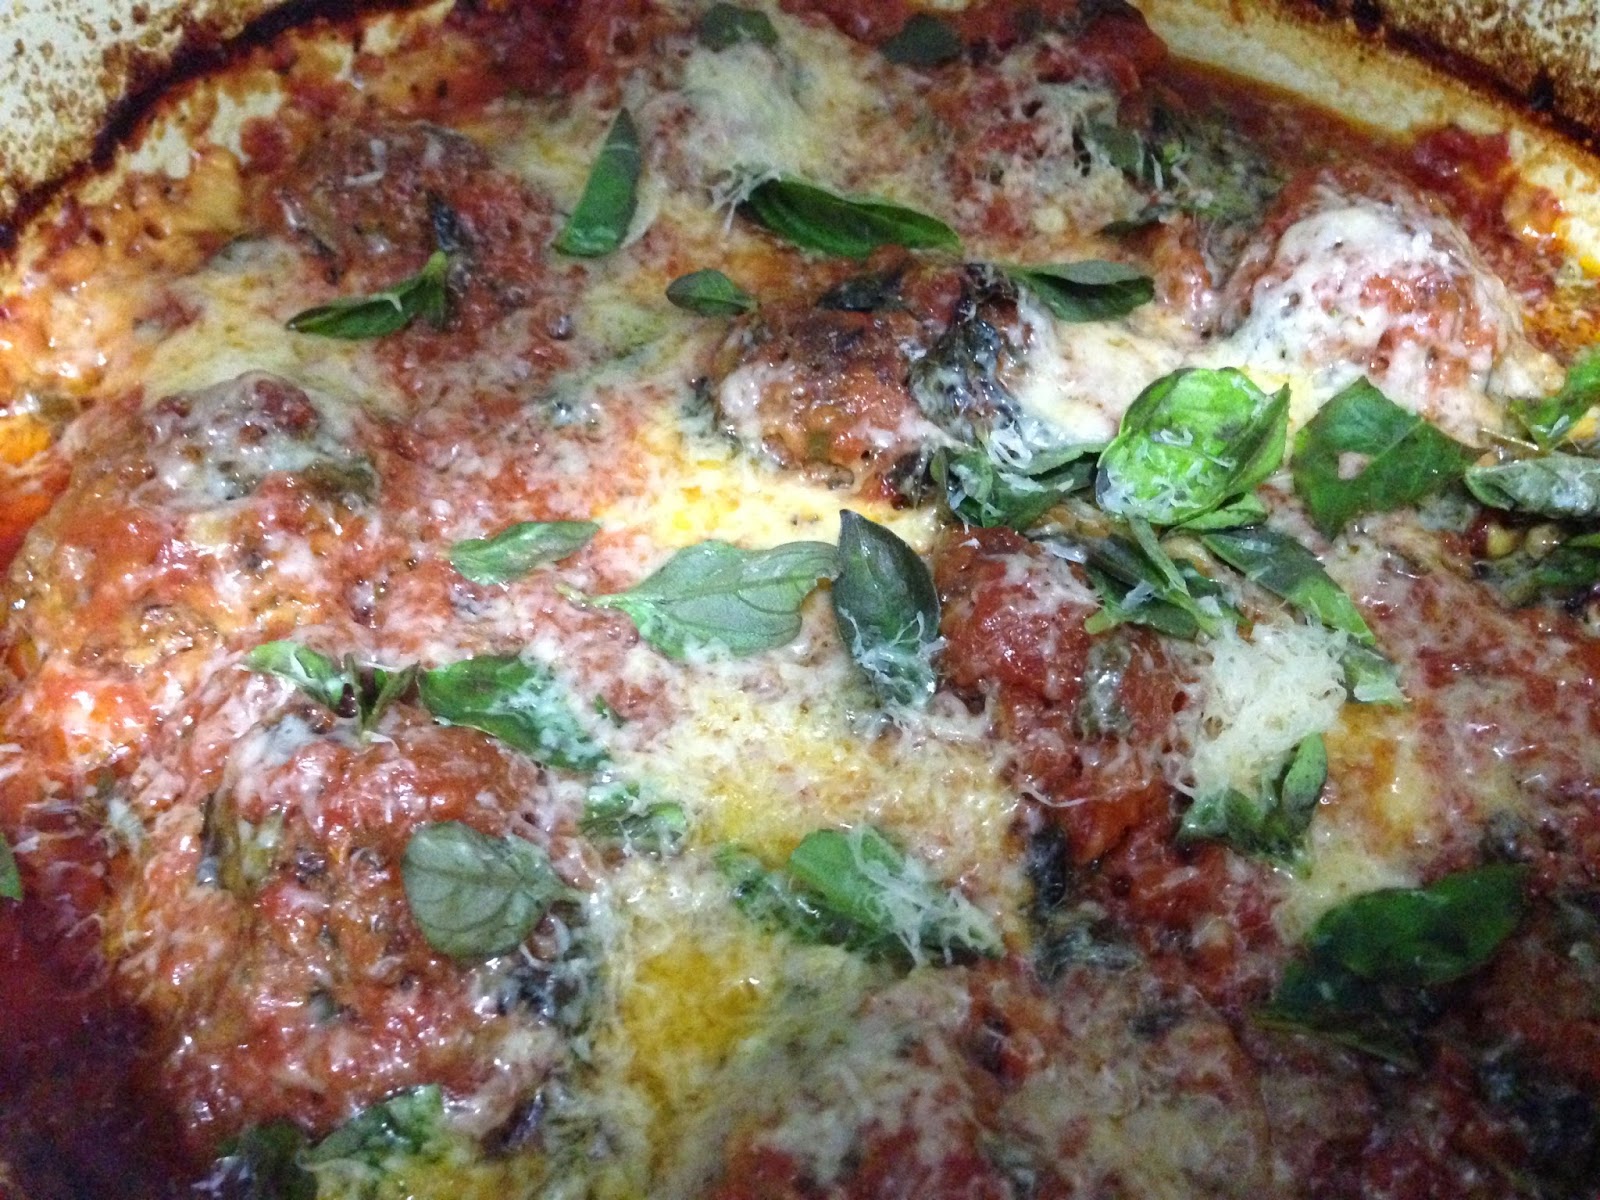
- Scatter the mozzarella, parmesan and basil over the top and bake for another 15 min or until the cheese is oozy and golden. Serve.

Tuesday, 9 September 2014

Jamie Oliver's Calzone recipe from Delicious. magazine - September 2014 - Issue 141.

This weeks meal planning took me a while. I thought it was all done and dusted and was pretty impressed with myself then looked at what I'd planned to make this week and to be honest... none of recipes felt like a little challenge or something new. They were the things I would make before I started this blog, recipes I would make with no recipe to follow and get to the end of dinner and be a little disappointed at myself for not branching out. I had also chosen books from my shelf that I had cooked out of and blogged from already so I wasn't showing you a new sneak peek into my cookbook obsession. SCRAP IT! I thought and started again by choosing books/magazines I hadn't cooked from or blogged about yet and chose a recipe out of each to make this week.

It started off with Jamie Oliver's Calzones from the latest Delicious. magazine this month (September 2014 - Issue 141). I wanted a little challenge and this is exactly what I felt like. I adapted the recipe slightly because our local supermarket isn't very good with ingredients that are a little out of the ordinary or specialised.
pizza dough

I'll be honest. I was a little hesitant about making this but thought that if it fails completely it's only Tristan and myself who I'm feeding and we can always have pasta with cheese on if its terrible. So on that note, I had nothing to loose.
pizza dough

I started with the dough and quartered the recipe that Jamie gives in the magazine. For the Calzone recipe you are meant to half the recipe but then that makes six calzones. Six is a little much for two of us no matter how greedy we are sometimes so I halved it again, quartering the original recipe. I had to scale out 2g of dried yeast... that was a little tricky since my scales are very tempremental. I had planned on seeing how many teaspoons 7g was then quartering it by eye but went with the rough 2g measurement instead... and it worked! YAY!
kneading pizza dough

I kneading the dough on my lovely blue bench top for 5 minutes then let it rest. The recipe says to rest it for 1 hour... I didn't have one hour. My stomach was eating itself even with just the thought home made Calzones. This step is good for tuck-shop lady arms.
calzone filling

For the filling I boiled two small potatoes, pan-fried some mushrooms, roughly chopped some baby rocket and then quartered bocconcini balls. The original recipe says use Taleggio cheese which is a strong soft italian cheese. When I worked in the restaurant it was on the cheese platter and it was a stinky one! I have nothing against smelly cheeses and I would have probably used Talleggio but like I've said above, our supermarket stocks a large brand variety of basics. And I have an obsession with bocconcini at the moment... mmm those soft little round milk stringy balls of cheese...
pizza base

After I got over my day dreaming of cheese, cheese and more cheese. I divided the dough into three, rolled the out to roughly about 5mm thick. Divided the filling between the three and folded one side over sealing the edges, pinching the sides over each other. Scored the tops and baked them in a very hot oven for 20 minutes. YUM YUM YUM.
vegetarian calzone

(Ok I'll admit something... I was meant to add a spoonful of creme fraise or sour cream to the filling but I got so excited that they were coming together and it was working and I wasn't pulling my hair out in frustration that I completely forgot to add it. But can confirm they are delicious with or without the cream fraise... I might add a couple of cherry tomatoes halved next time to make it a little more juicy. Who knows... maybe if I'd added the creme fraise I wouldn't be thinking nest time to add cherry tomatoes?!?)
calzone

Anyway... the verdict... it was scrumptious and I was pleased that I had gone outside my boundaries and made Calzones on a week night and not saved them for a weekend when I plan to make a more special meal and everything goes down the drain because something crops up. If your organised enough (not like me) you can even make the pizza dough the night before and leave it in the fridge so all you have to do it roll it out, fill them and bake them. How easy is that?!!

jamie oliver's calzone

Let me know what you think... there are a few steps in here that are hard to explain... would a little video help?? I'd love to hear your thoughts!
calzone

Click here for a different Calzone recipe by Jamie Oliver or make my version below :)

Calzone from Delicious. magazine September 2014 issue by Jamie Oliver.

Serves 2 hungry people or 3 with a side salad.
(recipe adapted)

Pizza Dough - 

250g 00 Flour (or strong white flour)
2g dried instand yeast (or 1/4 of a 7g sachet)
1 tsp caster sugar
15mL olive oil

Filling -

180g potatoes, halved
1 tsp butter
1 tbsp olive oil
2 thyme sprigs, leaves removed
200g button mushrooms
1 garlic clove, crushed
pinch of chilli flakes
1 tbsp creme fraiche or sour cream
150g bocconcini balls, quartered
1/2 cup baby rocket, roughly chopped

**Pre-heat your oven to 220 C or 420 F. **

Start by making the pizza dough: 
- Sift the flour and a pinch of salt into a large bowl or onto your bench. Make a well in the centre.

- In a jug mix 160mL of warm water, dried yeast, caster sugar and olive oil together and let sit for a couple of minutes. (You are waking the yeast up in the step so it can make your dough rise later)

- Using a fork, pour the liquid into the well in the flour and start working it together gradually from the centre until all the flour has been incorporated. Don't worry if it looks like a shaggy mess at the moment. Turn it out onto your bench if you have used a bowl and start kneading it with the heel of your hand on a floured surface.

- The amount of extra flour you will need to add will depend on the weather and the type of flour you have used. You want an almost tacky dough. Not so sticky that it's sticking to your hands every time you knead it but you defiantly don't want it too dry. The more you knead it, the better it will come together. If you're unsure about adding too much flour start by adding a little at a time as you work the dough. Knead it for 5-10 minutes or until smooth and stretchy.

- Place the dough in a floured bowl and cover with a damp tea towel somewhere warm for 1 hour or until it's doubled in size. While your dough is resting, start your filling.

For the filling:
- Boil your potatoes for 12-14 minutes or until cooked through, drain and then slice into 1.5cm pieces. Allow to cook a little.

- Pan fry your mushrooms with the butter, olive oil and thyme until all the liquid has been absorbed and they start to colour. Add the garlic and chilli flakes and cook for another minute. Allow to cool a little.

- In a bowl add the bocconcini, baby rocket, potatoes, mushrooms and creme fraiche (or sour cream) and mix together.

Constructing your Calzone:
- Knock back your dough by punching it down in the bowl then roughly knead it for a minute or so. (It's at this point you can cling wrap your dough and refrigerate it for 24 hours ready to use straight from the fridge). Divide it into 3 pieces.

- Roll out each piece of dough on a lightly floured surface to about 5mm thick and circle in diameter as possible.

- Divide the filling up between the three rolled out pieces of dough.

- Fold one side over and bring the edge to meet the other edge. Seal it by pinching and turning the edges over on each other then giving the final end a good pinch. Do the same to all of them.

- Score the top then place in the oven for 20 minutes. I had to rotate my trays so get even baking so make sure you keep an eye on them when your oven is up this high.

Sunday, 7 September 2014

Nigella Lawson's Double Potato and Halloumi Bake from Nigella Bites cookbook.

So I've been a little bit bad on my posting this week. I started so well and I feel I've gone down hill which is dissapointing. I am hoping to be better this week and try and post more frequently.

I've just got home from fathers day breakfast. HAPPY FATHER'S DAY DAD! Hope you had a good breakfast, I enjoyed it! Mum and Tristan cooked scrambled eggs, smoked salmon, grilled tomatoes, bacon, sourdough and then fruit toast to finish. It was so delicious! I ate too many chip sangers last night for dinner... terribly unhealthy dinner but quite tasty so it was nice to have a big breakfast.

Ok back to what I made on Thursday night.... eeek it's Sunday and I haven't posted what I made on Thursday for dinner yet. I'm terrible... Muriel.

Nigella Lawson's Double Potato and Halloumi Bake

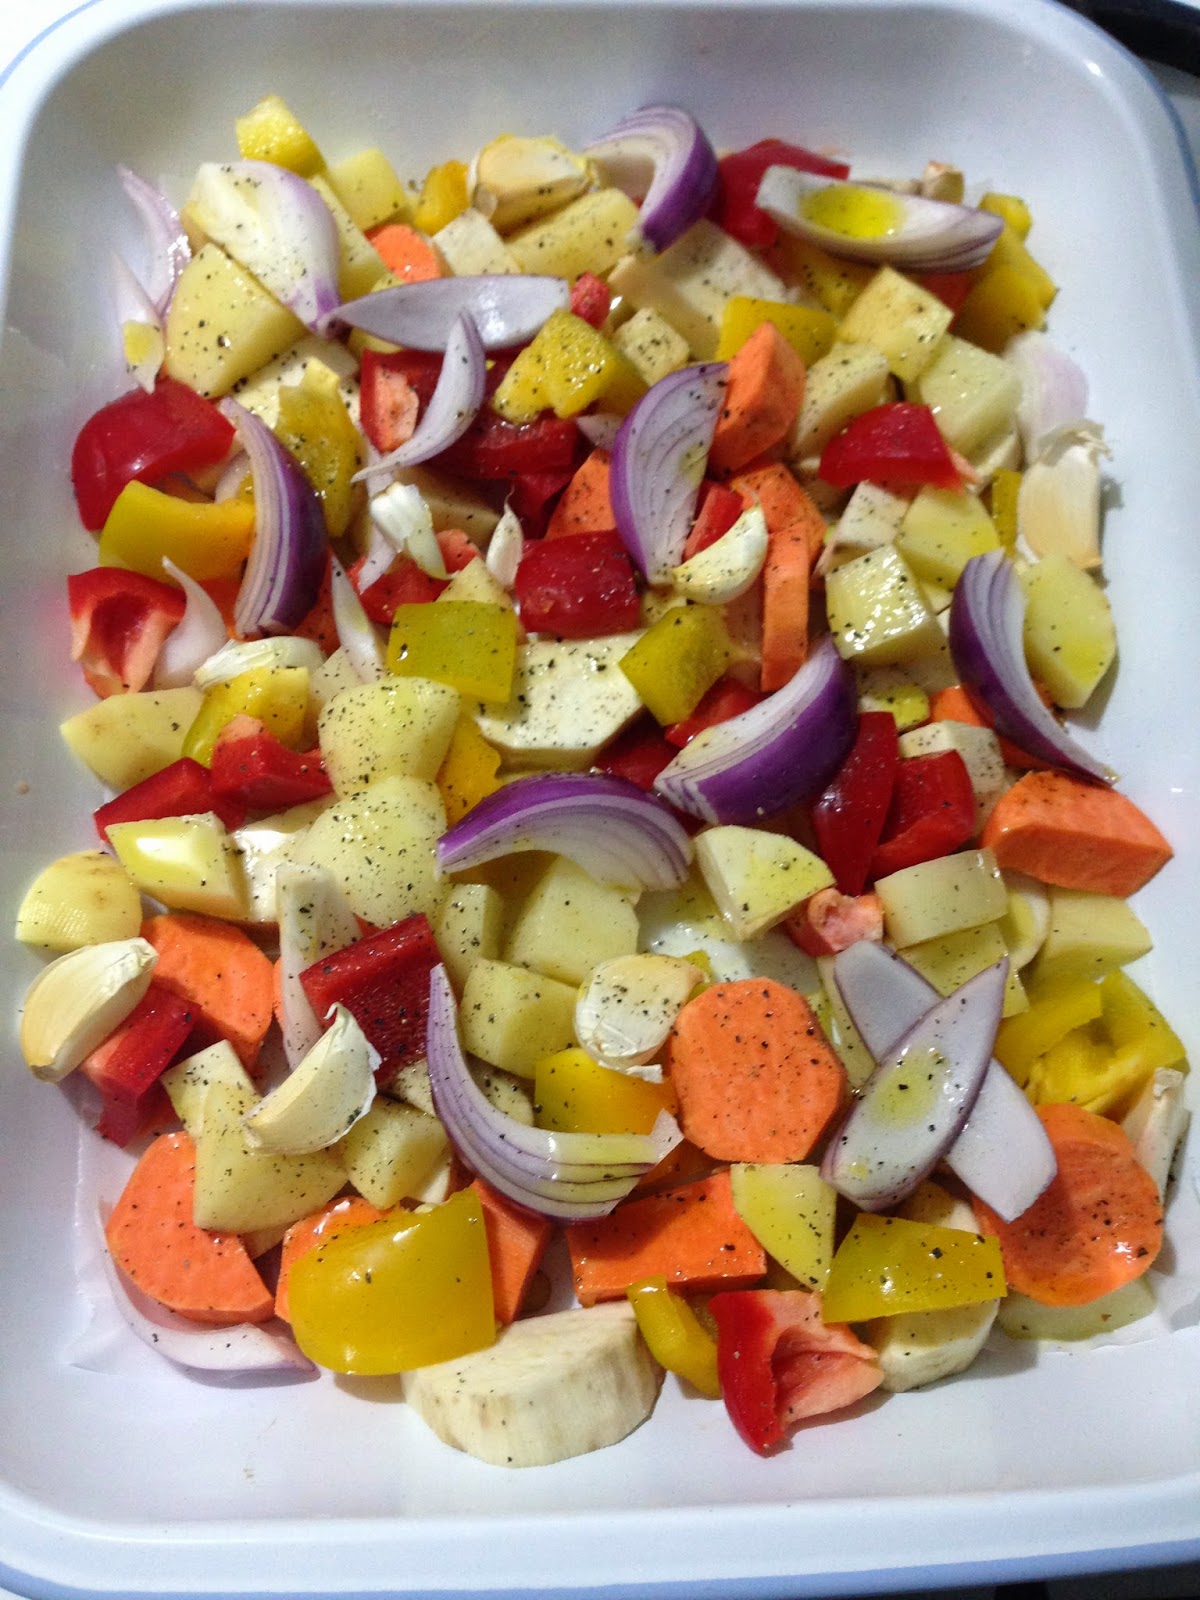
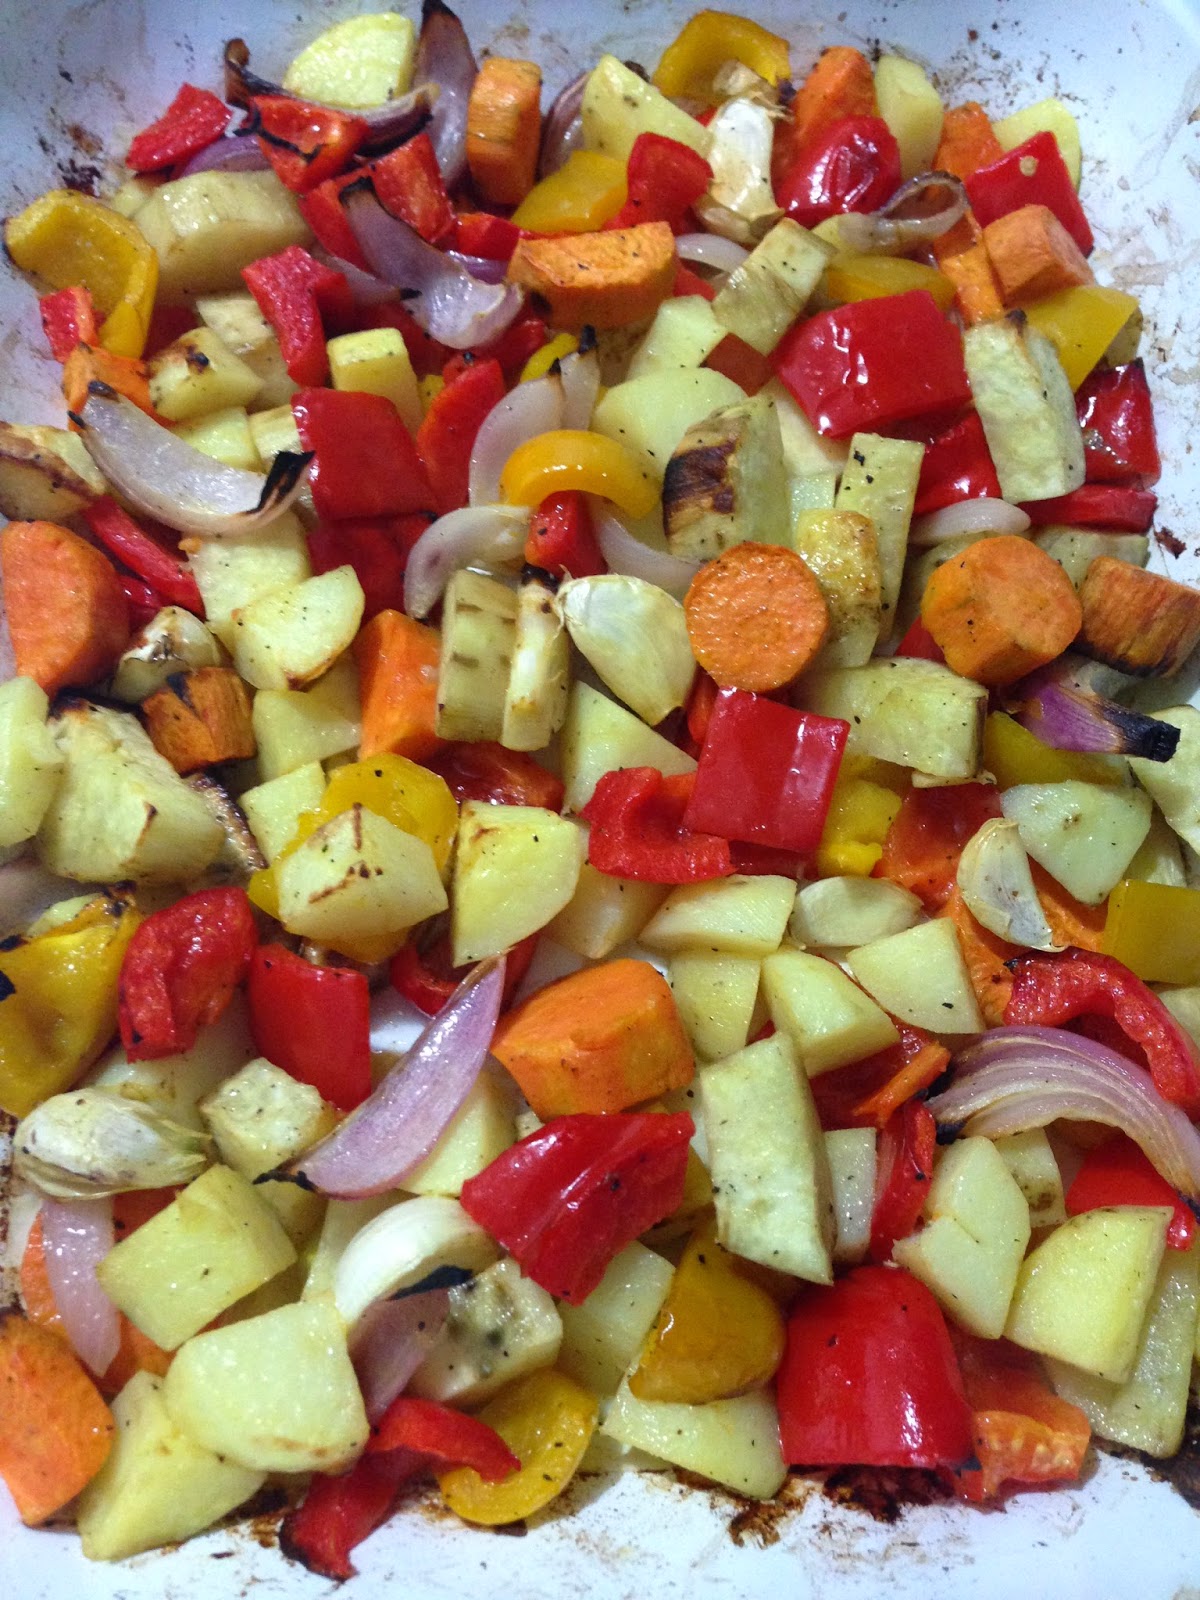
I decided that because I'd mastered the chicken tray back last week that it was a new tray bake to try and I guess because Nigella Lawson's worked so well last time I'd try another tray bake of hers. I made the Double Potato and Halloumi Bake from Nigella Bites. Who doesn't love cheese? This was a delicious mixed potato bake with all the little extras that roast veggies should always have (garlic cloves and onions) with sweet capsicum throughout it then covered in burnished thin slices of squeaky halloumi cheese. YUM! We had it with steak that Tristan cooked on the BBQ. One day I'll cook a steak on the BBQ but I'm a little hopeless on a BBQ... I always end up with either well done steak with charcoal bits or a steak that is still moo-ing on my plate.

Nigella Lawson's Double Potato and Halloumi Bake

This dinner is another great dish to bung everything in an oven tray, shove it in the oven, go have a shower or potter around before dinner then just add the cheese for the last 10 minutes of cooking and  serve. It would be great by itself as a vegetarian main or as a side like we had it. I even had it cold for lunch the next day. Just add a little splash of balsamic vinegar to it when it's cold and you have an amazing roast vegetable salad. The halloumi doesn't do so well the next day so eat all of it straight away (I'm sure that won't be hard) and then add some feta the next day to turn it into a kick-ass salad!

Nigella Lawson's Double Potato and Halloumi Bake

Such a pretty colourful dinner!

The recipe says to use sweet potato and normal baking potatoes. When we were at the supermarket I found a  red sweet potato. I had no idea what it was like but I did expect it to be red on the inside but it was white and oxidised very quickly and turned a very unappetising splotchy brown colour. It tasted great when cooked, sort of in between a sweet potato and a normal baking potato. This is also a great recipe to double if your having friends over and just divide everything between two baking trays and there is no exact amount of any ingredient. If you want just sweet potatoes then just had sweet potatoes, if you don't like sweet potatoes this can be made with normal baking potatoes or carrots or pumpkin!? Ahhh the vegetable combinations are overwhelming!! Just bake it all until the veggies are cooked through and top with cheese... mmm I love halloumi.

Nigella Lawson's Double Potato and Halloumi Bake

Nigella Lawson's Double Potato and Halloumi Bake from Nigella Bites cookbook.

serves 2-3
(recipe adapted to suit to amount of potatoes I had at home)

3 medium sized baking potatoes
1 medium sweet potato
1 medium red sweet potato
1 red onion
6 cloves of garlic
1 red capsicum
1/2 yellow capsicum
4 tbsp extra virgin olive oil
 black pepper
180g halloumi cheese, thinly sliced

- Preheat oven to 200 C or 400 F.

- Cut the baking potatoes into 2cm pieces.

- Cut both sweet potatoes into 4cm pieces, they don't take as long to bake as normal potatoes.

- Peel and cut red onion into 8 wedges.

- De-seed and roughly cut both capsicums into 2cm pieces.

- Throw everything into a baking tray with the garlic gloves and extra virgin olive oil and give a good toss together. Make sure everything is spread out on a single layer and you haven't over crowded the tray. Split into two trays if you need to.

- Bake for 45 minutes (or until the potatoes are soft/cooked through). Place the halloumi over the top and bake for a further 15 minutes or put under a grill until melted and golden.

- Serve by itself or as a side dish. (don't forget it makes an amazing roast veggie salad the next day with a splash of balsamic vinegar!)


Wednesday, 3 September 2014

Jamie Oliver's Trapani-Style Rigatoni from 30 minute Meals.

This dish I cooked for dinner should have been called 'Trapaneeeeasy-style Rigatoni'...

hehe get it!?

Ok I'm lame but maybe it's a little funny.... just a little?

If you didn't get my terrible joke, this was a very easy dinner to make which suited a grocery shop night perfectly. It meant we saved $50 on takeaway, it was super healthy and tasted way better than anything we could have ordered or ready made meal we could have picked up from the supermarket.

Earlier this week I made Jamie Oliver's Trapani-Style Rigatoni from 30 minute Meals. Jamie Oliver's 30 minute Meals cookbook has huge, three course meals in it which feed a family of 4 -6... not a small team of two. So instead of making the whole kit and caboodle which according to Jamie only takes 30 Minutes... I have my suspicions let me tell you. I think you'd have to be a crazy chicken to achieve it in 30 minutes. I only make one component of the meal which was plenty for the two of us and a green iceberg salad. But please, if anyone actually has cooked one of his big 30 minute meal dinners in the given time frame or at all please comment below and tell me how you went. I do feel a challenge coming on for a blog post in the future which includes this book and my iphone stopwatch... hmmmm.

Jamie Oliver's Trapani-Style Rigatoni from 30 minute Meals.

I would have loved the entire meal - Trapani-Style Rigatoni, Grilled Chicory salad, Rocket and Parmesan salad and a Limoncello kinda Trifle - but I think I'd need a second stomach to fit it all in, not to mention a washing up wench to work over time! So the Trapani-Style Rigatoni by its lonesome it was. This pasta served with a simple green salad would easily serve four people for dinner.

Growing up I used to love mums pesto she made in her food processor called 'osca'. It was spicy from the raw garlic but cheesy and creamy from all the parmesan cheese and pine nuts. The colour was vibrant green and herby from the basil and turned the olive oil green that slicked my lips afterwards as I wiped my plate clean with a slice of bread after I'd demolished a huge bowl of spaghetti. It was always a bit of a treat to have because mum wouldn't be as keen as dad and I were on the raw garlic she put in it. We loved it! It was even better when she used the home grown basil in the height of summer when its at its most fragrant. She always served it with a tomato salad dressed in balsamic vinegar and fresh oregano. One of my favourites in summer to end a meal, the vinegar cutting through the olive oil and finishing it of lovely.

Jamie Oliver's Trapani-Style Rigatoni from 30 minute Meals.

The Trapani-Style sauce is kind of like a lighter, sweeter pesto sauce. You don't have to cook it so it only take as long as the pasta does to cook which is a great mid-week meal. And If you have any left I think it would be great on some crusty bread with some cold meat and salad... mmm I'm already wishing I'd made extra for this weeks lunches! It uses almonds instead of pine nuts and also has cherry tomatoes through it which gives it that sweetness and lightness. The basil wasn't the best that I bought but in summer when the bunches are huge and smell like what I'd imagine an Italian summer garden to smell like I think this dish could be a real winner. It does use anchovies too... turn your nose down! I can see you turning your nose up from here!! I can't stand the smell of anchovies, or the way they make your fingers smell but when you add them to things as a seasoning rather than a flavour... its like a salty magic. I will admit I used only 2 fillets instead of 4 like the recipe says... I was too chicken.... but I couldn't taste them at all. I was almost disappointed that I didn't man up and add the 4 like Jamie said to. Next time I'll add the four like recipe says.

I can already tell that this pasta will become a staple in the summer. Easy, quick, fresh and minimal mess because everything gets bunged into a food processor and whizzed! Also when its stinking hot in our apartment and anything more than one stove element on is too much to handle this will be a perfect dinner.

If you want to give the entire meal a go, please let me know how you go otherwise I strongly recommend the rigatoni.
Jamie Oliver's Trapani-Style Rigatoni from 30 minute Meals.

Jamie Oliver's Trapani-Style Rigatoni from 30 minute Meals cookbook.

Serves 4

500g rigatoni pasta
40g parmesan cheese
100g whole blanched almonds (my packet of almonds said 110g... I used the whole packet)
2 cloves of garlic, peeled
1-2 red chilli's, stalk removed
2 large bunches of fresh basil
4 anchovy fillets in oil
450g cherry tomatoes
extra virgin olive oil

- Add the rigatoni to salted boiling water and cook according to packet instructions or al dente.

- While the pasta is cooking, make the Trapaneeeeeasy sauce :)

- Trapaneeeeesy sauce: Put the almonds, parmesan, garlic and chilli's into the food processor (using the bowl blade) and blitz until fine. Next add your anchovies, two thirds of your tomatoes and 1 1/2 bunches of basil and keep blitzing until it becomes a paste. Add about 2 tbsp of extra virgin olive oil, taste then season with some salt and pepper.

- Half your remaining tomatoes and pick the leaves off the 1/2 a bunch of basil left and set aside (I forgot to do this step...).

- When your pasta is cooked to perfection, reserve a little cooking water and add the pasta and sauce back to the hot pan, mix well and add a little splash of the cooking water if it looks a little dry to loosen it up. Toss the remaining tomatoes and basil in and serve immediately.

Enjoy your meal with the relief that there is hardly any washing up.

Thursday, 28 August 2014

Nigella Lawson 's Italian Traybake from Nigellissima.

"If at first you don't succeed, try, try again"
Remember that saying? Also remember my chicken tray bakes that take forever to cook and we end up eating at midnight or serving raw chicken to a dinner quest? Well... guess what?! I have not been put off by a chicken tray back. Nope. And all my efforts paid off!

SUCCESS!!! Wahhoooooooooo

This week I chose Nigella Lawson's Italian Traybake from Nigellissima. I was only serving two for dinner so halved the amount of meat in the recipe and made sure I didn't over fill my baking tray. No double layers, everything on a single layer. I pre-heated my oven as soon as I got in from work. And I left it in the oven for an hour, turning half way through. I cut my potatoes to the size the recipe told me to and butterflied my sausages. I was going to make this fail safe.

We had fluffy roast potatoes and chicken thighs that fell apart and sausages that had gnarly little crunchy bits on them. Soooo Delicious! Oh how I've missed fluffy roast potatoes. They were crunchy and soft and YUM!

I should have trusted Nigella first... She was one of my first true food hero's and her recipes always seem to impress! Her book 'How to be a Domestic Goddess' was the first Cookbook I stole from my mother and I still have that copy today. Oh I do love her and her dramatic and colourful ways of describing ingredients when she cooks.
Nigella Lawson 's Italian Traybake from Nigellissimia

 I found this recipe on her Nigellissima App....this weeks meal planning was pretty shocking. I worked an extra day this week and was totally not organised, so on my way home while I was stuck in traffic I meal planned. Yes I know... very illegal but I was a hungry woman who was stuck in a fogging up car in the pouring rain with a window half open getting a wet arm on a mission... who still had to face the supermarket. Most of the recipes I found online, knowing I had the books at home. There are so many good recipes online but I have thousands of pages sitting in my living room waiting to be cooked from and shared with you lovely readers. So I tried my best to find recipes that were from books I was yet to share with you. There are still so many recipes and meals and food I want to make and blog about. If time and money weren't an option I would eat like a king every meal (ok I defiantly want a dishwater too... or washing up wench). I would also probably be the size of a house...

I definitely recommend this meal as a mid week dinner you can quickly throw everything together in a baking dish, chuck it in the oven while you have a shower or get comfy and an hour later you have a mini roast dinner. The only addition I would add is some garlic cloves chucked in there in their skins so they get soft and mellow.
Nigella Lawson's Italian Traybake from Nigellissimia

Yay so excited a tray bake worked!! (photo looks like it was a little burnt but I swear I wasn't!).   It proves the saying right... keep trying (or traybaking) and eventually you'll get it right. Tristan was also pretty happy eating at a decent time and everything was cooked :)

Nigella Lawson's Italian Traybake from Nigellissimia.

serves 2
(recipe adapted slightly)

500g potatoes, cut into 2cm chunck
4 chicken thighs, deboned
3 italian sausages, butterflied
4 sprigs of fresh rosemary
1 lemon, zest
Salt and Pepper
olive oil

PRHEAT YOUR OVEN! 220°C or 400°F.
(if your oven is fan forced you make not need it on so high)

- Line the very base of your baking tray with foil or baking paper.

- Arrange your chopped potatoes, chicken thighs sausages in your baking tray. Make sure nothing is overlapping or on top of each other. If it is, split everything between two baking trays.

- Finely chop half the rosemary leaves and sprinkle over the chicken. Place the other sprigs of rosemary around the tray.

 - Zest the lemon over everything and give it all a good helping of salt and pepper.

- Finally drizzle with some olive oil and bung it in the oven for 1 hour or until everything is cooked through and the potatoes have a fluffy centre. If your oven is an uneven cooker (like mine) turn it half way through.

ENJOY!

Tuesday, 26 August 2014

Ricotta Dumplings with Tomato and Basil Sauce from Two Greedy Italians Cookbook by Gennaro Contaldo and Antonio Carluccio.

Have you ever made something that you are so proud of your self for that you keep telling you and who ever is around you over and over again and by the end of the day everyone is like 'Yeh we know, you made gnocchi'.

Yes that's right readers, I made gnocchi... from scratch. Ok if we're getting technical its not called gnocchi... its Ndundari (Ricotta Dumplings).

Making gnocchi (Ndundari) is something that I've wanted to do for a while but there is an element of unknown hanging around it because I've never made it before. This week I will not hide away from food, I will grow and make and - did I tell you I made gnocchi... from scratch!! Waahhoooo!

It was so damn good...
and fun...
and easy... believe it or not!

This recipe is from the cookbook Two Greedy Italians by Antonio Carluccio and Gennaro Contaldo. It uses ricotta cheese for these deliciously little tasty dumplings, not potato. It's one of Gennaro's recipes and I've seen him make it on the TV show a few times. He makes it look so easy and you know what?!... it was just as easy to make as he makes it look. No hidden tricks or anything. This is straight up honest food made from scratch. I loved that I knew exactly what went into the gnocchi and it didn't consist of 20 ingredients like some of the vacuum packets do. This had 7 ingredients in it, thats all. Flour, egg yolks, ricotta, parmesan, ground nutmeg, salt and pepper.

Ricotta Dumplings with Tomato and Basil Sauce by Gennaro Contaldo from Two Greedy Italians Cookbook.

Just put all your ingredients in a bowl, give it a mix then turn it out onto a floured bench and knead until you have a smooth dough. Roll the dough into a sausage and cut small bits off. There it is... you have gnocchi!
Ricotta Dumplings with Tomato and Basil Sauce by Gennaro Contaldo from Two Greedy Italians Cookbook.

Ricotta Dumplings with Tomato and Basil Sauce by Gennaro Contaldo from Two Greedy Italians Cookbook.

Ricotta Dumplings with Tomato and Basil Sauce by Gennaro Contaldo from Two Greedy Italians Cookbook.


I felt like an Italian Mama. All I needed was a large family to yell at to get them all to come to the dinner table, instead I had Tristan waiting patiently and a cat who has decided he likes to drink out of everything (yes I mean everything!) apart from his water bowl.

Ricotta Dumplings with Tomato and Basil Sauce by Gennaro Contaldo from Two Greedy Italians Cookbook.

Ricotta Dumplings with Tomato and Basil Sauce by Gennaro Contaldo from Two Greedy Italians Cookbook.


The sauce that went with the gnocchi was so simple and full of flavour. Olive oil, canned tomatoes, garlic and basil. So simple and fresh! It would have been nice to use home grown basil but Mr Caterpillar has made the basil plant his buffet so there is no basil leaves at all on the poor thing.

I will definitely make this again... and again! I absolutely loved it!

"Why I cooking so good??!" -Gennaro Contaldo

Ricotta Dumplings with Tomato and Basil Sauce by Gennaro Contaldo from Two Greedy Italians Cookbook.

Ndundari Con Salsa Di Pomodoro e Basilico from Two Greedy Italians Cookbook by Gennaro Contaldo and Antonio Carluccio.

(Ricotta Dumplings with Tomato and Basil Sauce)

serves 4 (or 2 very greedy people)

For the Ricotta Dumplings -
200g '00' Flour, plus extra for dusting
220g ricotta
3 egg yolks
20g freshly grated parmesan
pinch ground nutmeg
pinch sea salt
pinch cracked pepper

For the Tomato and Basil sauce -
700g tinned chopped tomatoes
a few fresh basil leaves
6 tbsp olive oil
3 garlic cloves, cut into thick slices

- Combine all the ingredients in a bowl. Give it a mix and turn out onto a floured work bench. Knead gently with the palm of your hand until the dough becomes smooth.

- Divide the dough into quarters and roll one of the quarters into a thin sausage shape. Cut pieces off about 2cm long and place on a tray. Do the same to the other 3 quarters. You may need to add a little more flour as you go, it depends on how wet your ricotta was or how big your egg yolks were. You don't want a dry dough but you don't want a sticky shaggy mess.

- Let dumplings sit on a tray while you make the sauce. Put a pot of boiling salted water on the stove, ready to go.

 - Heat the olive oil in a large sauce pan (large enough to hold all the dumplings and sauce together) on a medium heat and add the garlic. Don't walk away! Once the garlic begins to colour add you tinned tomatoes straight away to stop the garlic from colouring anymore, you don't want a bitter taste. Add the basil leaves to the sauce and bring to a simmer while you cook your ricotta dumplings.

- Add your dumplings to the boiling salted water. Wait until they rise to the top and the cook for a further 2 minutes simmering. Check they are cooked (I pulled one out and tastes it - if it doesn't taste floury and its not stick they are done) then add them to your simmering sauce.

- Serve immediately with a little extra grated parmesan if you desire.

ps. THESE ARE SO DAMN YUMMY!!

Sunday, 24 August 2014

Pasta Soup with Peas from 'The Art of Pasta' by Lucio Galletto & David Dale.

If you haven't worked it out by now ... I LOVE pasta. I've always thought I should have been born an Italian but no... born in Australia with a Swiss dad and an English mother. No Italian in me that I know of but I absolutely LOVE italian food. I eat alot of pasta... its quick to cook, a base for so many sauces and flavours and it comes in so many exciting shapes. Yes I get totally excited when I get to buy a new shape pasta each week! This Wednesday its was elbow shaped pasta. The recipe called for tubetti or ditalini but in the recipe photo it looks to me like elbow pasta. So I went with elbow pasta. They say you can use broken spaghetti for the recipe I chose or any miss-match broken pasta you may have in the bottom of your pasta jar.

Being still so chilly here I thought of making a pasta soup. Having a limited budget this week and also being a Wednesday, I finish work late, I needed a recipe that was quick and comforting. I went to a book that I often take off the shelf and flick through the pages, looking longingly at the food wishing I was having that for dinner. It's also a very beautiful book, a good coffee table book for a foodie. It's 'The Art of Pasta' by Lucio Galletto & David Dale. My copy is loosing the new book smell and not looking as pristine as it was when it first arrived home because I keep taking it out and admiring the photography and how delicious the recipes sound.
Pasta Soup with Peas from The Art of Pasta cookbook

Feeling like a soup I went to the 'Soups and Broths' chapter and it was like my prayers had been answered with the recipe 'Pasta soup with Peas'. It was exactly what I wanted and needed. Quick, not expensive, comforting and warm. BINGO! It's a bit like a one pan pasta because you cook the dried pasta in the broth which ends up being the soup part of the meal. Which is great for the washing up... only one pot!
Pasta Soup with Peas from The Art of Pasta cookbook

And it fulfils my love of frozen peas. I never ever thought I would say that. As a kid I hated peas. I didn't really hate much but peas were one of them and I hated them with a passion. The only time I had to eat them was a Ballet camp. Ballet camp was at an old boarding school in a small rural town in NSW run by nuns. It had a rule that everyone had to have a little bit of everything on their plate even if you didn't like it, but you still had to have the smallest serving of it. You also had to finish your entire plate of food and weren't allowed to waste, including dessert (which was never a problem for me). Lunch time meals were a fully fledged roast with the best roast potatoes I've ever eaten in my entire life along with meat and two veg. Every second day the veg was peas. I tried everything to escape eating them. I used to try knock them on the floor, hid them in a serviette or in my pockets... I even used to try swallow them hole but it was hard if everyone at your table had drunk all the water. I don't remember the specific moment when I suddenly started eating them but now I absolutely love them. Sweet and juicy and they can go with so many things. Such a handy thing to have in your freezer as a store cupboard staple and a versatile ingredient to add as an extra vegetable in something or into a salad or smashed with feta and mint or as the main attraction in the dish. So yummy! Pea's were defiantly the stand out ingredient in this pasta and everything went with it so well.
Pasta Soup with Peas from The Art of Pasta cookbook

Pasta Soup with Peas from 'The Art of Pasta' by Lucio Galletto & David Dale.

serves 4 
(recipe adapted slightly in regards to cooking times)

90ml extra virgin olive oil
25g butter
1 small white onion, finely chopped
70g pancetta (I used streaky bacon)
400g fresh or frozen peas (I used frozen, of course!)
sea salt and black pepper
200g tubetti, ditalini or broken spaghetti (I used elbows)
1 tablespoon finely chopped flat leaf parsley
80g freshly grated parmesan
1 litre of water or stock (I used half and half)

- Place oil and butter into a large pot (big enough to fit all your ingredients) and heat until butter is melted. Add your onion and pancetta (or bacon) and fry until onions are soft, about 6 minutes.

- Add the peas, some salt and pepper and stir everything together and cook for a couple of minutes.

- Add your water or stock and bring everything to a boil, cook peas for a few minutes. Add the pasta and cook for the indicated time on the packet (mine was about 8 minutes). Stir every now and then to make sure the pasta doesn't sink to the bottom and stick.

- Once the pasta is cooked, stir in the parsley and top with parmesan cheese to serve. YUM YUM YUM.

Wednesday, 20 August 2014

Rachel Khoo's Creme Caramel from The Little Paris Kitchen.


Lets just say this dessert saved the day.

Last night for dinner we had a friend over. We're having Roast Chicken Marylands with potatoes, carrot and onions. Sounds great, right? It was in a red wine marinade and all baked in a tray.

There it is. Did you see it? "all baked in a tray" these recipes are around to try me. You'd think that I'd have given up by now but no. I'm still persisting but this disaster of a dinner may have just done the trick for a while. If it was just Tristan and I for dinner I wouldn't have worried too much and shrugged it off as a bad dinner and been happy with Vegemite on toast but we had a guest. Yes, you read this right. We had a guest for dinner and it was a DISASTER!

First the chicken had gizzards inside which I didn't expect. Now I'll admit I'm a little squeamish with offal but if I'm prepared for it I can handle it. This I was not prepared for.

The potatoes even said boil them for 2 minutes and I did thinking I'm super safe with this recipe, the potatoes will definitely be cooked. Nup. Crunchy potatoes anyone?

I'm terrible at time management. It wasn't until 8:30pm that I revealed this monstrosity of a dish which had huge hunks of chicken. That were raw. Long sticks of raw carrot. Yes some were still just as raw as when I snacked on them before I put them in the baking tray, raw onions and did I mention crunchy potatoes?! Oh and the chicken was raw... I think I said that but I'll repeat it again. I served raw chicken to a dinner guest. It was a DISASTER! I hung my head in shame and hardly ate a thing. I kept saying sorry and I could feel myself getting sheepish and what I wanted to do was hide. Hide and hang my head in shame.

One day I will be able to master a chicken tray bake. Goodness knows what will happen if I try roast a whole chicken... dear oh dear I might resuscitate it instead of cook it!

Rachel khoo's creme caramel from My Little Paris Kitchen

At least I had this amazing dessert I made the night before to finish the dinner off with... hopefully it left a better last mouthful of dinner and the horrible roast chicken was erased from everyones memories. Mine might be scared for a while.

Creme Caramel is my favourite dessert I think of all times. I can guarantee that I will post more than once a recipe or review on a creme caramel. I'm even caught sometimes buying the ones pre-made in the supermarket cold section... They remind me of going to the local leagues club with the family and having my favourite dinner of all time. Spaghetti bolognese and a creme caramel. I have so many variations of this classic dessert and I've tried a couple but always go back to the simplest ones.

The recipe I chose was from one of my favourite cookbooks and cooking TV shows...

Rachel Khoo's Creme Caramel (Vanilla Cream with Caramel Sauce) from The little Paris Kitchen is sooooooo good! Such simple ingredients cooked in a perfect way. It did take alot longer in my oven than it was meant to but I'm thinking I'm going to have to double the time on everything I put in the oven.
Does it get any simpler than milk, vanilla, eggs and sugar?

Vanilla milk

This recipe wasn't overly sweet like some are and you get that rich bitterness through the caramel sauce by melting the sugar in a dry saucepan rather than with a little water. The recipe also says to cook it until it looks like the colour of cola. I have a guilty hungover pleasure for coca cola and I definitely don't want my caramel to look like that. It would taste burnt. I've have cooked caramel to that colour before and smoked the place out. Maybe more of a crimson sunset colour I would say.

dry caramel

To make your caramel in a dry pan make sure you don't add all your sugar at once and start with a clean dry pan. (I have learnt the hard way when I first started working in a kitchen and I had to google how to make a dry caramel during service. Not a very fun memory. Lots of sticky, burnt, crystallised pots). Start by adding a sprinkle in the bottom of your pan and place on a medium heat. Once that starts to melt sprinkle over a little more. Never put a spoon in the caramel, as temping as it is. Swirl the sugar in the pan gently but never stir it. Gradually add more, a little at a time making sure the last bit of sugar has melted and continue adding it until you have added all your sugar. The sugar can burn very quickly so when I first started making it I would take it on and off the heat so that if I thought it was getting away from me I could control it and allow the sugar to melt in the residual heat. Sounds complicated but it's not. If you a little hesitant to make it this way you can alway add some water to the sugar and boil it till golden. The difference in flavour is that when you melt the sugar in a dry pan you get more rich intense flavour where as when you add water to start with it has a sweeter taste and far less intensity.

The rest is easy peasy. That was the hard bit.

Rachel khoo's creme caramel from My Little Paris Kitchen

Rachel Khoo's Creme Caramel from My Little Paris Kitchen.

serves 6 (or as many ramekins you own - I made 8 small ones in various sizes)
(recipe adapted slightly - no cola colour here!)

For the Custard -
500mL milk
1 vanilla pod, sliced in half lengthways and seeds scraped
60 grams of sugar
3 eggs plus 2 egg yolks

For the Caramel -
250g caster sugar
2tbsp water

Preheat your oven to 110 degrees celsius.

Start with the Caramel. 
- Melt the 250g caster sugar in a clean dry pan gradually (see above for more details) until it becomes a crimson sunset colour. Add your 2 tbsp of water and stand back. This will spit and splutter and might seize on you. Let it calm down and get your self a heat proof spoon/spatular and dive it a little stire. Because all your sugar is added and melted it is ok to stir now. Never before.

- Divide caramel up into the ramekins evenly.

For the Custard.
- Boil milk and vanilla pod and vanilla seeds together and let sit to infuse while you whisk the eggs, extra yolks and 60g sugar together in a bowl. Careful not to over mix or you will get bubbly creme caramel bottoms.

- Pick out the pod from the milk. Pour the milk into the egg mixture whisking as you go so you don't scramble your eggs. Make sure it is all combined and then divide between the ramekins.

- Place the ramekins in a roasting try with a thin tea towel on the bottom (I was taught this trick at TAFE to regulate the cooking and so they don't rattle around in your tray). Pour cold water into the baking tray until it comes half way up the sides of the ramekins. Place into the oven until the custard is set around the edges but it still has a sexy wobble going on. Rachel says 30-40 minutes but I'm coming to terms that in my oven you have to double the amount of time they are in the oven.

I baked mine for about 60 - 70min but kept checking because I had a variety of sizes cooking toether. Ideally you want all the same sized ramekins.

- Remove from the water and allow them to rest in the fridge overnight or for at least 4 hours... I waited maybe an hour. Make sure you cover them in the fridge well or they will take on what ever your fridge smells of at the time... onion creme caramel isn't very tasty.

- To serve, run a knife around the edges and dip in hot water for about 30 seconds then invert onto a serving plate. Enjoy these delicious little morsels of custardy goodness!

Tuesday, 19 August 2014

Jamie Oliver's Shepherd's Pie vs Milkman's Pie from Jamie's Great Britain.

I don't think I'm having a good cooking week this week and it's only Tuesday.... I will explain in tomorrow's post... #dinnerpartynightmares eeekkk

Jamie Oliver's Shepherd's Pie vs Milkman's Pie from Jamie's Great Britain.

Last nights dinner was Slop pie... sorry I mean Shepherds Pie. My mum always made Shepherds pie when I was a kid and used her recipe of beef bolognese sauce and added mash potato on top. I was never a huge fan of mash, my dad always says potatoes give him a headache even though we all know he just doesn't like them, where as mum, LOVES mash potatoes. To her horror I would smother the entire shepherd pie in tomato sauce (ketchup) and sit there wishing I was having pasta for dinner.

It is cold and rainy at the moment in Sydney so I wanted something that meant the oven got to stay on for a while to warm the place up but also something that was cozy and homey.  Choosing from a book I haven't yet blogged about I went to trusty Jamie Oliver. I love his recipes and books! But I think you already guessed that one. I can't wait to make the honey and lavender shortbread from the book!

I thought... cold and rainy.... England is cold and rainy. (Sorry UK readers... I've only ever been to the UK in winter and thats all my mum ever says about England... She got rained out and moved to Australia and never looked back) But I do love a rainy night when you can hear the pitter patter on the roof as you drift off to sleep all rugged up in woollen blankets and sock tucked into your pants. So thats how I chose a recipe from Jamie's Great Britain. Shepherd's Pie vs Milkman's Pie. It was very different to what I would normally call a Shepherd's pie but in a good way. It was creamy and meaty with the soft mash potato on top and a surprise cheesy layer in the middle. Even better for lunch the next day reheated.
Jamie Oliver's Shepherd's Pie vs Milkman's Pie from Jamie's Great Britain.

But let me explain the slop pie... this is not dissing Jamie at all. When it was time to dollop the mash potato on top I hadn't let it reduce enough so the lovely creamy dollop of mash potato started to sink into the saucy filling which was then starting to rise and flow over the edges of my pie dish. I proceeded to continue dolloping the mash on top thinking it would be ok until it started to look like an upside down shepherd's pie on the verge of over flowing if I didn't stop what I was doing and pour some of the sauce out. As I poured some out, some of the potato came out with it, I had melted stringy cheese over the edges, sauce down the side of the dish, sauce slopped and splashed over the bench.... It was a HUGE MESS. A delicious mess but still huge and a lot of washing up. Given all that I still scraped the pan to not waste any and ate it as entree while my Slop... sorry Shepherd's/Milkman's Pie was cooking in the over.

Jamie Oliver's Shepherd's Pie vs Milkman's Pie from Jamie's Great Britain.

If I've got any tips.... Let it reduce properly... don't be impatient like me (I blame hunger) and get your self a dishwasher or washing up wench. My wench is still in a sling so he's only a bench wiper at the moment.

I would definitely make this again but would maybe rethink my pots and pans situation...hmmm...

Jamie Oliver's Shepherd's Pie vs Milkman's Pie from Jamie's Great Britain.

Jamie Oliver's Shepherd's Pie vs Milkman's Pie from Jamie's Great Britain.

serves 6
(recipe adapted slightly)

2 onions, roughly chopped
2 carrots, peeled and roughly chopped
olive oil
50g butter
salt and white pepper
8 sprigs of fresh thyme, leaves picked
2 bay leaves (I used dry but it says fresh)
500g veal mince
1 heaped tbsp plain flour
1 lemon, zest only
1 chicken stock cube, crumbled
110mL Bitter (I used VB)
800g potatoes, peeled and quarted
splash of milk
150g button mushrooms, thinly sliced
200mL pure cream
50 cheddar cheese, grated

- Fry the onions, carrots, bay leaves, thyme, some salt and pepper in a pan with the olive oil and butter until vegetables have softened. Make sure you stir often so they don't catch and burn.

- Add the veal mince and break up with a wooden spoon while browning it. Add flour once the meat is broken up and the zest of the lemon. Cook it until the liquid which came out of the meat has cooked away.

- Once it it frying again, add the bitter and just enough water to cover the meat (don't add too much here.. I think this is also where I went wrong and added maybe a little too much water). Bring everything to a boil and then reduce heat and allow to simmer with the lid half on for 1 hour on a low heat.

- Meanwhile preheat your oven to 180 degrees celsius and boil your potatoes until soft and almost falling apart. Drain the potatoes and allow to sit for a couple of minutes so that can steam off any excess liquid. I mashed them with a hand masher with a splash of milk, a dollop of butter and a generous serving of salt and pepper. For someone who doesn't like mash... mmmm mmm yum!

- Let mash sit until your sauce has had its 1 hour cooking then add your mushrooms and cream and simmer until the sauce has thicken considerably.

- Once it is no longer swimming in sauce, pour it into a baking dish and sprinkle over the grated cheddar cheese. Dollop your mash potato on top or use a fork to squash it down and as Jamie puts it - "make squiffs and quiffs".

- Place it in the oven for about 40 minutes or until golden on top and serve with some steamed broccoli or buttered peas.

So so tasty!!

...

#giveaway 15 minute meals 30 minute meals 5 Minute Food Fix A Common Table A Kitchen in the Valley A Modern Way to Eat Acquacotta Adam Liaw Alison Roman Alison Thompson almonds Amelia Morris Anna Jones Annie Herron Antonio Carluccio Anya von Bremzen apple apps Apt 2b Baking Co Artisan Sourdough Made Simple Ashley Rodriguez autumn avocado babies baby baby shower bacon Bake baked pasta baking Bali Barcelona Cult Recipes basil BBQ beans beef beetroot Bill Granger biscuits blondies Bon Appetempt Bowl & Spoon bread breadcrumbs broccoli brussel sprouts burgers burrito buttercream butternut squash byo cabbage cake calzone camping Carla Lali Music carrot cauliflower chicken childhood chilli chinese cooking chipotle chocolate chorizo chutney Claire Ptak Classic German Baking Classics 1 Classics 2 coconut Comfort Food cookbook addict cookies cordial corn cucumber curry custard Cynthia Chen McTernan Date Night In David Dale Delicious. magazine dessert Dining In dinner party nightmares Dinner: A Love Story dip doings Donna Hay Donna Hay Magazine dumplings easy egg eggplant Eleanor Ford Emiko Davies Emilie Raffa Emma Spitzer ENOTW Every Night of the Week Veg family Fast Fresh Simple Feast Feasting fennel fiction Fire Islands Five Quarters Flora Sheedan Florentine Food & Wine Food52 Fresh & Light Fress frozen dessert Fuchsia Dunlop galette Gatherings Genius Recipes Gennaro Contaldo Gennaro's Fast Cook Italian Gennaro's Italian Bakery Gennaro's Pasta Perfecto! german ginger gnocchi goats cheese granola Greenfeast gumbo Gwyneth Paltrow Happenings holiday home home-grown herbs How to be a Domestic Goddess hungry Hunter Valley ice-cream indian Indonesian Cooking involtini It's All Easy It's all Good jam Jamie Does Jamie Magazine Jamie Oliver Jamie's America Jamie's Great Britain Jamie's Italy Jane Hornby japanese Jenny Rosenstrach Jessica Fechtor Julia Turshen Justine Schofield. The Weeknight Cookbook kale Karen Martini kimchi Kitchen korean Kylee Newton LA Cult Recipes Land of Fish and Rice leek lemon lentils life Light of Lucia Link Love links long weekends love Luciana Sampogna Lucio Galletto Lucy Tweed Luisa Weiss Maggie Beer maple Marc Grossman Marcella Hazan Marian Burros Martha Stewart Matthew Evans meal planning meatballs meatloaf mess mexican Michael James Michelle Crawford mince mint miso Monte Carlos Mum's cooking mushroom mussels My Berlin Kitchen My Kitchen Year Naturally Ella new beginnings New York Cult recipes Nigel Slater Nigelissima Nigella Bites Nigella Express Nigella Lawson No Time to Cook noodles North West Island nostalgia Not Just Jam NotWithoutSalt oats omelette paddle pops parsley pasta Paul McIntyre Paul West Paulene Christie pea pecans pesto pickle pickles pie pizza Plenty Plenty More plum pork potato prawns preserving prosciutto pudding pumpkin quesadilla quinoa Rachel eats Rachel Khoo Rachel Roddy ragu rambles raspberry recipe rhubarb rice risotto River Cottage Australia romantic Ruth Reichl saffron salad Sally Wise salsa verde Salt Fat Acid Heat Samin Nosrat sandwiches Sara Forte sausage Save with Jamie schupfnudeln seafood sesame Seven Spoons Simon David Simple slow cooker Slow Cooker Central Small Victories Sophie Hansen soup sourdough Sprouted Kitchen starters Stephanie Danler Stir stir-fry stuffed sushi Sweet Amandine sweet potato Sweetbitter tahini Taking Stock Tara O-Brady Taste Tibet Tasting Rome thai Thai Food Made Easy The Art of Pasta The Best of Maggie Beer The Comfort Bake The Dinner Ladies The Little Book of Slow The Little Paris Kitchen The Modern Cook's Year The Modern Preserver The Naked Chef The New Classics The Tivoli Road Baker The Violet Bakery Cookbook The Wednesday Chef The Zen Kitchen thyme Tom Kime tomato tuna turkey tuscany Two Greedy Italians Two Red Bowls Valeria Necchio vanilla veal vegetables vegetarian Veneto vietnamese wedding wedding cake What can I bring? What to Bake and How to Bake it Where Cooking Begins Where the Heart is yoghurt Yossy Arefi Yotam Ottolenghi Yumi Stynes zucchini