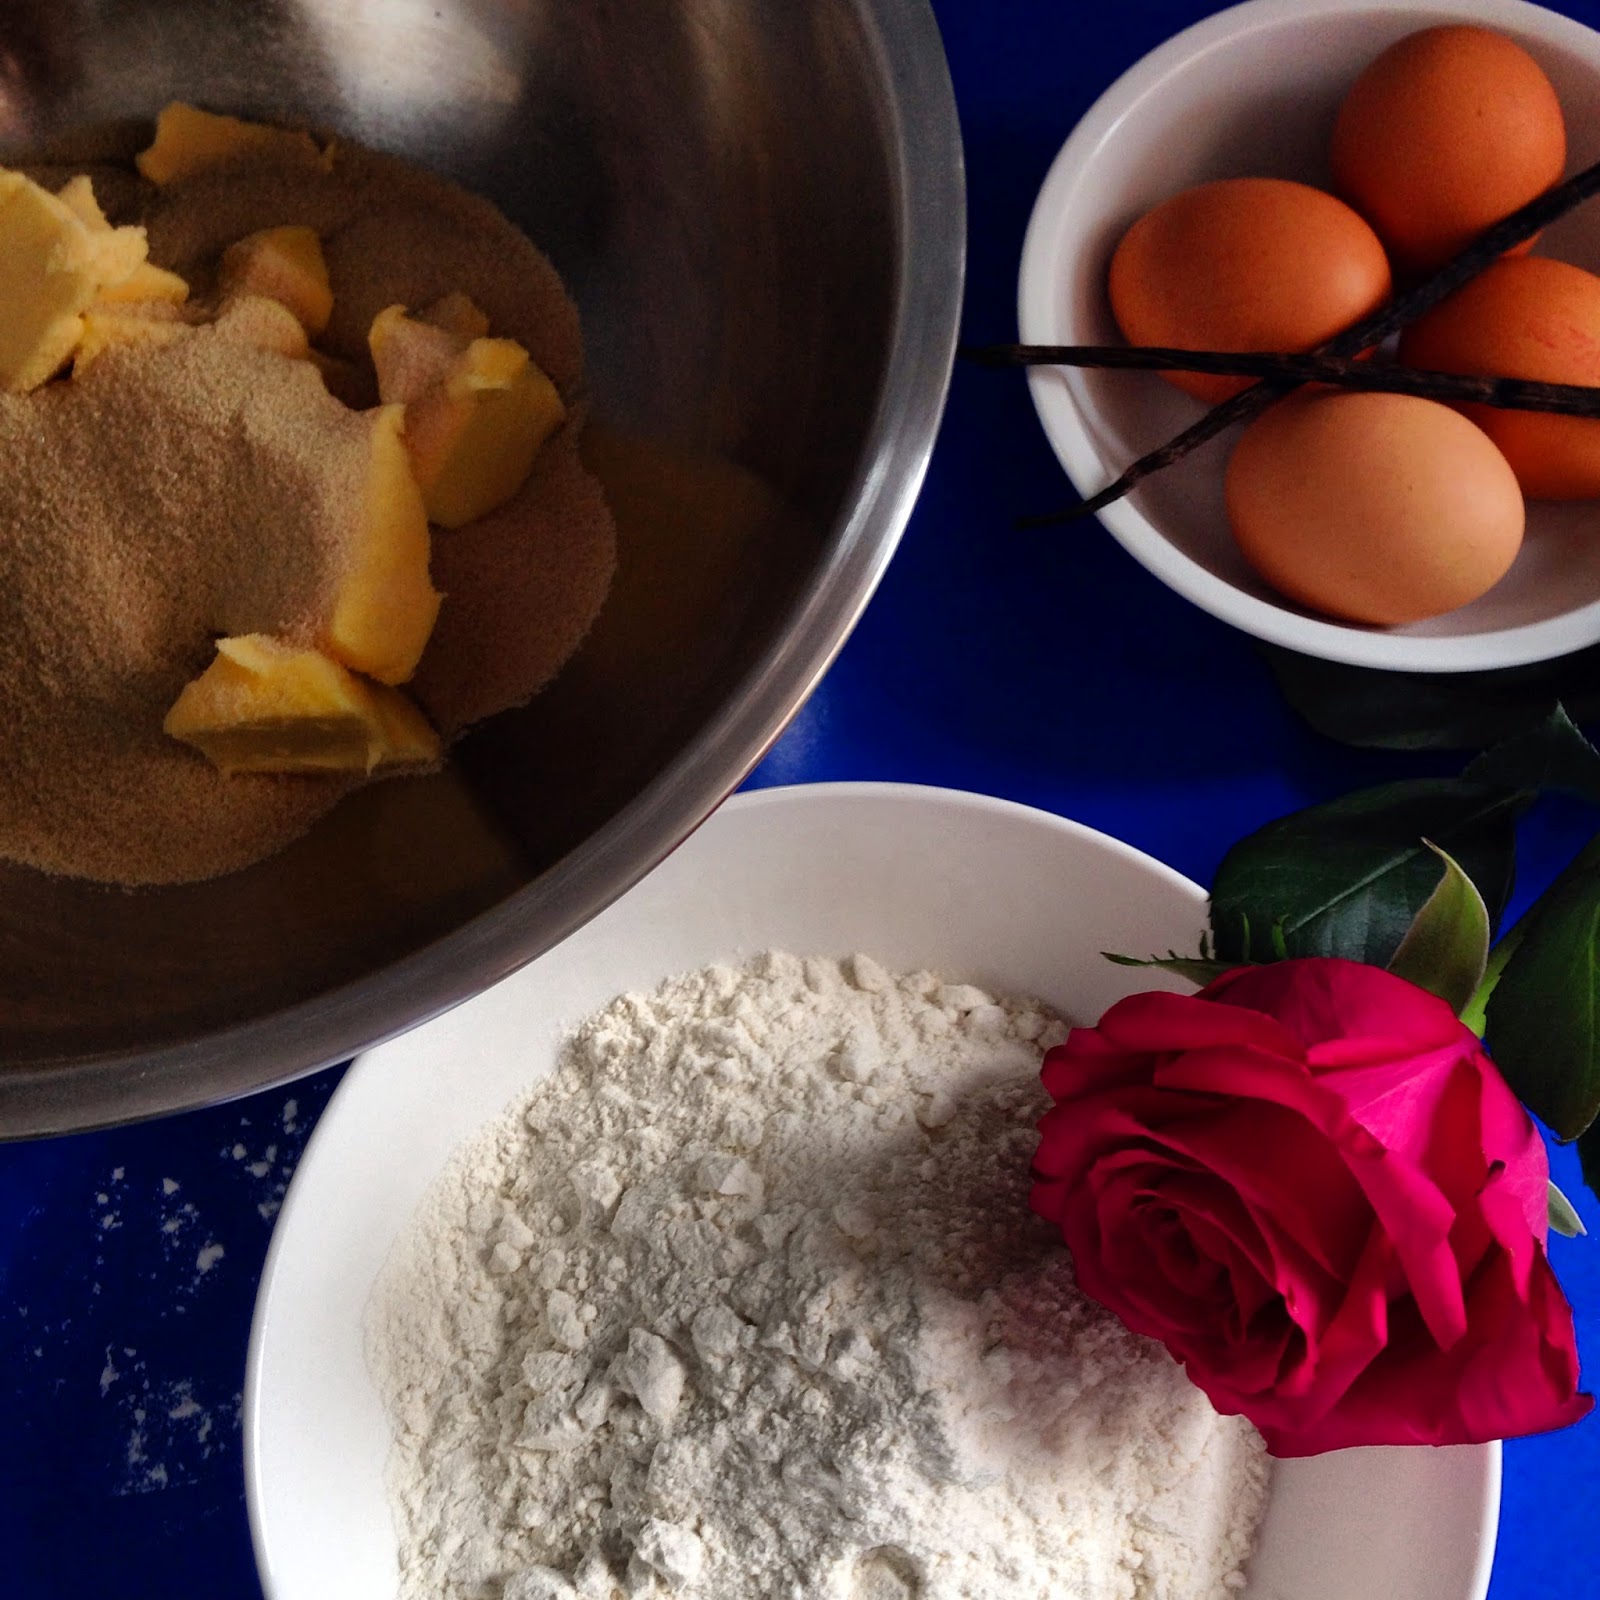
Monday, 10 November 2014

Something a little different: Nostalgia.

Do you ever feel nostalgic about food? about a specific smell? Or even a lip gloss you used to use when you were in high school? Does it bring memories of your childhood or teenage years flooding back?

Or do you simply crave those memories and create that smell yourself?

Thats what I did tonight. Having a quarter life crisis at the moment and having a down day I wanted something that was home cooked that brought back memories of my mum's cooking when I was younger and had not a care in the world. It wasn't quite the same or even as good as her's but it filled our tiny apartment with the smell of my mum's cooking and it has given me a satisfied full tummy like when I was little. And I'm sure ever mum has their own version of chicken curry but nothing does it like your own mum's.

I remember asking for this curry for my birthday dinner one year catching my mum by surprise, normally I wanted to go out to the little Italian restaurant at the end of our street which served sizzling garlic prawns in little black pots. But I wanted mum's chicken curry.

So I thought tonight instead of sharing a recipe I've cooked from a book, I'd share my mum's chicken curry which always makes me feel like I'm home again. Given that I didn't have chicken and only turkey mince and no eggplant, only carrots and broccoli the photo looks a little different but the recipe is right. I know this won't bring the childhood memories back like it does for me but it's still a pretty damn good dinner, nostalgic or not.

What smell or home cooked meal takes you back to a place where it feels all warm and fuzzy?


My Mum's Chicken Curry.

1 tbsp vegetable oil
1 glove garlic, crushed
1 onion, chopped
500g chicken thighs, cut into rough pieces
2 tsp Keen's traditional curry powder (if it's not Keen's it wont taste the same)
1 tbsp soy sauce
2 tbsp fish sauce
1 tbsp sesame oil
2 tbsp lemon juice
400ml coconut cream
1 eggplant, roughly cubed

- Heat vegetable oil in a large saucepan over medium heat and fry garlic and onion till golden and soft.

- Add eggplant and cook for a few minutes. Add chicken and cook until browned.

- Add curry powder, soy sauce, fish sauce,sesame oil, lemon juice and coconut milk. Stir and bring to a boil. Reduce to a simmer and cook for 20 minutes on low.

- Serve with steamed rice, tomato salsa (recipe below), cucumber cooler (recipe below) and poppadoms.

Tomato Salsa.

2 tomatoes, diced into 1cm cubes (roughly)
1/2 red onion, finely diced
pinch of salt and pepper
1 tbsp balsamic vinegar
1 tbsp extra virgin olive oil

- Mix everything together and serve.

Cucumber Cooler.

1/2 cup light sour cream (or greek yoghurt)
1/2 continental cucumber, diced in 1cm pieces (roughly)
pinch of salt and pepper
1/2 tsp dried dill tips

- Mix everything together and serve.

Monday, 3 November 2014

Quinoa with Butternut Squash, Scallions (spring onions) and Parsley from It's all Good.

Quinoa. Who hasn't heard of this super food lately? it's everywhere! quinoa everything!!!

I am going to admit that when I first saw this ingredient everywhere I pronounced it 'Quin-oh-ah'. Yep, I was one of them. Until everyone told me it was actually pronounced 'Keen-wa'  I said it wrong for months. I then thought the ingredient was silly because of it's name. Then I tasted it. I was a convert. A super healthy grain that works well in salads and is a change from rice and pasta and also works well as a side and also filling out chicken patties or making veggie burgers from scratch. Plus you feel super healthy while you eat it knowing it's a superfood. Guilt free.

To go with the Beer Butt Chicken and Potato Salad I made the other week I also made the Quinoa with Butternut Squash, Scallions (spring onions) and Parsley from It's all Good by Gwyneth Paltrow & Julia Turshen. It was so fresh and healthy and really hit the spot as a side to the chicken. It was like the healthy opposite to the potato salad. I added some baby spinach leaves to it to add a little greenery and they worked well. I served it as a warm salad and it was really delicious.

I'm always a little hesitant when it comes to cooking things like quinoa and rice as I'm so used to making it in the microwave but since our microwave busted I am a stovetop girl now. It's not as scary as I thought it would be, it's actually really really easy. I followed the recipe for Perfectly cooked Quinoa and presto! Perfectly cooked Quinoa! Definitely have a go at cooking quinoa, it's easier than it seems.
Quinoa with Butternut Squash, Scallions (spring onions) and Parsley from It's all Good.

Quinoa with Butternut Squash, Scallions (spring onions) and Parsley from It's all Good.

serves 4 
(recipe adapted slightly)

1/2 butternut squash, peeled and cut roughly into 2cm cubes
extra virgin olive oil
sea salt
1 tbsp lemon juice
2 cups of perfectly cooked quinoa (see recipe below)
3 spring onions 
3/4 cup chopped parsley
2 small handfuls of baby spinach leaves

- Preheat oven to 190C or 400F.

- Place butternut squash, a drizzle of extra virgin olive oil and a sprinkle of sea salt on a baking tray and give it a good toss so that all the squash is covered in the oil.

- Bake for about 15-20 minutes or until soft.

- Whisk lemon juice with 3 tbsp of olive oil in a large mixing bowl and add a pinch of salt. While the butternut squash is still warm but not piping hot, toss it in this lemon and oil mixture along with the quinoa, spring onions, parsley and baby spinach. 

- Taste and adjust seasoning and lemon juice if needed. Enjoy!

Perfectly Cooked Quinoa from It's all Good.

makes 3 cups
(recipe adapted into ml's)

1 cup quinoa
440ml water
big pinch sea salt

- Rinse quinoa in a fine mesh sieve.

- Place the quinoa, salt and water (cold) in a pot and bring to a boil. Turn the heat to low, cover with a lid or foil and cook for about 12-15 minutes or until all the liquid has been absorbed.

- Turn the heat off, place a dry piece of paper towel between the pot and lid (or your homemade foil lid) and let it sit for 5 minutes.

- Fluff with a fork and serve.

Sunday, 2 November 2014

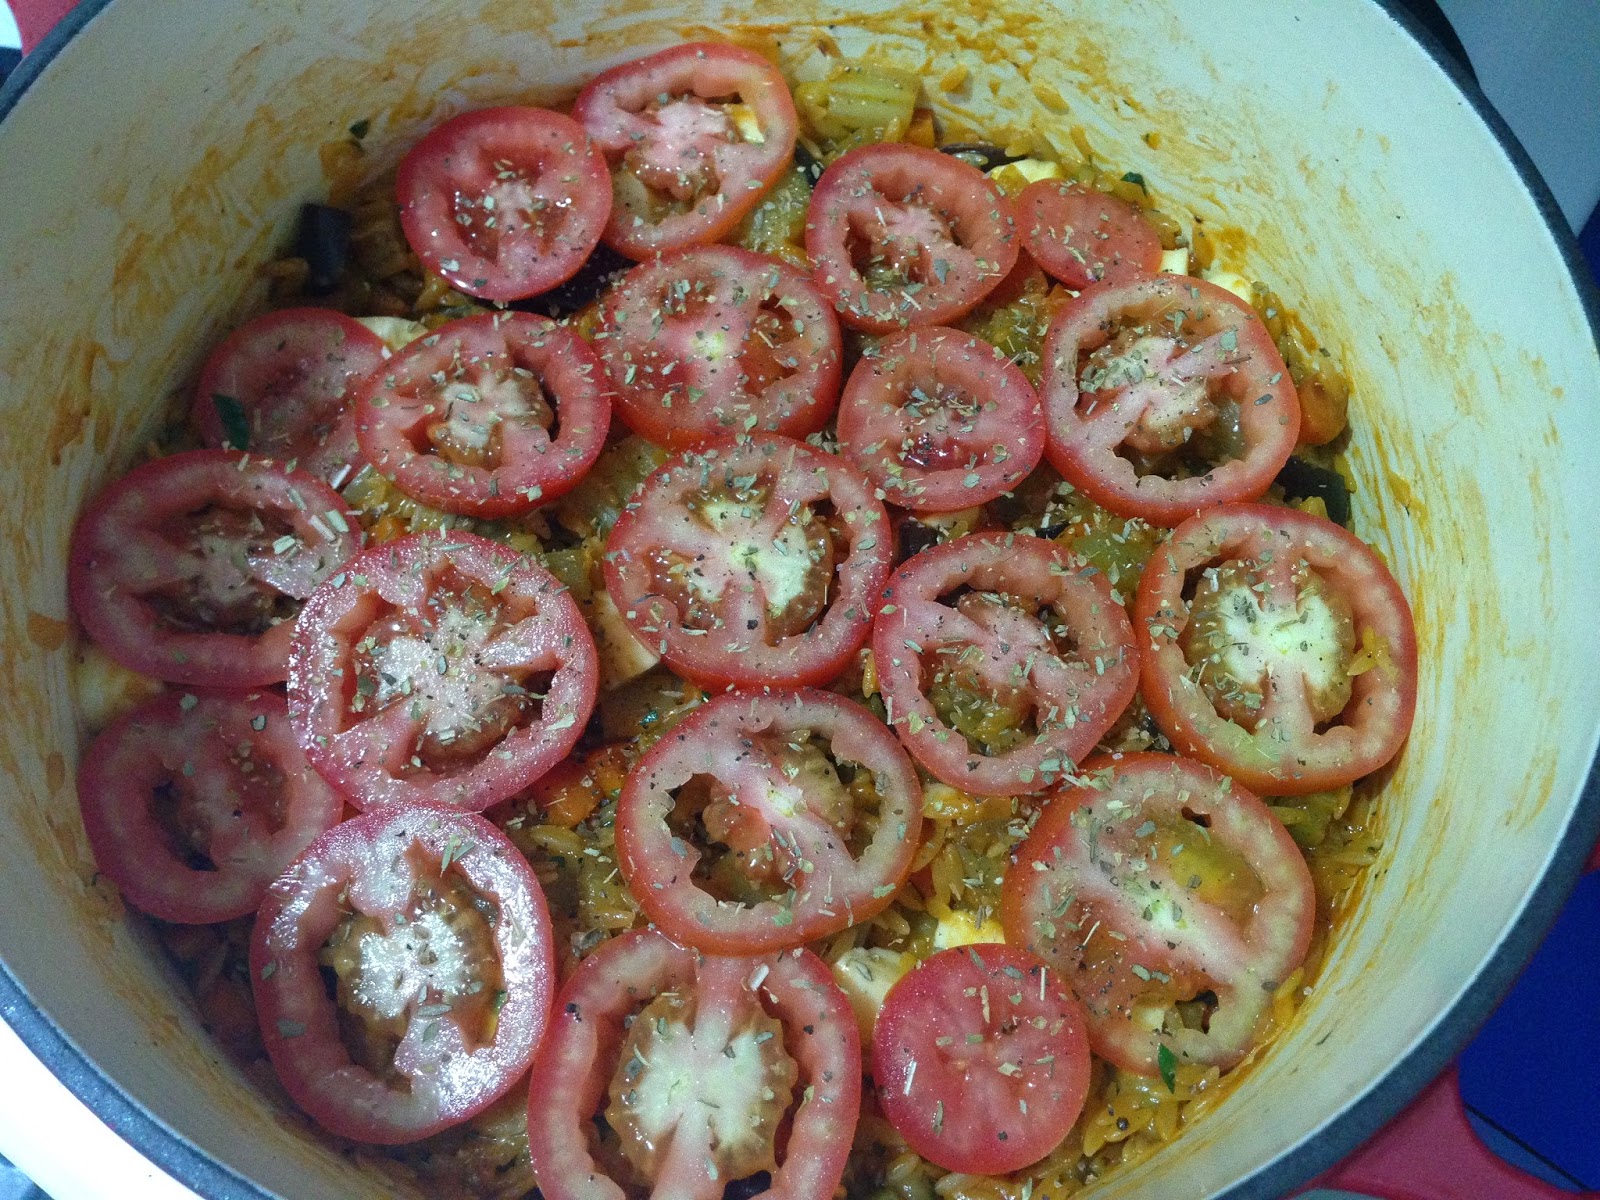
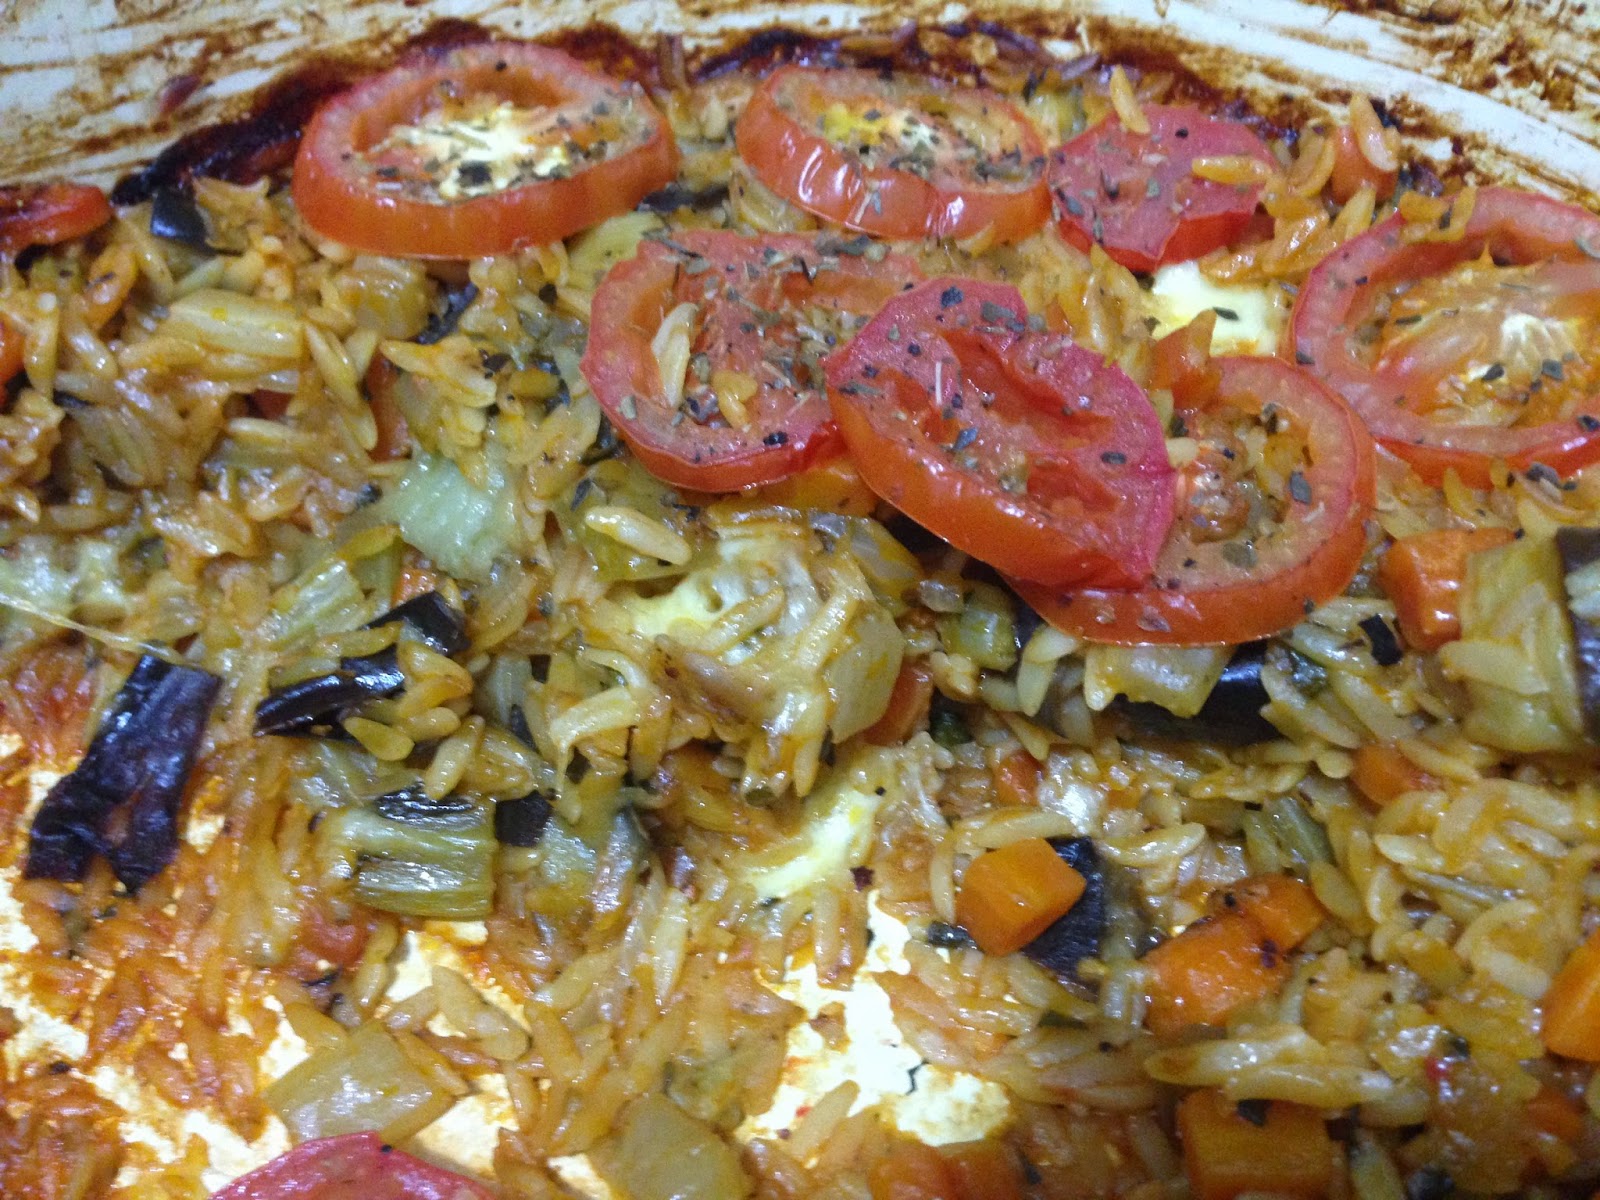
Yotam Ottolenghi's baked orzo with mozzarella and oregano from Plenty More.

We all know how much I love a good pasta bake right? Well have I found a winner for you!

Rich, tomatoey, vegetable-full, cheesy and full of flavour. Does it get any better than that?!

This months Delicious. magazine features an exclusive extract from UK Chef Yotam Ottolenghi's new vegetarian cookbook Plenty More. His previous vegetarian cookbook Plenty is such a fantastic cookbook even if your not a vegetarian because it has salad and side option which go great with any meat. It also has some great stews that most meat eaters will completely forget that there isn't any meat in the dish in the first place. This little snippet Delicious. has provided has made me want this new cookbook so badly (I might have to visit book depository after I finish this post). Plus this months (November 2014) issue of Delicious magazine is a gooden! definaly go out and pick one up. now. There is so many recipes in it getting you in the mood for summer and food which just makes you want to host a summer party. Plus this weather we're having at the moment in Sydney is pretty good too for wanted to host summer lunches with huge jugs of mocktails full to the bring of ice and fresh mint.

The recipe that caught my eye was the Baked Orzo with Mozzarella and oregano. Umm.... yum!

Yotam Ottolenghi's approach to cooking vegetables is to make them 'sing with flavour' and I have to agree. The few recipes I've made of his in the past really do show off how delicious vegetables are as the hero and not just the runner up on the side.

This pasta bake is a little fiddley in the fact that you need to fry the vegetables off separately then add them all back in the pan then pour everything into a oven safe dish to bake it. I kinda cheated in this section and used a oven proof dish to fry everything in then I didn't have as much washing up in the end.
Yotam Ottolenghi baked orzo with mozzarella and oregano from Plenty More

First I fried the cubed eggplant in some olive oil for about 8 minutes (yes I actually used a timer for this so I could kind of forget about it and come back and stir it every now and again while I chopped the rest of the goodies) then used a slotted spoon (or tongs) to take the eggplant out and let it drain on kitchen paper. Next I fried the carrots and celery for about 6 minutes and instead of taking them out of them pan I just added my onions and garlic and cooked it all for a further 5 minutes until they were soft.

I then added the orzo (which is also called risoni pasta) and tomato paste, gave it a good stir for a couple of minutes. Added the stock, fresh oregano, lemon zest and eggplant. I brought it to a boil then took it off the heat and added the mozzarella, parmesan, salt and pepper. At this point I should have poured everything into an oven proof dish but I was already using one so I just gave it all a good mix then arranged slices of tomatoes on top, sprinkled it with dried oregano, salt and pepper and baked it for 40 minutes at 200C (or 400F).

It then says cook until all the stock is absorbed but all my stock was pretty much absorbed before it went into the oven. I was a little worried I'd done it wrong and read the recipe wrong, again! But I re-read the recipe about 6 times and double checked the markings on my jug about 10 times and it all seemed right and it was a waiting game to see if it actually worked or not.

It worked!! YAY! It's going to be super hot when you take it out of the oven so let it sit for 5 minutes and then dig in! The cheese is stringy and vegetables full of flavour... this is also great cold the next day eaten straight out of the pot.

I defiantly recommend to give this a go if your a pasta bake lover like me. It brought back memories of my high school days and being surrounded by friends at my mums kitchen bench as we all devoured the easiest pasta bake known to 16 year old girls.

This will defiantly make an appearance again on our dinner table, it was freakin' delicious!

(I apologise for this photo... hunger 1 : dani 0)

Yotam Ottolenghi baked orzo with mozzarella and oregano from Plenty More

Yotam Ottolenghi's baked orzo with mozzarella and oregano from Plenty More.

serves 4
(recipe adapted slightly, excerpt taken from Delicious. magazine Nov 2014)

 100ml olive oil
1 large eggplant, cut into 2cm pieces
4 carrots, peeled, cut into 1.5cm pieces
4 celery stalks, cut into 1.5cm pieces
1 large onion, finely chopped
3 garlic cloves, crushed
250g orzo (risoni) pasta
2 tsp tomato paste
375ml vegetable stock
1/4 cup chopped fresh oregano leaves
zest of 1 lemon, finely grated
120g mozzarella, cut into 1cm pieces
1/2 cup grated parmesan
3 tomatoes, cut into 1cm slices
1 tsp dried oregano

- Preheat oven to 200C or 400F.

- In a oven proof pot heat the oil on a medium heat and fry the eggplant for about 8 minutes, stirring now and then until golden. Remove from pan using a slotted spoon or tongs and drain on some kitchen towel.

- In the same pan (keeping the oil) fry the celery and carrots for about 6 minutes. Add the onion and garlic and good for a further 5 minutes until everything is soft.

- Add the orzo (risoni) and tomato paste and cook for a couple of minutes giving it a good stir. Then add the stock, fresh oregano, lemon zest and eggplant. Bring to a boil.

- Remove from the heat and stir in the mozzarella, parmesan, 1 tsp salt and 1/2 tsp grounf black pepper. Mix well.

- Arrange the sliced tomato over the top. Sprinkle with the dried oregano and a pinch of salt and pepper. Cover (I used the lid to my pot but otherwise foil will be fine) and bake for 40 minutes or until pasta is cooked through.

- Let sit for 5 minutes before serving (or you'll burn the roof of your mouth off!).

Wednesday, 29 October 2014

Donna Hay's potato salad from Modern Classics 1.

There is always a divide between people who like creamy potato salad and people who like an olive oil based dressed potato salad. I'm going to have to stand square in the middle because I personally love ALL potato salads. Ok maybe not the ones that have pineapple in them... ew. I don't have a specific preference if its creamy or not... having potato salad means the beginning of summer to me. It reminds me of Christmas day, beach BBQ's, hot summer days by the pool, eating off paper plates using plastic forks and always being surrounded by friends and family. It's such a gathering's food that I sometimes make it for the two of us and indulge in it the next day enjoying my huge bowl of carbs telling myself it's all ok because potato is technically a vegetable so I'm being health conscious.. right??

This specific time I made potato salad it wasn't to stuff myself but we had friends over for dinner and our little oven heats the entire apartment up when you turn it on and on hot days it turns into a sauna so anything other than boiled potatoes was out of the question. I decided to make Donna Hay's potato salad from Modern Classics 1. It is a creamy version so if you hate the creamy version probably stop reading now but if you like them or sit in the middle like me, keep reading because this is a simple and devilishly naughty but divine potato salad. It wont win any health awards let me tell you but mmmm yum!

The recipe says boil the potatoes whole then slice them but as normal I didn't read the recipe properly until I had cut all my potatoes and then it was too late so I cut them first then boiled them which seemed to work ok too. I also added a splash of vinegar to the dressing as I couldn't help myself and I love a good little tang on a dressing.

I served this potato salad with Jamie Oliver's Beer Butt Chicken I blogged about earlier (yes this post is LONG over due.. Im very sorry about that) and I also apologise about the lack of photo's... hunger always wins!

I would definitely make this again if friends were over but if your not a fan of creamy based salads this one is unfortunately not for you. I on the other hand, LOVED IT!

Donna Hay potato salad modern classics 1

Potato salad.

serves 4 -as a side dish
recipe adapted from Donna Hay's Modern Classics 1

1kg potatoes, washed
1/4 cup chopped flat leaf parsley
3 spring onions, finely chopped

dressing:
1/2 cup whole egg mayonnaise
1/2 cup sour cream
splash of white wine vinegar
pinch of salt and pepper

- Cook potatoes in boiling water until they are cooked through and soft (keep checking them as time will vary depending on the size of your potatoes). Drain. Refrigerate them until cool then cut into desired shapes. I sliced mine thickly to match the picture in the cookbook but this is where you can get creative.

- Make the dressing: combine the mayonnaise, sour cream, vinegar, salt and pepper in a small bowl and mix well. Taste and see if you need more seasoning or vinegar to your taste.

- Combine the cooled potatoes, parsley, spring onions and dressing together in a large bowl.

- Keep chilled if not serving straight away or serve it and enjoy!

Monday, 20 October 2014

Devil's Double Choc Malt Cookies from Jamie Oliver's Comfort Food.

Ok Just going to say it.

How good is my photo?!?

I can't take total credit for it. I had help from a lovely little one who is much better at this sort of thing than me and she supplied the flowers to cheer me up. How beautiful are they??? I love them.

Last week I was asked by my big sister to bake a cake for 30 people for Sunday lunch. Yes, I said 30. You read it correct the first time. Of course I said I'd do it... who can ever say no to their big sister?! If you're the youngest (like me) you adore your older sister from when you first sat outside her bedroom door watching her put her make-up on thinking that all you ever wanted to be when you grew up was exactly like her. So yes was an easy answer when she asked.

I'm sure you've all heard about my tiny oven so how was I meant to bake a cake for 30 people in it you ask? I had a plan to make two cakes. And my plan also consisted of a lovely little lady to come and help me bake all afternoon.

We made a dark chocolate mud cake and a white chocolate mud cake (I will blog about these cakes in a future post... I promise there is more to come and much more frequently). But it totally wasn't fair of us to bake all afternoon and not actually end up eat anything deliciously home-baked and naughty so it was a completely logical idea when we decided to make cookies.

Early that morning when I went to the supermarket to get ingredients (oh by the way... Chocolate is super expensive!?! Cadbury what happened!) I also added ingredients onto the list for these decadent cookies from Jamie Oliver's new book Comfort Food (by the way this book is BEAUTIFUL!) which I had been eye-ing off for a while and what better excuse than now to make them. I needed to pick up a few ingredients I'd never made cookies with before; Horlicks which is a powdered malt drink and condensed milk. I've used condensed milk a heap of times before but not in a cookies so I was super keen to see how these would turn out.

The cookie dough was a tough one to stir... my lovely helper ended up with a blister on her finger :( but totally worth it (I think) :) they were fudgy, rich, malty and just like every home baked cookie should be... chewy in the centre. They made you want a hot cup of tea or cold glass of milk. YUM. And they were a melt and mix recipe which I LOVE! it meant the hand held mixer didn't have to come out of the box and the clean up was super easy.

I defiantly recommend you give these a go - they have smashed up Maltesers inside them... how can these taste bad?! You can also freeze the raw cookie dough so you can bake them in small batches so you always have freshly baked cookies only 15 minutes away.

You will be super impressed with yourself after making these. Make ice cream sandwiches with them for a cheeky little dessert when you have friends over or just have them as a decadent afternoon tea treat. mmmm think I'll go and get myself one after all this talking about them.

And a quick but BIG THANKYOU to my little baking helper over the weekend! You are amazing!!

Devil's Double Choc Malt Cookies from Jamie Oliver's Comfort Food.

Makes 24

50g unsalted butter
200g quality dark chocolate (70%)
1 x 395g tin of condensed milk
25g ground almonds
2 heaped tsp Horlicks
200g self raising flour
100g Maltesers
50g white chocolate (chopped or chips)

- Melt together the butter and dark chocolate on a low heat until smooth.

- Remove from the heat and add the condensed milk, ground almonds and the Horlicks, mix well. Add the sifted flour and a pinch of salt and give it a good hard stir. This is where you'll need to give it a bit of elbow grease and use those tuck shop lady arms :)

- Place in the fridge for about 20-30 minutes (no longer!).

- While the mixture is still pliable, smash the Maltesers and add them to the mix along with your white chocolate. Mix it all together, making sure all the goodies are distributed evenly.

- Preheat your oven to 170 C or 325 F.

- Divide the mixture into 24 evenly sized balls - roughly a little bit smaller than a golf ball (we got 23 out of the mixture). Place them on a baking tray lined with baking paper and squash the tops (you can freeze them at this point if you want ).

- Bake cookies for about 12 minutes or until they are chewy in the centre and firm on the edges.

ENJOY! and make you self a lovely cuppa to have with them :)

Monday, 13 October 2014

Jamie Oliver's Beer Butt Chicken from Jamie's America.

Has anyone stuck a can of beer up a chickens bottom before?

Yes a chook you buy from the grocery store, not a live one. I hope no one has ever or will ever do it to a poor live chicken. I'm talking about BBQ Beer-Butt Chicken.

I had friends over the other week and it was the perfect excuse to give this ago. I always think that a whole chicken cooking for just two people is a little extravagant so when we have people over I get a little excited and cook too much food. I know that people will disagree with that statement because there is SOOO much you can do with left over chicken but thats just how I feel... or we leave it for a special occasion like a Sunday dinner.

It was a warm night when we decided to have visitors so cooking the chicken outside on the BBQ was perfect because it meant the oven didn't have to go on for a long period of time and bake us all in our tiny apartment. I chose to use a recipe from Jamie's America Cookbook (yes by Jamie Oliver - my weakness). It was super simple and didn't make that much mess (in the kitchen that is). You make a spice rub in a mortar and pestle and rub it all over the chicken then drink half of the can of beer (not hard to do) then stick it up its bottom and place it on a preheated BBQ. Cook for one and a half hours and yum!

And this time I didn't serve raw chicken. It was well and truly cooked. But... we were so hungry by the time it came to eat I got no photo's of the cooked chicken, just of it as I placed it on the BBQ. Sorry folks but it just means I have to do it again to get you that lovely picture.

I was worried the chicken would have been a little over cooked because it stayed on the BBQ a little longer than is should have but it was still yum. I was told by our dinner guests and Tristan that it wasn't dry at all but maybe they were being polite :) I also made two salads to go with the chicken but if I start on them too in the post I might be half way to a novel so I will save them for next time.

The only thing with the chicken was... I thought the can of beer would be empty when we took the chook off the BBQ but it was still half full. My thinking was that the BBQ heats the beer and it boils and evaporates into the chicken as it cooks and in the end all the beer is gone but it wasn't. I have never made this until then so I could be completely wrong. The recipe says nothing about the can being empty or full after so no idea if I actually did it right but it still worked if you ask me.

Mmmm. Chicken. Good.

Jamie Oliver's Beer Butt Chicken from Jamie's America.

Serves 4

1 large whole chicken (about 1.5kg)
1x 473ml larger (I used a can of Stella)

Spice rub:
1 heaped tsp fennel seeds
1 level tsp cumin seeds
1 level tsp smoked paprika
1 heaped tsp brown sugar
1 level tsp mild chilli powder (I used 1/4 tsp of cayenne pepper instead)
Salt and Pepper
3 tbsp olive oil

- Preheat your BBQ to 200 C or 400 F.

- In a mortar and pestle smash up the fennel and cumin seeds. Add the paprika, brown sugar, chilli powder, salt and pepper and give it a good mix. Finally stir in the olive oil, you should have a nice paste now. Drizzle and rub this all over the chicken, giving it a good massage.

- Open your can of beer. Drink and enjoy half of it. Place the chicken on top of the can so it looks like it's sitting on it (Can look a little rude about now) then place it on the BBQ hot plate.

- I used a gas BBQ (please forgive me Dj Bbq) and had the grill side turned on but had the chicken on the hot plate side so there wasn't direct heat straight underneath but heat all around it.

- Cook it for 1 hour and 30 minutes until the meat pulls away from the bone and the juices run clear. 

- Once cooked, remove the can from it's bottom with tongs. Be careful because it's very hot!

- Serve with salads or roast veggies. Enjoy!

I served this with Donna Hay's Potato Salad from Classics 1 and a Quinoa and Butternut squash Salad from It's all Good By Gwyneth Paltrow. 

Wednesday, 8 October 2014

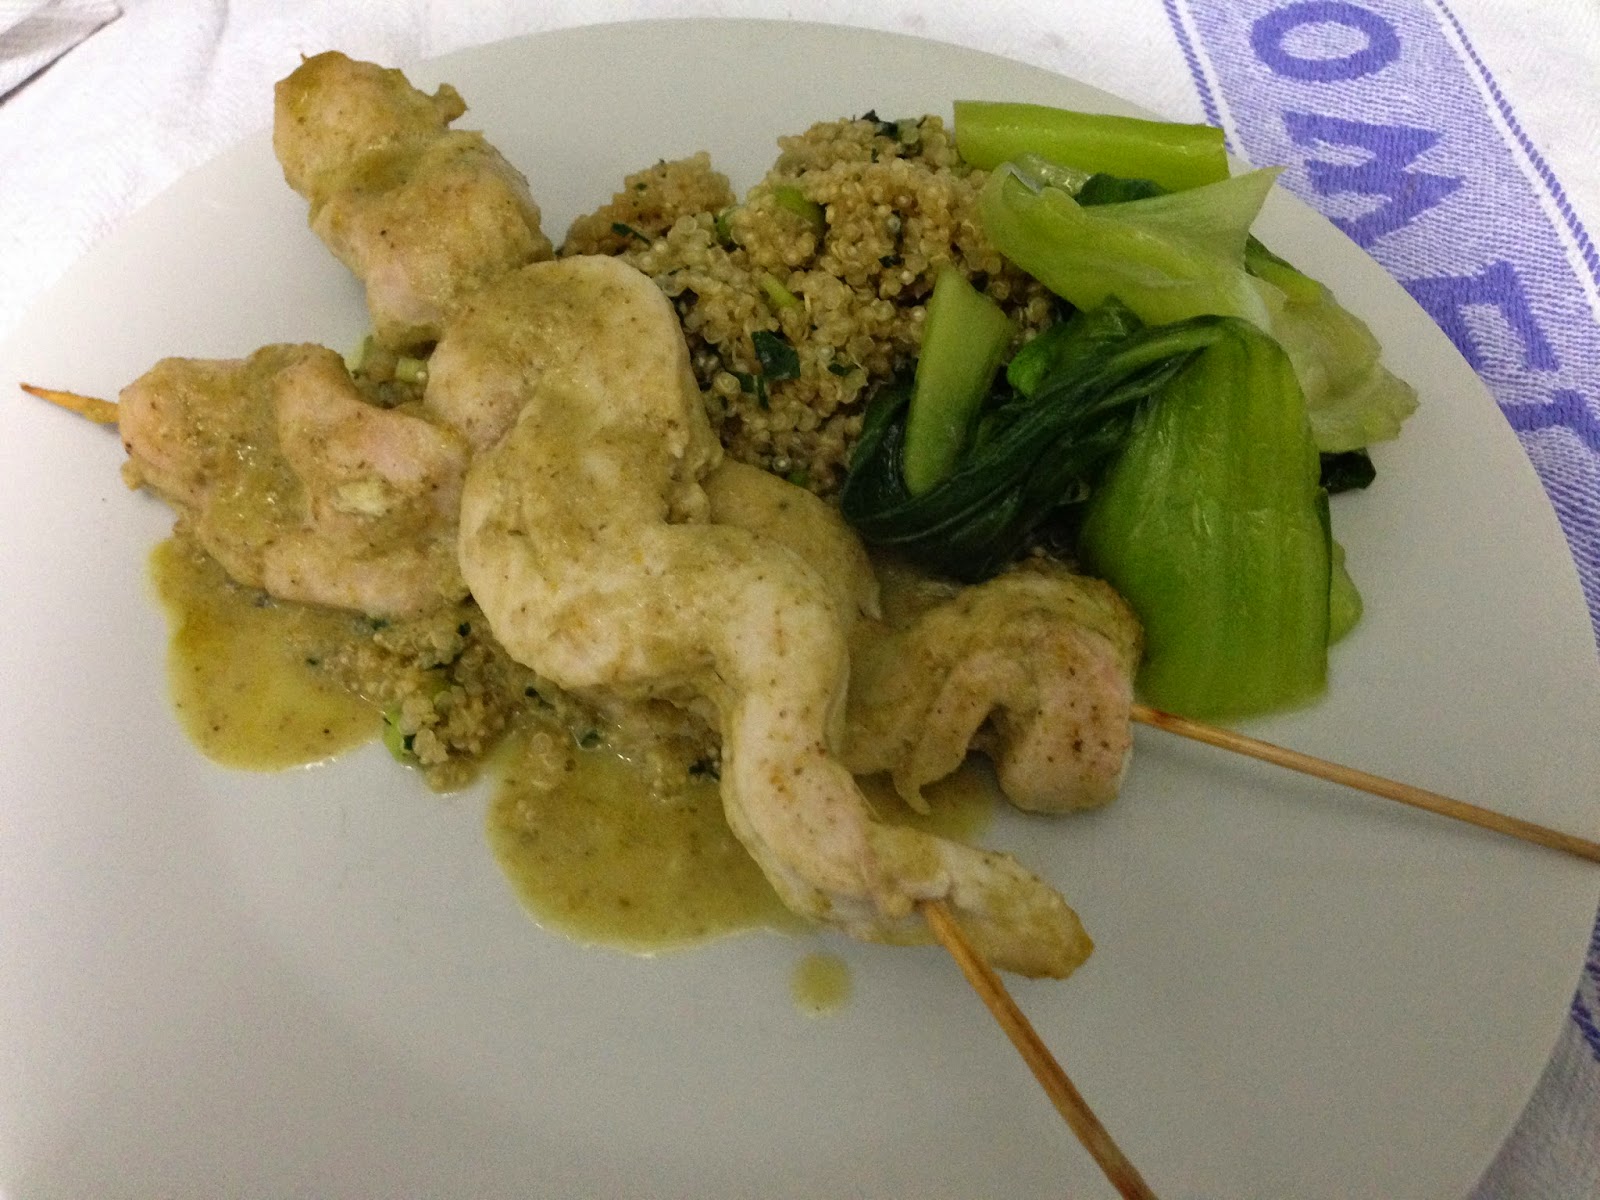
Thai green chicken skewers with ginger quinoa from Donna Hay's cookbook Fresh and Light.

Have you ever eaten anything so spicy that you felt like your tongue was swollen and your tummy was burning?

I should have followed the recipe.

Here I am getting cocky again and boy did I regret that choice. Instead of two tablespoons of curry paste it was more like three... and I knew this stuff was hot. Somehow this completely slipped my mind and turned into a dinner that blew my taste buds away with so much spice.

Trying to be healthy and incorporating "super" foods into my diet lately I went with a different/light variation of a Thai green chicken curry which used quinoa instead of rice. I made the Thai green chicken skewers with ginger quinoa from Donna Hay's book Fresh and Light.

The quinoa was so delicious but the little bit of refreshing heat fresh ginger gives off it didn't help the burning on my tongue from the curry sauce. I had to cover my dinner in plain yoghurt but the flavours were really fresh and delicious once my mouth had started to cool down and I could taste again. It was such a lovely light change from the normal green chicken curry we make at home and it made me feel healthier :)

I added some steamed bok-choi to add a vegetable to the dish. The recipe could easily feed 4 but I'm always a little scared that maybe some people are smaller eaters than me and Tristan so what happens if I'm hungry after?! this is why we always have so many left overs and freezer lunches because I'm scared of going hungry... hmm think I'm a little crazy... please keep reading this crazy girl's food blog even if I am crazy! 

It's quick to prepare and doesn't make that much mess which is exactly the kind of recipes I love.

You can find the recipe on Donna Hay's website here.

I used one of those small can's of coconut cream (I think they are about 160ml) instead of just using the 60ml specified in the recipe, it gave more sauce for the skewers and quinoa plus I hate having half a can of anything sitting in the fridge going to waste. Also please don't make the mistake like I did and use a really hot curry paste - unless of course you LOVE hot things then by all means blow your socks off just offer your guests yoghurt as a condiment. If you know it's a hot paste be careful how much you use so you can enjoy it without having to slather plain yoghurt over it to extinguish your burning mouth. 

I will definitely make this again but either use less of the same curry paste I used or a different brand and hope that doesn't blow my socks off too.

Give this a go for a light summer change! ...just watch the amount of curry paste you put in...

Thai green chicken skewers with ginger quinoa from Donna Hay's book Fresh and Light.

p.s. Donna Hay's photo looks much better so definitely click on the recipe link above to see how the professions make it look. hmmm...still dreaming of that fancy camera and fluorescent lights and some crockery to spruce things up... I'm just always so hungry when it's time for dinner... I guess patience is a virtue.

Sunday, 5 October 2014

Soba Noodle Salad with broccoli, chicken and toasted nori by Karen Martini.

Oh my goodness it's Sunday already!!??

It's been a beautiful weekend of weather and what more to celebrate summer on it's way than salads!!

I love a good salad. I'd been eye-ing off this recipe for ages but always went past it because of the sauce it used which I could never find in the super market and the fact that it used cooked roast chicken. I don't know how often you have left over roast chicken in your house but I don't have it often so the leftovers are always minimal.

But you know... who's going to stop me from roasting a couple of chicken breasts and shredding them especially for the salad. It's not hard work. Turn the oven on, place 2 chicken breast on a baking tray with some olive oil, salt and pepper and cook for 45 min. Done.

SO with no more excuses I finally made the soba noodle salad with broccoli, chicken and toasted nori from Karen Martini's Feasting cookbook that I'd been wanting to make for ages. Actually there are so many dishes in the book that I want to make but the book is set out as huge feasts and all of the dishes feed alot of people. Yes I know I can cut the down and halve them but it's hard when I'm menu planning for the week to grab a book that has all these beautiful large feasts in it when I'm looking for a quick midweek meal. But I was wrong about this book. I was pleasantly surprised that the recipe I chose was easy and didn't take that long, it was a perfect midweek meal with leftovers for lunch the following day (the nori sheets went a little soft but the flavours were maybe even better).

The recipe calls for ponzu... yeh I didn't know what that was either so I googled it while grocery shopping and it doesn't seem like it would be too hard to find in a well stocked supermarket but the one I go to is being renovated at the moment so is not so great. But here's hoping it gets better! When I couldn't find ponzu on the shelves I googled how to make it and I came across a few recipes that required reduced master stock and other fancy ingredients only available form asian grocery stores and nothing could help me in my supermarket dilema. Then I found a simple version here. What did I have to loose? If it tasted bad then I wouldn't use it and we'd make something else up instead and if it did then I could feel like a ponzu genius.

I felt like a ponzu genius.

The whole salad was super yummy. It impressed me so much how all the flavours worked together and how fresh and delicious it all tasted. YUM. I will definitely do this again soon now that I know how easy and tasty it is. Plus I feel that it's pretty healthy too... correct me if I'm not though.

It felt healthy anyway :)

A great recipe for when you have the girls over because you can have it already to go then add the nori sheets and dress it right before you serve and there is no excess cooking while people are over. And you can fell healthy eating it so the ice cream after doesn't make you feel too guilty :)

Soba Noodle Salad with broccoli, chicken and toasted nori

serves 4
recipe adapted from Karen Martini's cookbook 'Feasting' - find original recipe on here

2 chicken breasts
2 tbsp olive oil
pinch of salt & pepper
(or 400g leftover roast chicken, shredded)


300g dried soba noodles
1 head broccoli, cut into florets
2 tbsp sesame seeds
2 tsp sesame oil
60ml soy sauce
30ml rice wine vinegar
30ml cup lime juice
4 tbsp extra virgin olive oil
2 heaped tsp jarred grated ginger
5 spring onions, finely sliced
1 sheet of toasted nori, roughly ripped into shreds

- Preheat your oven to 200 C or 400 F.
- Drizzle olive oil over chicken and sprinkle with salt and pepper. Place on a baking tray and bake for 30-45 minute or until cooked through. Remove from the oven and cover with foil to keep in the juices.
- Go and do something else fun for a little while so it can cool down a little (or prep everything else so it's all ready to do).

- Combine the sesame seeds, sesame oil, soy sauce, rice wine vinegar, lime juice, extra virgin olive oil and ginger in a large bowl (your will eventually put everything in this bowl - the bigger the better).

- Cook the soba noodles according to packet instructions (mine took about 3-4 minutes), drain and refresh under cold water.

- Cook the broccoli for 2 minutes and then drain, rinsing under cold water.

- Shred the chicken breasts with two forks. 

- Place chicken, noodles, broccoli, spring onions into the bowl with all the sauces and top with nori.

- Serve cold or at room temperature.

Monday, 29 September 2014

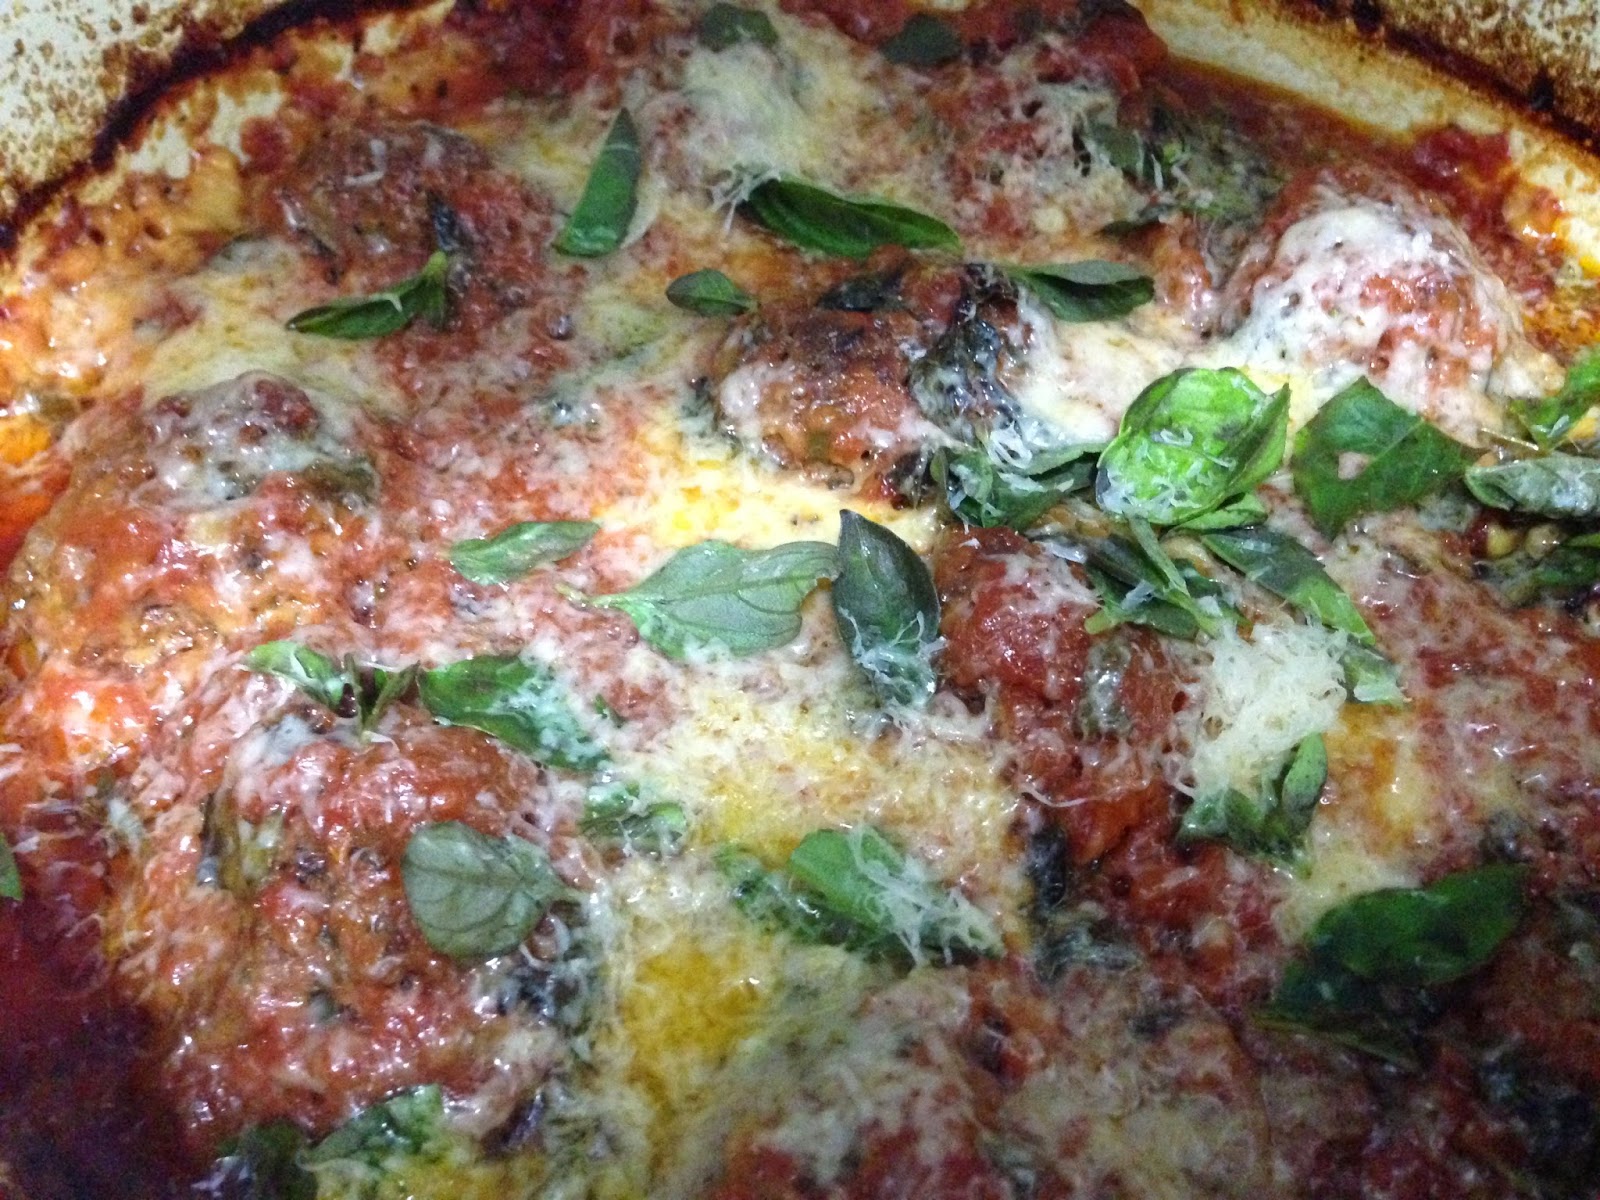
Meatballs from 'The Naked Chef'.

I'm a terrible blogger. I'm sorry.

Last week was full of birthday dinners, heart monitors and anxious thoughts that if I keep thinking about them too much I'll go crazy far sooner than a 25 year old should. So instead of worrying, I'm back to blogging.

Last Sunday I had one of my best friends over for dinner and I was super excited. I hadn't had anyone over for dinner in such a long time, it gave me an excuse to cook something that took a little bit longer and needed a little bit more labour of love put into it. And it was a Sunday night so shouldn't every Sunday dinner be a little special?
The Naked Chef Meatballs Jamie Oliver

I picked out a Jamie Oliver book I hadn't blogged about yet. I'd made a few recipes maybe 2 years ago from it but then it was put back on the shelf and has gathered dust ever since. And thats not to say that it isn't a great book because let me tell you this. I LOVE YOUNG JAMIE OLIVER. He's so cheeky and happy and full of energy, there is almost a bounce in his step in his first TV show 'The Naked Chef' as he teaches people to cook for the first time in our lounge rooms and kitchens. But seriously, who doesn't have a soft spot for young Jamie and the now Dad Jamie who is still just as cheeky!?

You all know I'm a Jamie Oliver junkie and I wouldn't be a true junkie if I didn't have his very first book 'The Naked Chef'. In his first books its all about honest food and cooking for people you love, weather its a for a few people or a date night. I chose Meatballs because I wanted a safe, affordable recipe that I couldn't stuff up.
The Naked Chef Meatballs Jamie Oliver

These were so delicious. Best yet! I did read the recipe wrong again and not all the way through first but that step was optional anyway so it was all good.

Also it does help that they were baked so I could do a quick spruce around the apartment before my dinner date came round and then all I had to do was cook some tagliatelle pasta when she was here. Easy Peasy dinner idea, and it can also feed more than three... We had leftovers for the next day and two lunches frozen for later in the week, so its great for a small crowd.

The Naked Chef Meatballs Jamie Oliver

Give this recipe a go, you wont regret it! I promise!

The Naked Chef Meatballs Jamie Oliver

The Naked Chef's Meatballs.

Serves 4-6
(recipe adapted slightly)

For the Meatballs: 

1kg beef mince
2 slices of bread whizzed into bread crumbs
2 level tbsp dried oregano
1/4 level tsp ground cumin
1/4 tsp cayenne pepper
1 tbsp finely chopped fresh rosemary
1 tbsp finely chopped fresh parsley
1 egg yolk
1 level tsp salt 
a good 2 pinches of freshly cracked pepper

- Place all ingredients in a bowl and give it a good mix with a fork or get into it with clean hands.

- Shape into balls (what ever size you feel like - I did big meatballs because they had time to cook in the oven but you can do any size you like - just remember the bigger they are, the longer they take to cook!) I made these tennis ball sized.

- Place on a plate and store in the fridge while you get on with the tomato sauce (see below).

Basic Tomato Pasta Sauce:

1 clove garlic, finely chopped
2 tbsp olive oil
1/2 tsp chilli flakes
2 tsp dried oregano
3 x 400g tins of chopped tomatoes
1 tbsp red wine vinegar
1 small handful of fresh basil
salt and pepper

- Gently fry the garlic with the olive oil but don't let it colour. Add the chilli, oregano and tomatoes. Stir everything together. Bring to a boil and reduce to a simmer for 30 - 45 minutes.

- Add the vinegar and chopped basil. Season with salt and pepper and taste.

Putting it all together:

3 tbsp olive oil
2 handfuls of fresh basil
120g mozzarella cheese, in chunks
60g finely grated parmesan
400g pasta of your choice (optional)

- Preheat your oven to 200 C or 400 F

- Heat the olive oil in a heavy bottom casserole pan on a medium heat (make sure it can also go in the oven) and add your meatballs. Fry them until they are brown all over but be gentle so you don't break them up.

- Turn the heat down and add all of the basic tomato pasta sauce. Cover and place in a preheated oven.

(Remember the bigger your balls the longer they'll need to cook. I baked mine for about 20 minutes, covered.)
- If serving with pasta, cook pasta according to packet instructions now so everything is ready together.

- Scatter the mozzarella, parmesan and basil over the top and bake for another 15 min or until the cheese is oozy and golden. Serve.

Thursday, 18 September 2014

Queen Victoria Sponge from Jamie's Great Britain.

My Mum is the easiest to please when it comes to birthday cakes. She likes a plain sponge cake. Super easy and it's always nice having a forgotten favourite now and again. Sponge cake is never something I think of often when I want to bake something sweet but every time I make it I always think, why don't I make this more often. They are great afternoon tea cakes and you can dress them up or down and fill them with anything you want. They make a lovely birthday cake too, letting you experiment with fillings, flavoured oils, icings and syrups. It's like a blank canvas for you to make your own!

queen victoria sponge cake

There are probably thousands of sponge cake recipes and I know the sponge cake I made at TAFE was completely different to this recipe. This one is much more of a pound cake but I think these are a little tastier and have a bit more guts to them. And the fact that to make a traditional sponge you need to whisk the eggs for about 10 minutes... there is that 'I don't have a stand mixer' problem again. So I went with this recipe from Jamie Oliver's Great Britain cookbook. It was quite fitting since Mum's an Essex girl originally but I think she's a true blue Auzzie now, being here more than 40 years.

I made this during the madness of Spiderman cupcakes and finished it off at my mum's place where we celebrated her birthday. Every time I walk into mum mum's kitchen I just wish it was mine. It's so lovely and new with large, wide benches that aren't blue and ... a dishwasher!! Luxury!

I split the mixture into two sandwich tins and baked them for easily 40 minutes but please don't go by this time. The oven I have is from the 60's and bakes things odd if you haven't already read about my oven disasters. I will put the time Jamie's uses below and go from that as a guide.

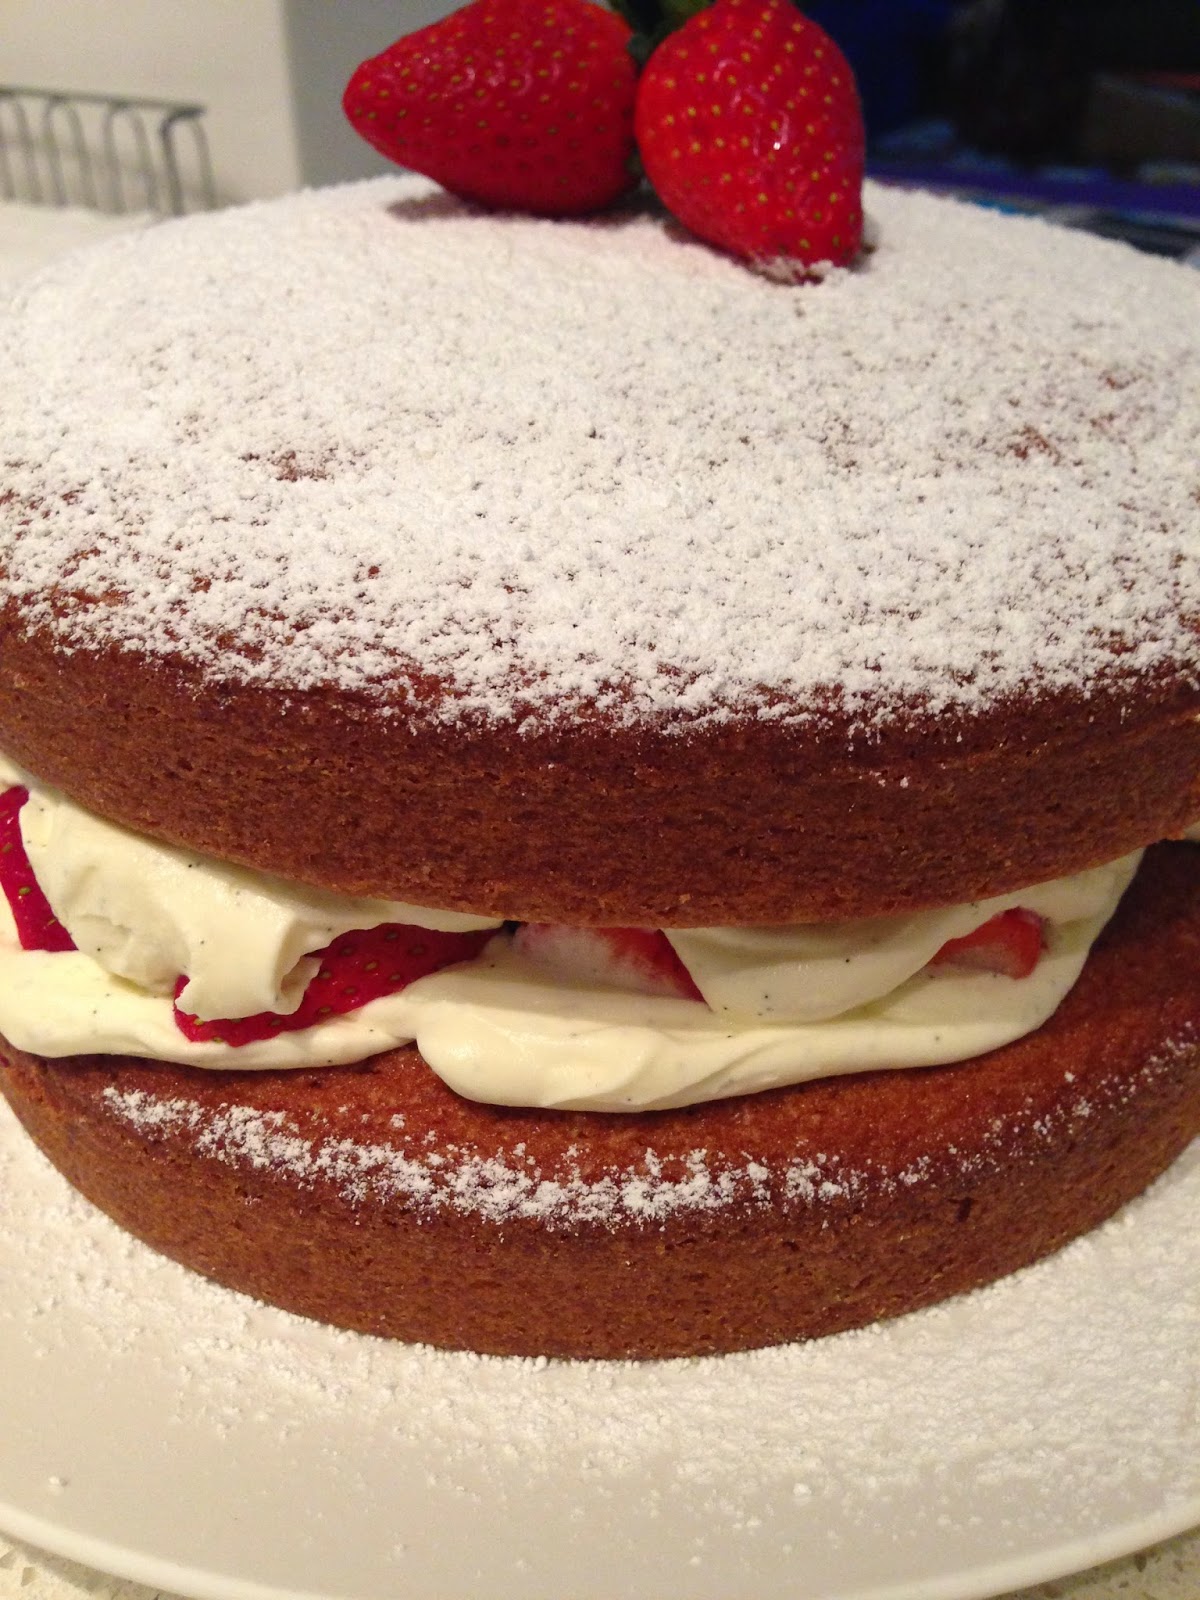
When they were cool I put whipped vanilla cream in the centre and fresh strawberries. Jamie says to add rose essence and orange zest to the cake but I knew Mum wouldn't be a fan of that and raspberry jam and fresh raspberries in the centre but the raspberries were $9 a punnet and the strawberries were $1.50 a punnet so I went with more strawberries over a tiny amount of raspberries.

I did try and crystallise rose petals but they turned out terrible and went straight in the bin. The reason... I don't have a pastry brush at home. I will try them again another time and let you know how they go and put a better description than brush egg white on them, dust in sugar and bake. Hmmm there has to be more to it or everyone would do it all the time. I will get back to you on this.

So some simple dusting of icing sugar over the top and a strawberry in the middle was my final touch and boy oh boy ... YUM.

Happy Birthday for last Friday Mama. I hope you had a wonderful day, love you x

queen victoria sponge cake

Queen Victoria Sponge from Jamie's Great Britain.

serves 10
(recipe below adapted -  find original recipe here.)

250g unsalted butter, softened
250g raw (golden) caster sugar
4 large eggs
250g self raising flour
1 tsp vanilla extract

250mL pure cream
2 tbsp caster sugar
1 vanilla pod, seeds scraped

300g strawberries, washed and halved

To make the cake - 

- Pre-heat your oven to 190 C or 375 F.

- Grease two 20cm cake tins with butter, line the bases then dust with flour. Make sure you line and make your cake tin non-stick properly. It's so disappointing to put all that effort in then have your cake stick and not come out of the tin.

- Cream butter and sugar together until pale and creamy with electric hand held beaters (or by hand - there is nothing wrong with a bowl and wooden spoon). Add vanilla and combine well.

- Add eggs, one at a time, mixing well after each addition.

- Fold the flour through by hand half at a time until it is all incorporated.

- If you mixture is really thick at this point (mine was) add 2 tbsp of milk and mix it in to loosen it up.

- Spoon the mixture evenly into the two prepared tins and spread with a pallette knife or the back of a spoon to even out the surface.

- Bake for 20 - 25 minutes (mine baked for 40 - so make sure you kinda know your oven).

- The cake should be cooked when a skewer is inserted and comes out clean. Allow to cool in tins slightly then turn out onto a cooling rack.

To decorate the cake - 

- Once your cakes are completely cool you can assemble them.

- Whisk cream, sugar and vanilla together until fluffy peaks (you don't want to create butter so be careful).

- If you're cakes have domed alot you may want to trim the top so you can stack them on top of each other. Choose which one will be the base and which one will be the top.

- On the base, cover the top with about half of the whipped cream then scatter the strawberries on top (you may not need all of them, just use enough to cover the top). Add the rest of the cream then place the second cake on top.

- Dust the top with icing sugar in a sieve and the most beautiful strawberry you can find.

- Store in the fridge if not eating straight away, otherwise... DIG IN!

...

#giveaway 15 minute meals 30 minute meals 5 Minute Food Fix A Common Table A Kitchen in the Valley A Modern Way to Eat Acquacotta Adam Liaw Alison Roman Alison Thompson almonds Amelia Morris Anna Jones Annie Herron Antonio Carluccio Anya von Bremzen apple apps Apt 2b Baking Co Artisan Sourdough Made Simple Ashley Rodriguez autumn avocado babies baby baby shower bacon Bake baked pasta baking Bali Barcelona Cult Recipes basil BBQ beans beef beetroot Bill Granger biscuits blondies Bon Appetempt Bowl & Spoon bread breadcrumbs broccoli brussel sprouts burgers burrito buttercream butternut squash byo cabbage cake calzone camping Carla Lali Music carrot cauliflower chicken childhood chilli chinese cooking chipotle chocolate chorizo chutney Claire Ptak Classic German Baking Classics 1 Classics 2 coconut Comfort Food cookbook addict cookies cordial corn cucumber curry custard Cynthia Chen McTernan Date Night In David Dale Delicious. magazine dessert Dining In dinner party nightmares Dinner: A Love Story dip doings Donna Hay Donna Hay Magazine dumplings easy egg eggplant Eleanor Ford Emiko Davies Emilie Raffa Emma Spitzer ENOTW Every Night of the Week Veg family Fast Fresh Simple Feast Feasting fennel fiction Fire Islands Five Quarters Flora Sheedan Florentine Food & Wine Food52 Fresh & Light Fress frozen dessert Fuchsia Dunlop galette Gatherings Genius Recipes Gennaro Contaldo Gennaro's Fast Cook Italian Gennaro's Italian Bakery Gennaro's Pasta Perfecto! german ginger gnocchi goats cheese granola Greenfeast gumbo Gwyneth Paltrow Happenings holiday home home-grown herbs How to be a Domestic Goddess hungry Hunter Valley ice-cream indian Indonesian Cooking involtini It's All Easy It's all Good jam Jamie Does Jamie Magazine Jamie Oliver Jamie's America Jamie's Great Britain Jamie's Italy Jane Hornby japanese Jenny Rosenstrach Jessica Fechtor Julia Turshen Justine Schofield. The Weeknight Cookbook kale Karen Martini kimchi Kitchen korean Kylee Newton LA Cult Recipes Land of Fish and Rice leek lemon lentils life Light of Lucia Link Love links long weekends love Luciana Sampogna Lucio Galletto Lucy Tweed Luisa Weiss Maggie Beer maple Marc Grossman Marcella Hazan Marian Burros Martha Stewart Matthew Evans meal planning meatballs meatloaf mess mexican Michael James Michelle Crawford mince mint miso Monte Carlos Mum's cooking mushroom mussels My Berlin Kitchen My Kitchen Year Naturally Ella new beginnings New York Cult recipes Nigel Slater Nigelissima Nigella Bites Nigella Express Nigella Lawson No Time to Cook noodles North West Island nostalgia Not Just Jam NotWithoutSalt oats omelette paddle pops parsley pasta Paul McIntyre Paul West Paulene Christie pea pecans pesto pickle pickles pie pizza Plenty Plenty More plum pork potato prawns preserving prosciutto pudding pumpkin quesadilla quinoa Rachel eats Rachel Khoo Rachel Roddy ragu rambles raspberry recipe rhubarb rice risotto River Cottage Australia romantic Ruth Reichl saffron salad Sally Wise salsa verde Salt Fat Acid Heat Samin Nosrat sandwiches Sara Forte sausage Save with Jamie schupfnudeln seafood sesame Seven Spoons Simon David Simple slow cooker Slow Cooker Central Small Victories Sophie Hansen soup sourdough Sprouted Kitchen starters Stephanie Danler Stir stir-fry stuffed sushi Sweet Amandine sweet potato Sweetbitter tahini Taking Stock Tara O-Brady Taste Tibet Tasting Rome thai Thai Food Made Easy The Art of Pasta The Best of Maggie Beer The Comfort Bake The Dinner Ladies The Little Book of Slow The Little Paris Kitchen The Modern Cook's Year The Modern Preserver The Naked Chef The New Classics The Tivoli Road Baker The Violet Bakery Cookbook The Wednesday Chef The Zen Kitchen thyme Tom Kime tomato tuna turkey tuscany Two Greedy Italians Two Red Bowls Valeria Necchio vanilla veal vegetables vegetarian Veneto vietnamese wedding wedding cake What can I bring? What to Bake and How to Bake it Where Cooking Begins Where the Heart is yoghurt Yossy Arefi Yotam Ottolenghi Yumi Stynes zucchini