She’s my sourdough starter and yes, I’ve named her. It’s what you do.
She’s just over a year old and I’ve killed her at least once. Thank goodness she survived her dried cryovaced state and I could resuscitate her.
She’s had a baby or two or three… not sure if her babies are still alive but she is and going stronger than ever before. I’ve found out what food she likes, half good ol’ plain flour and half organic stoneground wholemeal. You see, she’s just a little bit fancy.
Babbes came about when I needed a distraction. It worked a treat. I had to feed this jar of what looked like clag glue each day in hopes it got bubbly and sweet smelling. I started from scratch with organic stoneground wholemeal flour and tap water. It didn’t matter to me that she wasn’t 100 years old, 10 years old or even in the slightest established. I just wanted to see if I could do it and after about two weeks, I had my very own sourdough starter. At the very beginning I had some amazing beginners luck (like, truly amazing!). Then I got cocky and Babbs showed me who the boss really was. These were not loaves of bread I was baking, but bricks. Tristan, bless his cotton socks (that I steal) ate brick after brick after brick, encouraging me to do better each time and possibly, tried to convince me that they were getting better when I knew they were not.
However, I wasn’t giving up. I was now on a mission.
I read everything I could get my hands on from books I had at home, to books at the library, to blog posts galore. I wanted to pinpoint what I was doing wrong but turns out it’s pretty hard to do that as there are several things that can be finicky when it comes to sourdough. So instead I tried recipe after recipe after recipe, followed every word like it was gospel and each time I wrote notes. Yes I sound like a complete nerd, I know this already.
All of this reading and research lead me to a book called Artisan Sourdough Made Simple by Emilie Raffa, the blogger behind, The Clever Carrot. When I found out it was going to be released in Australia I knew I needed to get my hands on a copy (thankyou thankyou thankyou!) and I wasn’t disappointed in the slightest. This book really does do what it says, it simplifies all steps of sourdough, from making and keeping a starter, creating your first loaf, troubleshooting and other things to bake after you’ve mastered the everyday loaf or, if you just want to jump two feet in and start with sourdough bagels.
The steps in the book aren’t intimidating like some recipes can be, Emilie has written a simplified version for each recipe, an in depth version, jam packed with info that covers each individual step at length, and also an illustrated overview for the visuals of us out there. She is with you, holding your hand, throughout the entire process and one of the best things about this book, it’s not just a great book for beginners, it’s a great book for all bakers who dabble or regularly make sourdough at home. There are recipes for different varieties of sourdough loaves like Decadent Chocolate Chip, Olive Thyme and Parmesan, Saturday Morning Fruit and Nut, Country Farmhouse White, Light and Fluffy Brioche AND there are other sourdough leavened treats like Sunday Morning Bagels, Ciabatta, Roasted Garlic Sourdough Knots with Pecorino, Overnight Baguettes twists and No Knead Focaccia. Errr YUMM!
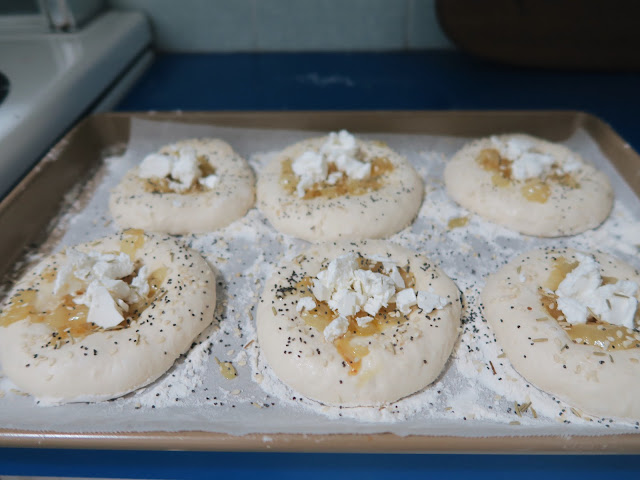
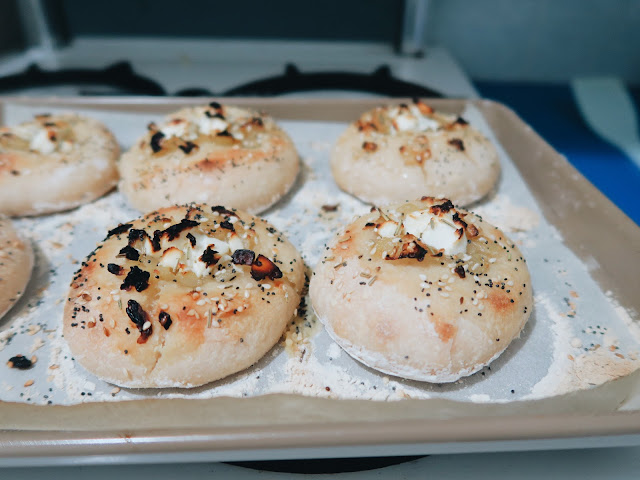
I’ve made the Everyday Sourdough loaf a few times now and I can vouch that it's a much simpler recipe than other books I’ve used but last weekend I wanted something different, a new challenge. I made the Overnight Sourdough Bialys with Caramelised Onions and Goats Cheese.
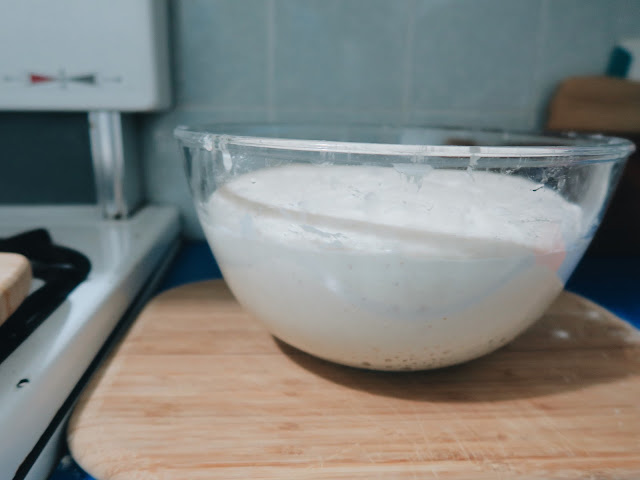
These little Bialys were so delicious. Salty from the cheese but sweet from the onions and the little rolls have that typical sourdough chew and slight sourness. They were super easy to make on a lazy Sunday morning (even though the recipe says overnight... I did over-day..) as all I had to do was a little bit of mixing first thing while making the morning coffees then we went out for a bush walk and came back to a bowl full of risen dough to shape, fill and bake.
Since devouring them, all I keep thinking is what else can I fill them with when I made them again!? Mmmm ham and cheese or sundried tomatoes, pesto and feta? They reminded me of those little mini doughy pizza things you’d get from the local bakery growing up but a thousand times better.
Sourdough is such a rewarding process and for a little labour of love and some patience, I think it should be shared more so everyone can feel like star when they pull a loaf out of their own oven that tastes as good, or better than the local bakery. The feeling of being chuffed never gets old and who doesn’t love fresh bread, still warm, smothered in salty butter? No one.
Now I’m not going to go into the nitty gritties of sourdough as this post is long enough and I am by no means an expert. There are plenty of other bloggers and bakers who have done this already, the author of Artisan Sourdough Made Simple included and I will link it all below as well as some recipes other bloggers have shared from the book. What I have shared below is the recipe for Overnight Sourdough Bialys with Caramelised Onions and Goats Cheese because you need them in your life, and even though I said I’m not going into nitty gritty, you’ll find some hefty instructions below and a couple of tips from me but please don’t be scared.
And if you’ve made it this far and want to give your hand at sourdough I’m more than happy to send some of Babbs dried with instructions to rehydrate her. You can name it, keep it (see tips below) and bake your little heart out. Just send me an email or comment below!
My Tips...
The ambient temperature of the room can make your sourdough rise super quickly during a bulk rise or make it feel like its taking forever and never going to happen, in winter the oven is your friend and summer, the fridge.
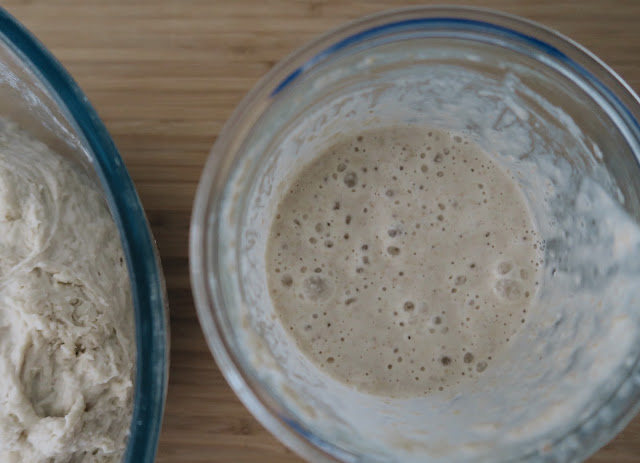
Now that Babbs is a little bit more established and not such a spring chicken I keep her in the fridge which means I don’t have to feed her everyday. All I do is bring her out for a big feed a day or two before I want to bake and feed her every 12 hours until she’s bubbly and sweet smelling.
When storing Babbs in the fridge, I try and feed her once a week and put her back in the fridge even if I don’t bake that weekend but more realistically, it’s about every two weeks (sometimes three...) between feeds when she’s stored in the fridge. The fridge slows her activity down and lets her sleep so you don’t need to feed her each day. Feeding on a daily basis works well if you bake daily but for weekend bakers like myself, keeping her in the fridge works really well.
You can't rush sourdough and not every recipe will suit your baking schedule. Try a few out and don't get disheartened if one doesn't fit right. If you talk to other home bakers, you'll find everyone has put their own twist on a recipe they found worked for them because of their oven, how warm/cool their kitchen is or even when they like to bake. You will find yours too.
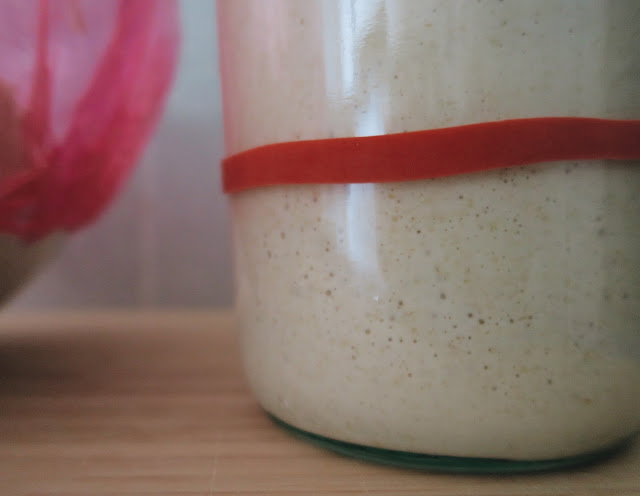
You'll know when your starter is ready to bake with because it will smell sweet, not sour and if you place a spoonful in a glass or bowl of water it should float. This can take anywhere from 4 to 6 hours or sometimes longer in winter after a feed, the float test is a good trick to remember. It will also have double in volume roughly, an elastic band is a perfect marker to see where it started and how much it's grown.
Useful links and recipes from Artisan Sourdough Made Simple-
- About Emilie, her Sourdough Journey & creating her book.
- Emilie’s beginners guide.
- Why won’t my sourdough rise? by Emilie Raffa.
- Beginners guide to sourdough by Alexandra Cooks & for High Hydration recipe.
- Everyday Sourdough recipe.
- Overnight Cranberry Pecan Sourdough recipe.
- Roasted Garlic Sourdough Knots with Pecorino recipe.
- Salted Chocolate Caramel Knot Swirl recipe.
OVERNIGHT SOURDOUGH BIALYS WITH CARAMELISED ONIONS & GOAST CHEESE
recipe from Artisan Sourdough Made Simple by Emilie Raffa
Note: In any New York deli, right next to the bagels, you'll find bialys. Bialys are similar to bagels, but they are lighter in texture, boast a more tender crumb, and are baked straight through, not boiled. They are very similar to rolls. You'll also find a small dip in the centre which can be filled with a variety of toppings, including onions, which is the most traditional. Or, omit the goat cheese and serve toasted with cream cheese and the toppings of your choice.
About the dough: The dough rises conveniently overnight to shape and bake in the morning. To make the most of your time, you can prepare the onion mixture up to 2 days in advance.
DOUGH
50g bubbly, active starter
375g cool water
500g all-purpose flour
9g (1 1/2 teaspoons) fine sea salt
FILLING
1 tablespoon olive oil
1 tablespoon unsalted butter
1 large red or yellow onion, chopped into small pieces
3 thyme sprigs, leaves picked, plus extra to serve
salt and freshly ground black pepper
114g goats cheese crumbled
mixed seeds, such as poppy, sesame, fennel, flax and sunflower
MAKE THE DOUGH: In the evening, whisk the starter and water together in a large bowl. Add the flour and salt. Mix to combine, then incorporate by hand until a rough dough form. Cover the bowl with a damp tea towel and rest for 30 minutes to 1 hours, depending on your schedule. Replenish your starter with fresh flour and water, and store accordingly to preference.
After the dough has rested, work the mass into a semi-smooth ball, about 15 seconds.
BULK RISE: Cover the bowl with a damp towel and let rise overnight at room temperature, 21C, about 12 to 18 hours. The dough will double or triple in size when ready, with a few bubbles on the surface.
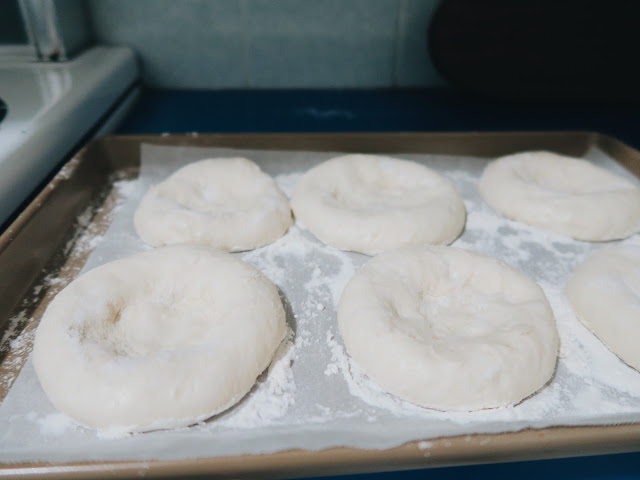
DIVIDE: In the morning, line a sheet pan with parchment paper. Sprinkle heavily with flour to prevent sticking. Set aside. Remove the dough onto a lightly floured work surface. Divide into 12 pieces, about 75g each. Gather the ends, flip the dough over, and roll each piece into a ball. Place the dough onto your lined sheet pan, 3 pieces across and 4 down.
SECOND RISE: Cover the dough with a damp towel and let rest for 1 to 1 1/2 hours, or until puffy.
PREPARE THE FILLING: Meanwhile, in a large skillet, warm the olive oil and butter over low heat. Add the chopped onions and thyme and season lightly with salt and pepper. Saute until soft and translucent, but not yet caramelised, about 7 to 10 minutes. Remove the pan from the heat t o cool before topping the dough.
Preheat your oven to 450F/230C.
SHAPE AND ASSEMBLE: Lightly dust the tops of the dough with flour. Working with one piece of dough at a time, use three fingers to make an impression into the centre. Then, using your fingertips, gently push and stretch the centre indentation to about 2 to 3 inches (5 - 6 cm_. If the dough starts to resist, let rest for 10 minutes ad try again. Repeat this technique until you have finished with all of the dough.
Lightly brush the outside of the sough with water. Spoon some of the cooled onions into the centre and top with goats cheese. Sprinkle the outside of the dough with seeds.
BAKE: Bale the bialys on the centre rack for 10 to 12 minutes. They will puff up and turn light golden in colour, and the onions will become caramelised. Transfer to a wire rack to cool before serving.
Bialys are best enjoyed on the same day. Stored at room temperature in a plastic bag up to 1 day.



Yum!!! Can I please have one next bake :)
ReplyDeleteI don’t think I have time to look after a bake a sourdough :( I can’t wven keep a cactus alive . . . .
Yum!!! Can I please have one next bake :)
ReplyDeleteI don’t think I have time to look after or bake a sourdough :( I can’t even keep a cactus alive . . . .
Next bake I will save you one don’t worry :) and I can’t keep plants alive either... but a sourdough starter seems to stay alive! I’m always happily surprised/releived that it’s alive again each time :) xx
DeleteLovely sourdough... thanks for sharing
ReplyDeleteNo worries :) Thanks for stopping by! X
DeleteThese look good - another on the list to try. The book is great and much more straight forward than some instructions.
ReplyDeleteSo much more straight forward! It makes recipes seem so much more aceivabke than other :) and less intimidating! X
Delete